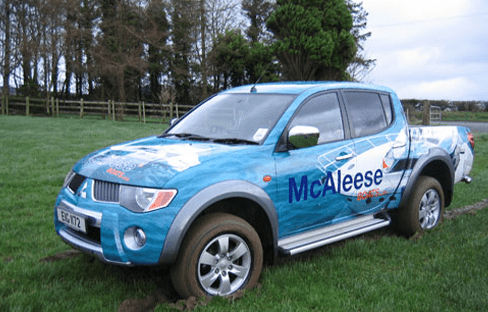
Fitting Vinyl to a 4×4 Wheel cover
I tend to do a lot of fittings onto wheel covers & I have found them a bit of a pain due to the fact that they have a flexible outer ring which gets in the way & stops you from getting the full pressure needed to apply vinyl graphics/images bubble free!
In this quick demo, I will show you how I regularly go about doing this.
it is a very cheap & easy to make wheel cover platform that we get perfect results every time, no matter if it is straight vinyl lettering or digitally printed images.
Image 1
* Using an Old sheet of plywood, (which was actually an old sign). I have cut a 24-inch diameter Circle from it using a router. This could also be easily done using a jigsaw or similar.
* I made it 24 inches as it seems to fit most sizes of wheel covers.
* Although I have chosen to use plywood, any solid, flat material will do the job just the same.
* I have also fastened two old, 4”x2” wooden batons to the rear of the circle as shown below.

Image 2
* Here, you see that I have simply slipped the wheel cover over the wooden circle, Allowing me to easily apply my vinyl on the platform created.

Image 3
* This picture shows the digital print taped into place, ready for application.

Image 4
* I always dry-mount these prints, but this is only my personal preference.
* The picture below, shows me applying the graphic using a rubber roller.

Image 5
The last picture shows the work completed.
* I have found this an excellent way of doing ALL wheel covers, even the totally flexible ones!

I hope this demo is of use to someone, as I have picked up so many useful tips, I thought I should give something back.
Ian Higgins