From Paint to Vinyl

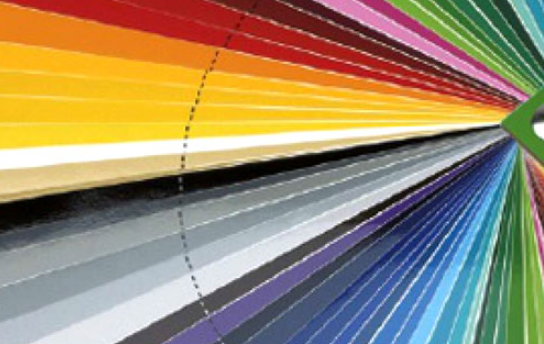
Before we could lift a finger, we had to match the colours.
This proved difficult & took me 3 visits to the customer to get the ones he was happy with. Most were easy enough, but the main mustard colour was not only difficult to match but expensive to buy in.
All colours used were from the Mactac, Oracal & 3M ranges. The mustard from 3M costs around £17.50 a metre! What’s that all about, eh?

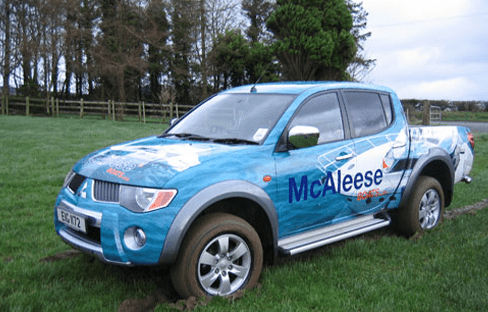
All the artwork shown was set-up and hand digitised from digital images of older trucks by Andrew Ritchie a member of staff and also a partner of VectorWise. VectorWise will be offering a service for recreating vector artwork from picture images here on the UK sign boards very shortly.

Moving on…
The customer like i have said wanted the trucks to appear to be the same as all his others but with a fresh new finish.

Picture 1a & 1b shows the truck in question.
The red band is actually vinyl, which I have just applied.
When I started the job this was a cream “painted” band, like the panels above in cream.

As you can see in Pictures 2a, 2b & 2c I decided to start with the bands.
After applying a band of red all around the truck & trimming it up to suit the sloping ends of the cream.
I then began to apply the pinstripes. This gave a nice finish to the panels but took a bit of time to go around them all. They carried on up the side of the truck, around the front & up around the panels at the top, and even on the spoiler.

Picture 3a & 3b
This picture shows me applying the dark green checks of the tartan.
before taping this up, we applied a single “lighter” green check to the centre of these ones.
I find it helps cut down onsite labour doing it this way and it is also easier to get it more accurate as you are in the comfort of your own workshop.

Picture 4 shows a section almost complete. After removing the tape I trimmed back the slope on the right and trimmed the spaces between the panels.
You will get a much more realistic effect if the whole thing is put together accurately.
The thing that gives away the fact it is vinyl layers, is the small imperfections when lining things up. It may only be a little out here & there, but by the time the fourth layer is applied, it will look like a dog’s breakfast.

Pictures 5a & 5b show the pinstripes of the tartan being applied.
Some maybe say, “Why not just cut thin lines and apply, saves vinyl?” Yes, I know this could be done. But it takes longer to apply, isn’t as accurate & you are left with many overlaps of the lines. It also looks untidy and can cause a grubby appearance in months to come.
I applied the white lines first. (See lower picture 5b) Then I applied the mustard ones on top. (See picture 5a)

Picture 6a
Having completed the tartan i move to the corner scrolling flourishes on each front wing of the truck. Not difficult to apply but must be symmetrical to the one on the other end. Important for when it is viewed from the front.
Picture 6b shows me applying the large scrolls on the top section of the truck.
I applied the mustard first then applied the tomato red shadow second. This was lined up using a registration strip.

The next series of pictures show different parts of the truck’s graphics being applied. Picture 7a is the spoiler for the roof. It was fastened in place once I applied the thistle and reverse-arched text.
Picture 7b shows the last layer of the crossed flags logo being applied.
I applied the first layer in black. This was a solid silhouette, a good base to build the colours onto.
Picture 7c shows the painter’s highlights being applied to the shadow of the text. Not something i thought needed, but made this design match all the previous hand-painted ones. The highlights shown in the picture were applied using regular application tape but all others on the day were done using transparent app tape. This was much better to line up on the shadows & proved much more accurate. Having said that.. I hate working with the stuff, but it does have its benefits!

Pictures 8a & 8b
Show me applying the red pinstripe around the cream panels on the higher section of the vehicle.
After applying all the pinstripes I then went over them all with a heat gun.
The stripes, only being .25 of an inch thick, bent around the corners easily & stuck well!
Nonetheless, heat should be applied to all areas that you change the form of the vinyl. In time the vinyl will try & shrink back to its original form. Causing it to come away at the areas stretched most. i.e the corners.
I recommend applying a decent amount of heat to these areas. Not just heating the vinyl, but actually heating the panels of the vehicle until they hold heat.
This is easily done and can be checked, simply by touching the panel to see how warm it is.

Below is the completed work.
You can see I have also added some other graphics eher & there.. The tel number, thistle, white scroll on lower section of the door and some white lines around wheel arch..

Here you will see I have added text to the lower headboard in black and red. “Personally I would have done this in forest green to match the cab”, but they wanted black. I have also added text on the front above the tartan band as shown below.

any questions, feel free to ask!

Related Articles