How to convert a photo into a cuttable vector image

How to convert a photo into a cuttable vector image.
This is something I have just been working on and thought it would make an interesting step-by-step for other signmakers.
The software I am using is Corel Graphics Tools.

STEP ONE:
Find the image you want to use

STEP TWO:
Open it using Corel Photopaint.
STEP THREE:
Convert the image to grayscale by clicking on:
image>mode>grayscale (8-bit)
you should now have this:

STEP FOUR:
In this example, I don’t want to use the background in the image just the main characters in the pics, so using the paintbrush tool, paint out the background in white. Start with a large brush and move to a smaller one for the fine detail:
you should now have something that looks like this:

STEP FIVE:
Now we’re gonna convert this to black and white, click on
image>mode>black and white (1-bit)
STEP SIX:
You should now see the black and white settings window, in the conversion drop-down list choose line art.
STEP SEVEN:
For the best possible image adjust the threshold up/down. The lower you set it the more it looks like this:

and the higher you set it, it will look more like this:

Slide it about until you’re happy and Click on OK.
STEP EIGHT:
Save the new image somewhere where you will remember it.
At this stage I normally save as .cpt as it does not compress the image:
STEP NINE:
Load Corel Trace from the graphic utility folder in Corel.
STEP TEN:
Choose a file and open and load the saved image into Corel trace.
STEP ELEVEN:
Choose trace>by advanced outline, see below:

This shows the resulting trace in the right-hand window pane.
STEP TWELVE:
Choose file>save trace result.
Choose a location and save the file as a CMX presentation file (vector format)
STEP THIRTEEN:
Load CorelDraw.
Click on file>import, choose the CMX file that you have just saved and import it.
STEP FOURTEEN:
If you want to, you can now tidy the image up using nodes etc, or just cut directly from CorelDraw OR choose file>export, and choose the file type as an Adobe Illustrator .ai.
Choose a location to export it to, give the file a name and export it.
STEP FIFTEEN:
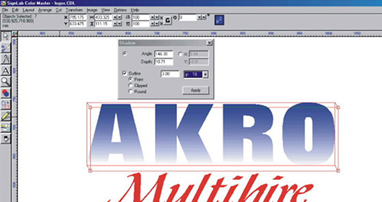
This step just gives you some more options if you wanted to import into signlab, if you cut directly from Coreldraw it isn’t really relevant.
Load Signlab, Click on file>import, choose the file and click OK.
STEP SIXTEEN:
Select the graphic and click on the weld tool flyout in the toolbox, click on the basic weld button
(see below)

You will then get the following message:
“objects the same colour as the background will be discarded. do you wish to continue?”
Click on YES.
STEP SEVENTEEN:
You can now do anything you want with the Gallagher brothers, including making a nice painting.

Of course, there will be times when this method doesn’t work perfectly. Like most things, a bit of trial and error comes into play on occasion. But in general, That’s all there is to it!


