How to quickly create sequential numbering using Corel software

How to quickly create a sequential numbering system using Coreldraw software.
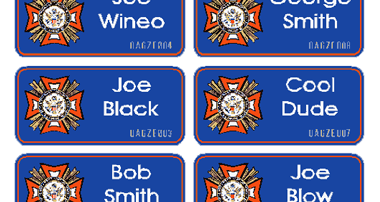
Start by creating the template for your label/print, and make the page size the finished sticker size. This is the document I’m working on;
Step One

Step Two
To create the numbering we’re going to use the print merge tool. Load this by clicking on File‐Print Merge, then click on Create/load merge fields, you will then be presented with this window;

Step Three
Ensure the option “create the new text” is selected and click Next
You’ll now be presented with this window;

Step Four
You can create fields for text or numbers but for this tutorial, we’ll look at creating a number field which automatically increases. In the numeric field text box enter a descriptive name for the field (it doesn’t matter what you call it its only for your own reference) Click on the add button, and you’ll see your field in the list in the middle of the window.
Highlight the field, as we want to have Corel increase the numbers for us automatically take the tick out of “continually increment the numeric field” (You would use this if you created other fields, i.e. an address field, this would increase the number as you create more and more address records)
Enter the starting value (i.e. the number you want Corel to start at) and then enter the ending value in the other box, you call fiddle with the “numeric format” dropdown box to make the values look different…. have a play. Once you’ve entered all the relevant data click on the next button, and you’ll be presented with a table view of the numbers
Corel has created it for you. If you’d created data fields too for example an address merge you would enter the address details now (you can also use CSV files with the print merge tool to create mailing documents) Check the numbers are as they should be and click next and then click finish.
You will now be back to the original document but with the addition of the print merge toolbar, see below;

Step Five
Now we are going to insert the “numbering” into our original document, click the text edit tool (letter “A” icon in the toolbar) and click into the text and put the cursor where you want the numbering to be (i.e. Official Member No. “x”)
In the print merge toolbar ensure that the correct field is shown in the dropdown on the right-hand side and click the insert button. You should now see the field inserted in the document, it will look like this;<field>
You can change the font colours etc like any other piece of text in a Corel document. (NB You don’t have to insert the field into a string of text, if you just want the numbering on its own on the document don’t click the text tool first just hit insert, you can move, position and format as normal.
To perform the merge click the print button on the print merge toolbar, just hitting print in the normal file menu won’t perform the merge first.
Once you click the print button you’ll be greeted with the print window as normal. Depending on how many copies you are creating and how big each document is (file size) it may take some time to load. I’d suggest creating these in small batches rather than in one go.
Choose your printer as normal (I’d suggest that you have the feature to print to pdf instead of directly to the printer, it gives you the chance to check the document and also call it up again later to reprint pages without the hassle of doing the whole merge again) Choose your page size and orientation in the normal way. Click on the layout tab, and at the bottom of the window you’ll see a dropdown window for “imposition”, there are several presets in here but I prefer to go in at set this myself, and click on the edit button. By altering the values shown in the highlighted image below you can choose how many copies you want on one page, both horizontally and vertically;

Step Six
By clicking between the copies you can re‐size the page spacing;

Step Seven
When happy click the “tick” in the top left-hand corner to confirm and take you back to the print window;
In the print preview flyout, you should now see your document with “x” copies per page. If you created cut boxes ( i.e. if you are going to print these on a versacamm or similar hit print and create your document, import into Versaworks and bada bing it’s done.
However if you want to add page bleed and crops read on.
Immediately above the “imposition” drop-down box is a box for bleed, put a tick in the bleed limit and set the amount (I won’t bother as my document hasn’t got a background I need to worry about)
If you want crop marks, click on the “prepress” tab and put a tick in “crop/fold marks” Experiment with the “exterior only” option to see how you want them.
Now click the print button and create your document (I’ve noticed on my laptop if I go into the preview window and try to print to pdf it crashes, don’t know if its a glitch. I just go back to the main print window and click print there and it’s fine)
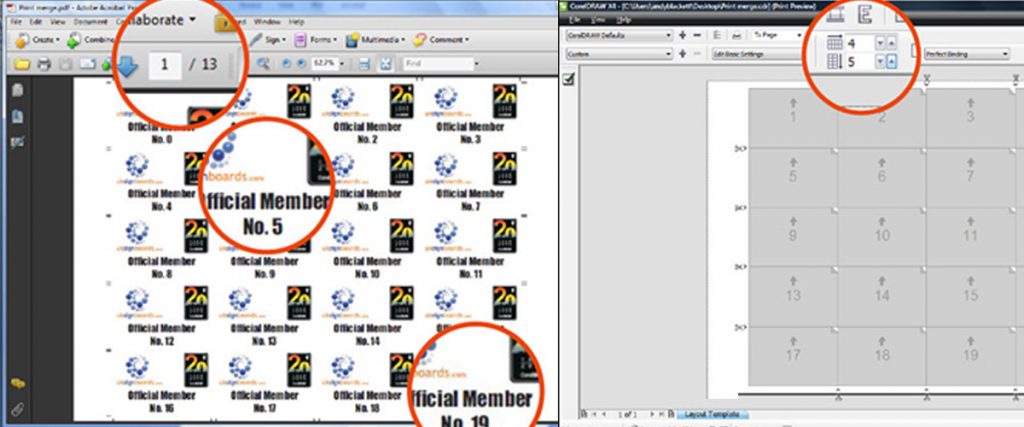
Here’s a screen grab of my pdf showing all my copies over 13 pages with the automatic numbering

Well that’s all there is to it, I hope this demo is of some use to you all…
Andy


Responses