Transition merge one photo into another photo using Photoshop
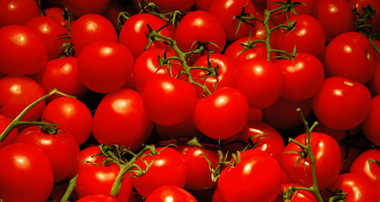
There are times when a customer brings you a load of photos and you wonder what you can do with them, one solution is to merge all the photos into one, so for this tutorial, I have taken a shot of a group of tomatoes and oranges and we will show you how to use the Layer mask within Photoshop. Your version of Photoshop may differ from the one shown but this method should be the same in most versions.

[left]https://www.uksignboards.com/images/avatars/uploads/1295952291446efce056902.jpg[/left]
Photoshop: Merging two photos into one using Layer Masks.
By Dave Rowland of The Sign Shop in Barnstaple.
1: Open two images that you wish to blend together, in this example I am using two pictures, one is called “toms.jpg” and the other is called “oranges.jpg”, make sure they are adequately sized and it is normally best to make them equal resolution and pixel size.

2: Open the Layers rollup by choosing the menu items “Windows” and then “Layers”

3: Select the Oranges photo and on the Layers rollup, press the “Create a new layer” icon to create a blank fresh layer. Layer 1 should appear in the Layer roll up above the Background layer.

4: With Layer1 selected in the Layers rollup, Select the Image menu and choose the item Apply Image, this command allows you to merge two open images together, we are going to choose the tomatoes photo to merge onto the new Layer1 of the photo of the orange.

Source: This needs to point to the second opened photo (toms.jpg)
Layer: The source image layer (should only be Background)
Channel: RGB
Blending: This can be set to Normal or Multiply.
Opacity: 100%
Target: oranges.jpg (layer1, RGB)
After you have confirmed the options, Layer 1 will now contain the second photo (tomatoes) and the existing Background layer will remain as the oranges. The window should now show the tomatoes but the oranges are hidden behind the tomatoes on a separate layer. We are going to sort that out now.
5: With Layer1 still selected in the layers rollup, choose the icon marked “Add layer mask”, this will create a white mask to the right of Layer1, which will allow us to control the transparency of that layer over the background layer.

6: Making sure that we have “clicked” on the new white mask (Layer mask thumbnail that looks like a white rectangle in picture 5), we can now draw over the mask and create our fade pattern. Choose from the Toolbox (see picture) the Gradient Tool marked as A. Then press the Default Black/White Colours button marked as B.

7: Start from the centre bottom and draw a line upwards to the top while holding the “shift” key. This will place a gradient from the bottom (black) to the top (white) but it will make a gradient on the Mask not the photo itself.

8: There you have it, two photos merged into one and the inset picture is a picture of what has happened to the layer mask. However, you can now do some fine-tuning to the picture with the common Photoshop tools like the eraser/brush tools on the tools rollup.

9: Just for fun, I am going to write the word “www.uksignboards.com” over the mask layer to show that it is not limited to gradients. Remember, you must select the layer mask in the Layer rollup (see item 6)

10: One last thing, we may want to merge everything together into one picture so we can store down, this technique is called “Flattening the image” or “Merging Layers”. Select the small triangle in a circle icon on the layers rollup, I have marked it as “A” on the photo, this will open the Layers menu, at the bottom you will see “Merge Visible” (marked as B in the photo), this will merge all the ‘visible’ layers into one layer.

That’s it; you now have one merged tomato and orange image.
Dave Rowland