Activity Feed › Forums › Sign Making Discussions › General Sign Topics › Wrapping on to a flexible roller door
Tagged: 3M, prssure-wheel, roller-shutter, rubber-roller, wrap, wrapping
-
Wrapping on to a flexible roller door
Posted by Simon Worrall on July 11, 2022 at 3:26 amHi
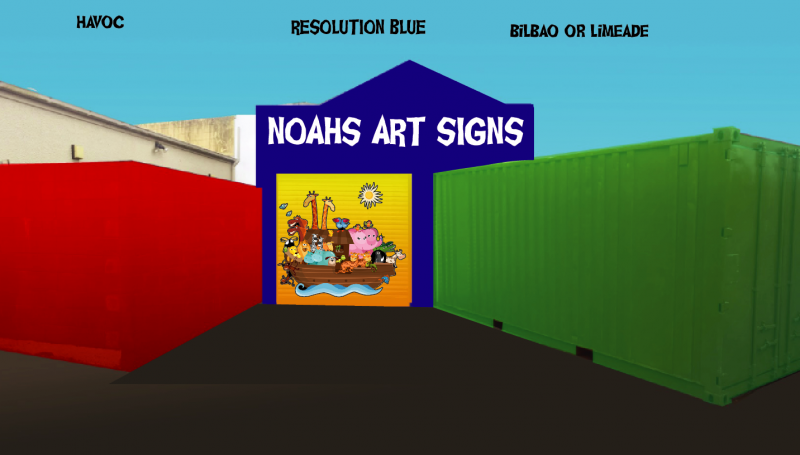
I am planning to jazz up the currently rather grotty back of my shop something like this.
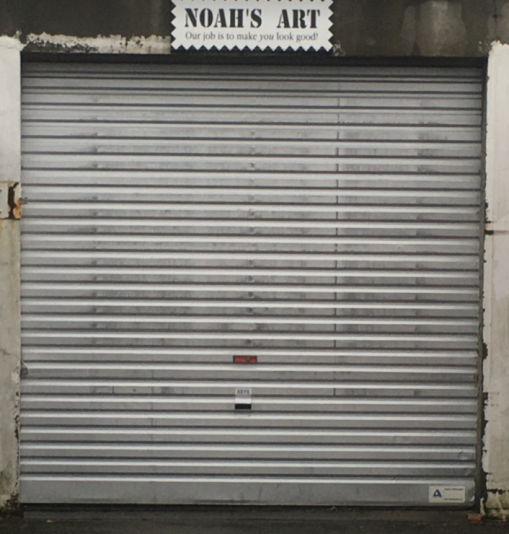
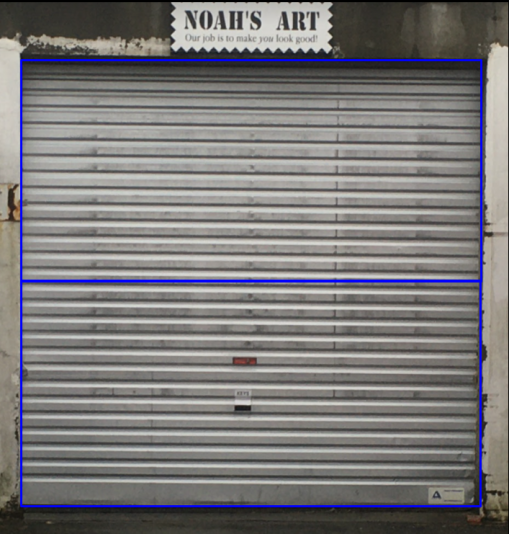
There is a roller door which consists of a pressed galvanised steel sheet, it doesnt have links, just sort of corrugated steel. This lifts up and rolls itself round a shaft at the top on the inside.
Obviously the steel has to flex somewhat in order to accomplish this.
I want to wrap the door with this boat design, but I am not sure what vinyl to use, because obviously it needs to flex along with the door.
Can anybody suggest anything? Would a standard wrap vinyl be any good or will it fail?
Simon.
 RobertLambie replied 2 years ago 3 Members · 8 Replies
 -
8 Replies
-

Morning Simon, I hope you’re all good?
I don’t think the slats themselves will flex, they just hook into one another and roll around. I’d think you could probably use a good polymeric, you need only cut it where it goes over the gaps.
Just be absolutely fastidious with the cleaning as the amount of crap that hides in the joins is monumental! Or it was in the case of a small single door size shutter I did some years back. Just did that in oracle 551 as it was going black.
The only issue you may find over time, is that at certain points it will make contact with itself and wear through / damage the print, though that’ll still look better than a metal shutter!
-

Thanks for the reply Hugh. All good here M8.😊
There are no links between the slats.
The entire door is pressed from a single sheet of spring steel.😳
-

Something you will have to take into account Simon is the “true depth” of the artwork.
You should design it as you would normally by its height and width.
But then tape masking tape and run it from top to bottom, in and out of those recesses. Just like you have with the scrap bit of vinyl.
Once you have done this, carefully pull the masking tape back off in one long piece and stick it to a flat surface. Now measure the length of the masking tape, and it will give you the true depth of your roller shutter doors.you should now go back to your artwork and stretch the artwork vertically to the new door depth.
what will happen now is, when you fit the vinyl and fold it in and out of each slat until your reach the bottom. The design will automatically shrink back up to your original design/visual.
-
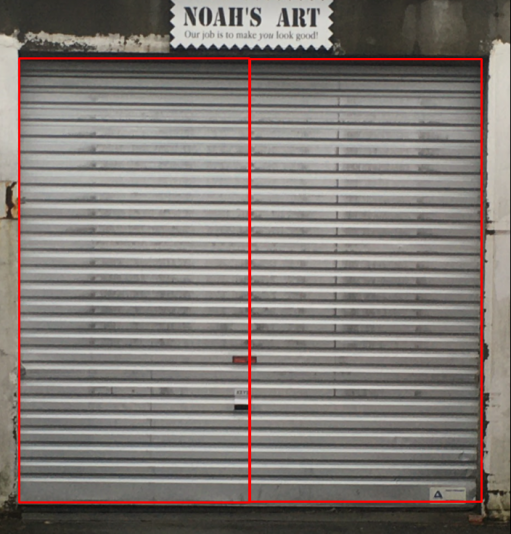
You should consider which way you want to install the prints.
Either in two vertical drops or two horizontal panels!If you are working alone, I would suggest doing it in two vertical panels.
I know this will create a visible seam down the middle. But applying the vinyl horizontally, in and out of those recesses, at that width, will be a bit of a handling nightmare. particularly in warm weather on hot metal. 🙄
-
Ultimately, you want a cast vinyl with a good aggressive adhesive with zero air-release / bubble-free type adhesive system. They will only reduce the adhesives bond and as many rely on pressure to reach an optimal bond, this isn’t going to happen in all those recesses.
As Hugh mentioned. your initial challenge is going to be cleaning this metal. between surface grime and other contaminants, they will all play a part in reducing the adhesives bond in the recesses. so be sure to clean and clean again.
All this said I think I would opt for a good polymeric vinyl and laminate.
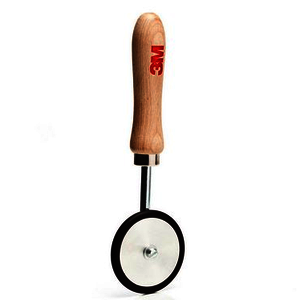
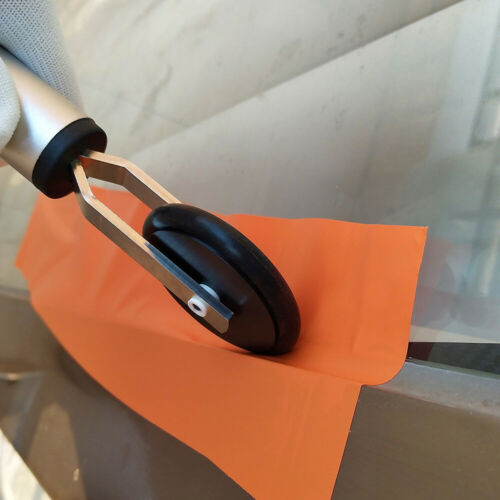
I would apply it the vinyl in and out of the recesses, making sure to make a good bond in the corners of the recesses. one the first panel is fitted. go back over the recesses with pressure and heat. “before” moving onto the second panel. If you have a rubber Roller pressure wheel, heat the slat and apply with that.
-
Once you have both panels firmly in place and you have heat and bonded it with your pressure wheel.
allow it to cool for a bit.
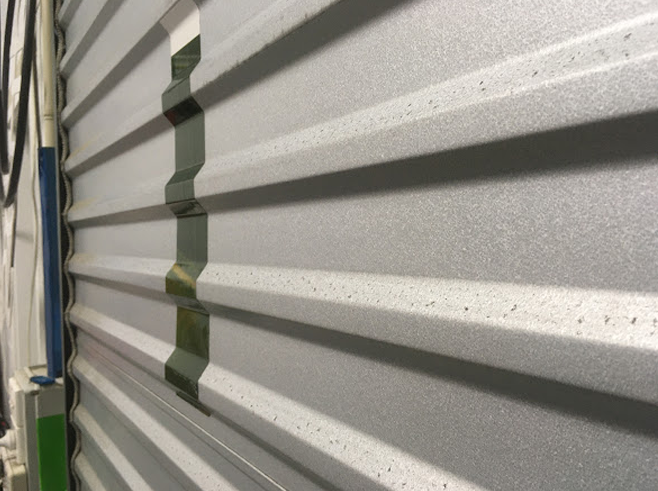
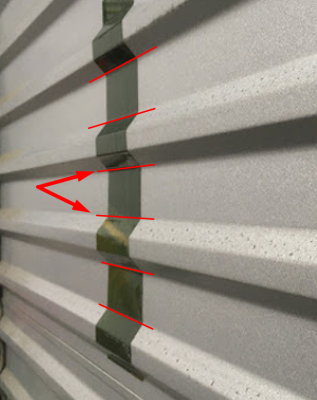
then go back with a new sharp blade and a decent straight edge and start slitting the vinyl where i have indicated in the attached photo.
what you are doing here is obviously slitting and separating the vinyl. IF the vinyl has been perfectly fitted. you shouldn’t see anything after it has been slit. However, if you have NOT got it in perfectly, or the vinyl you have has some shrinkage at all.
What will happen is the slits will open but remain bonded. standing back from it, you will not see it at all.
the key point in doing this is if you do not slit it. and there is any sort of tension or shrinkage, those recesses will pull back out. and due to the continual flexing of the door, the hot sun and cold of night temperate changes the metal will be continually expanding and contracting. and the movement will fail the recesses if not perfect. and will become unsightly in no time.
which is why i suggest slitting the base of each recess.
however, as i said, use a good straight edge and take your time to do it neatly. because it is in a few months time you will properly see if you did a good job or not!
Trust me, i have 33+ years of crap t-shirts under my belt. 🤣
-
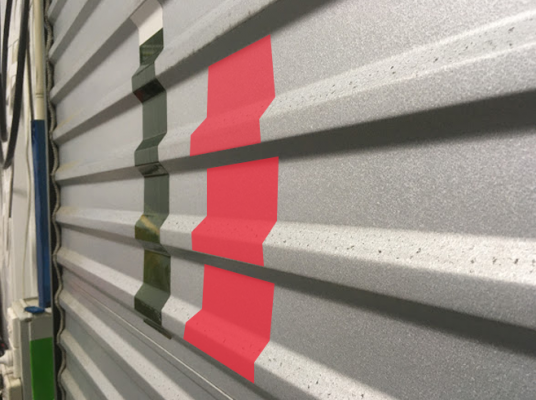
Another way of doing this using a polymeric vinyl, is as follows.
apply the vinyl completely flat down the door high-ground sections of the corrugations.
Slit along the bottom side of the flat are and allow the bridge of vinyl to be folded neatly into the base of the recess and part of the way back up the other side.
this is common for this type of application done on a budget, often on van recessed panels.
the idea is that you are looking at the job on the whole, and your eye bypasses the small missing strips.
just like you dismiss controvision from the inside and think it’s window tint.as you can see in my example panel shown in red.
you cut the bottom of the high-ground and let the bridge of vinyl fold in.now that said, you would do this from eye-level down to the floor.
but from eye-level upwards. you would reverse the slit from the bottom of the high-ground to the top of it.
this is because people will then be looking up at the underside of the slats. so you want those parts now folded into and down, rather than into and up. hope that makes sense!one last point, you do NOT need to stretch your artwork vertically, using this method.

Log in to reply.