-
Vinyl around the home: Reverse Stencil Dresser

Reverse Stencil Dresser by Miriam Bradford
I had an idea about reverse stencilling a ship onto a dresser. Well I did it!
So I have now gone from this:

To this!

Now you can stop reading here and just admire the pretty reverse stencilling OR you can read on for the step-by-step process.
Step 1
Take out the drawers and tape out the inside of the dresser

Step 2
Remove hardware and tape out the edges of the drawers themselves
Step 3
Insert drawers back into dresser without drawer pulls and pray you will be able to get them back out again (if you weren’t painting the area between drawers, than you could easily just take the drawers out, stack them together, apply the stencil and paint them…but since I wanted the ‘gap’ area included in the painting, I had to paint everything while fully assembled)
Step 4
Apply decal according to directions (in this case it was to tape half of the decal down, separate the two layers, remove the backing and then press the decal into place.)

(smoothing out the decal)
(apply the bottom of the decal in the same way as the top)Step 5
Use a knife to cut where the drawers edges are
Step 6
Remove top layer of decal, leaving decal in place

Step 7
Repeat process for second side of decal – note: since this decal was applied on a non-even surface, it was especially difficult to line up the decal and there may or may not have been some tears and cussing during this stage)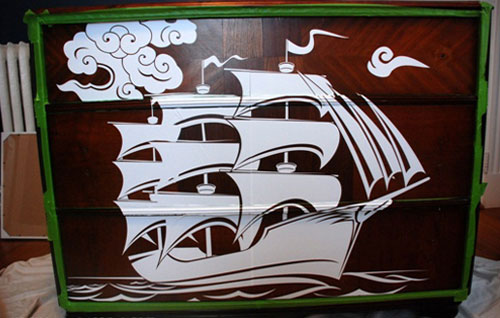
Step 8
Lightly sand dresser, try to avoid sanding over the decal
Step 9
Apply coat of primer to dresser, I used Kilz with the hope that it would truly keep the dresser from bleeding through the paint in the future

(after one coat of primer)Step 10
Apply two coats of white paint allowing to dry between coats

(after one coat of white paint)Step 11
IMMEDIATELY after last coat of paint, while paint is still tacky, start removing the decal

Step 12
Step back to enjoy handiwork
Step 13
Because of ridged, non-flat surface inbetween drawers, I ended up with some bleeding. To remedy this, I got a stain pen from Minwax and used it like a magic marker to clean up the bleeding a bit – below you can see where the bleeding occurred; I unfortunately do not have any pictures of the ‘fix’
Step 14
AFTER stain marker has fully dried, apply Polycrylic topcoat. Polycrylic is the way to go for a top coat that will go over both paint and stained surfaces, polyurethane will yellow any white paint you go over it with
Step 15
Remove painters tape and re-install hardware – project FINISHED!!

Custom decal was purchased from Dali Decals based on a design created using images purchased from Veer.com. Ship artwork by Seamartini and Cloud images by Sunrise. All work and images by Miriam Bradford
Source: flor.com/blog.
Log in to reply.
