Activity Feed › Forums › Sign Making Discussions › Gallery › vehicle graphics: capitol paving
-
vehicle graphics: capitol paving
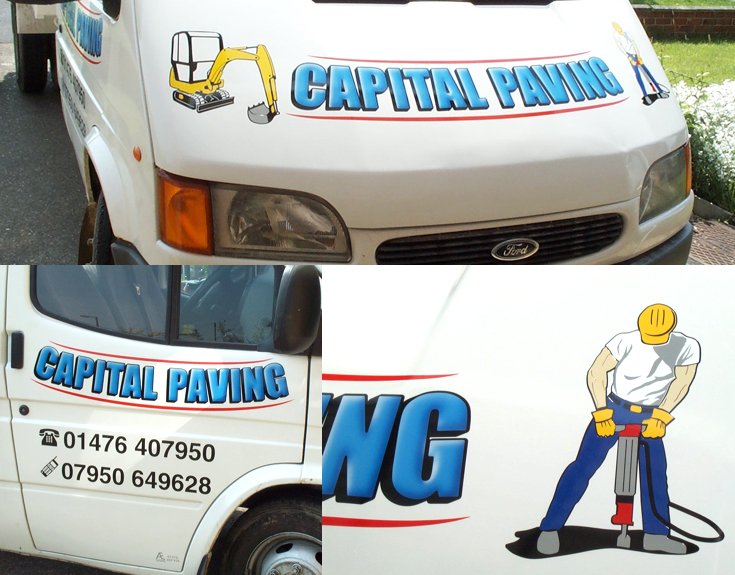
Posted by Alan on May 31, 2003 at 11:55 amJust the application this morning.
The chap was vectorised from a crap piece of clipart supplied and the mini digger from a photograph off the web. A little bit of airbrushing on the lettering, mainly because I can and others can’t/don’t, and the customer goes away with a smile from ear to ear.
The job may not be that special, but a smiling customer defiantly is. 😉
Attachments:
 Alan replied 20 years, 11 months ago 5 Members · 6 Replies
 -
6 Replies
-

I doubt if I’m going to be a much use to you on the paint Graham because I use Halfords car touch-up paint. This is there own brand and comes in silver/grey rattle cans. I’ve tried other brands but this is the one I trust. It passes my simple test i.e. spray paint straight from can onto a piece of vinyl, leave to dry half an hour, stick a piece of vinyl onto the surface of the paint and snatch it off. If the paint stays put you’re on a winner.
I don’t use the paint straight from the can for this type of work of cause. And the vinyl always gets a wipe over with isopropyl alcohol before spraying, but NO scuffing.
I spray the paint into a small cup and then pour it into the airbrush. Once the paint is dry I go over it with a soft cloth to remove any over-spray dust. If the feathered edge of the paint still looks very dusty from over-spray I spray it over with clean cellulose thinners to wet it up so it flows out.
Finish off with one or two coats of frog.I have used Deka sign air water based paints but they can clog the brush up a little. Cellulose, or whatever it is they use nowadays in these cans, works great every time.
If you go for a touch-up paint, test first. I have found some brands to be useless at sticking to vinyl.
Time: probably around an hour and a half, two colours, two frog juice and cleaning the brush etc.
The radius was not that critical. I pulled a picture of the van bonnet into CorelDraw and made an ellipse that took the line I roughly wanted and then set the text to that.
I don’t bother with vehicle outlines. I use the digital camera. Stand well back and zoom in to lessen any distortion and then take one or two long measurements (seem to seem or whatever). Scale up on the computer and put the graphics straight on the actual vehicle. Once printed you have one very impressed customer. One customer’s wife actually wanted to pay me because she thought I’d done the van and photographed it. 😀
Most of the above’s not for your benefit Graham (sucking eggs and all that) but others may want to know.
-
…well not only am I impressed with the job Alan – but I read and took onboard what you said about certain paints and the process…rest assured it’ll get used in future!
thank you! 😉
more soon
mikethesign
-

Beautiful work Alan. Please expalin more how this effect is achieved. I’m guessing you used a white paint in the airbrush to create the highlights. Did you create lowlights also using dark paint or is this my imagination. I presume this is all done prior to weeding the cut lettering and putting it all together on the van or is it?
This would make a wonderful step by step. 😀
-
i’m with Phil…Step by step..Step by step…Step by step…”chanting”.
Looks really good.
-
I’ll see if I can put something together for a step by step this next week.
Log in to reply.
