Activity Feed › Forums › Sign Making Discussions › Gallery › sign fabrication: marina quay
-
sign fabrication: marina quay
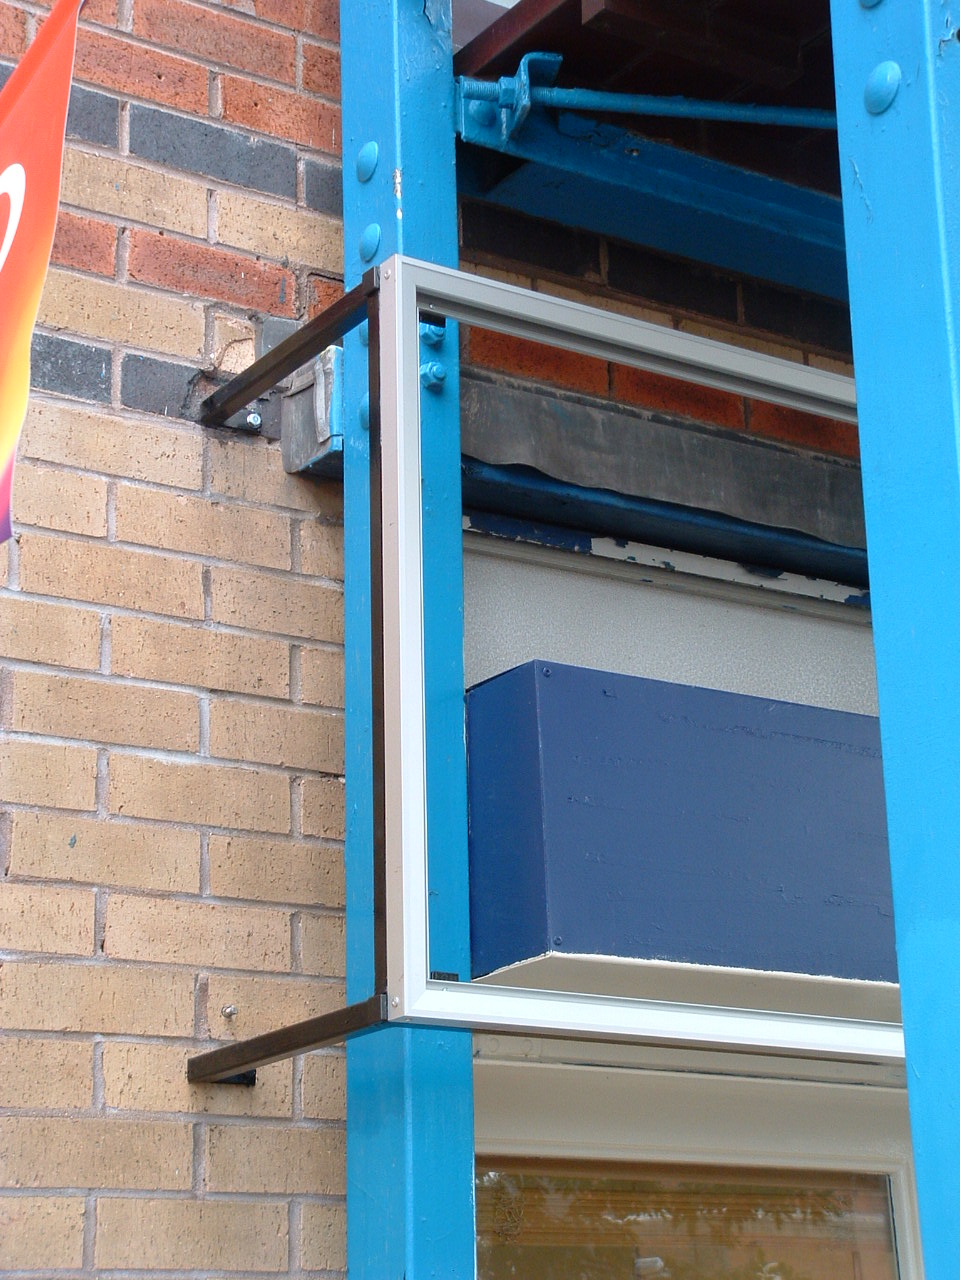
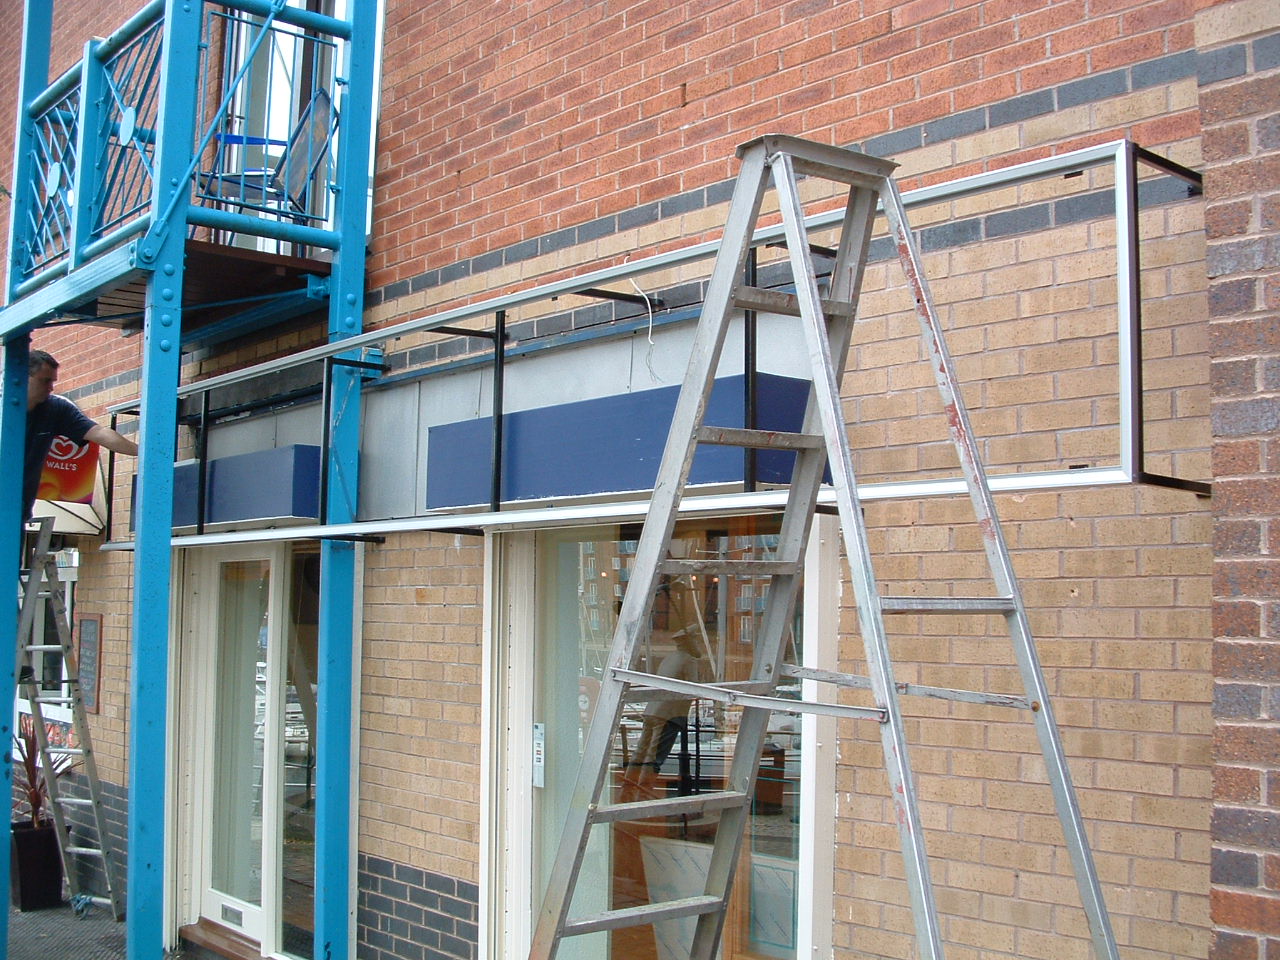
Posted by Mike Grant on January 21, 2010 at 8:21 pmThere maybe some mounting/fixing tips in here for someone.
As you can see I had to hide a lot of junk behind the sign.
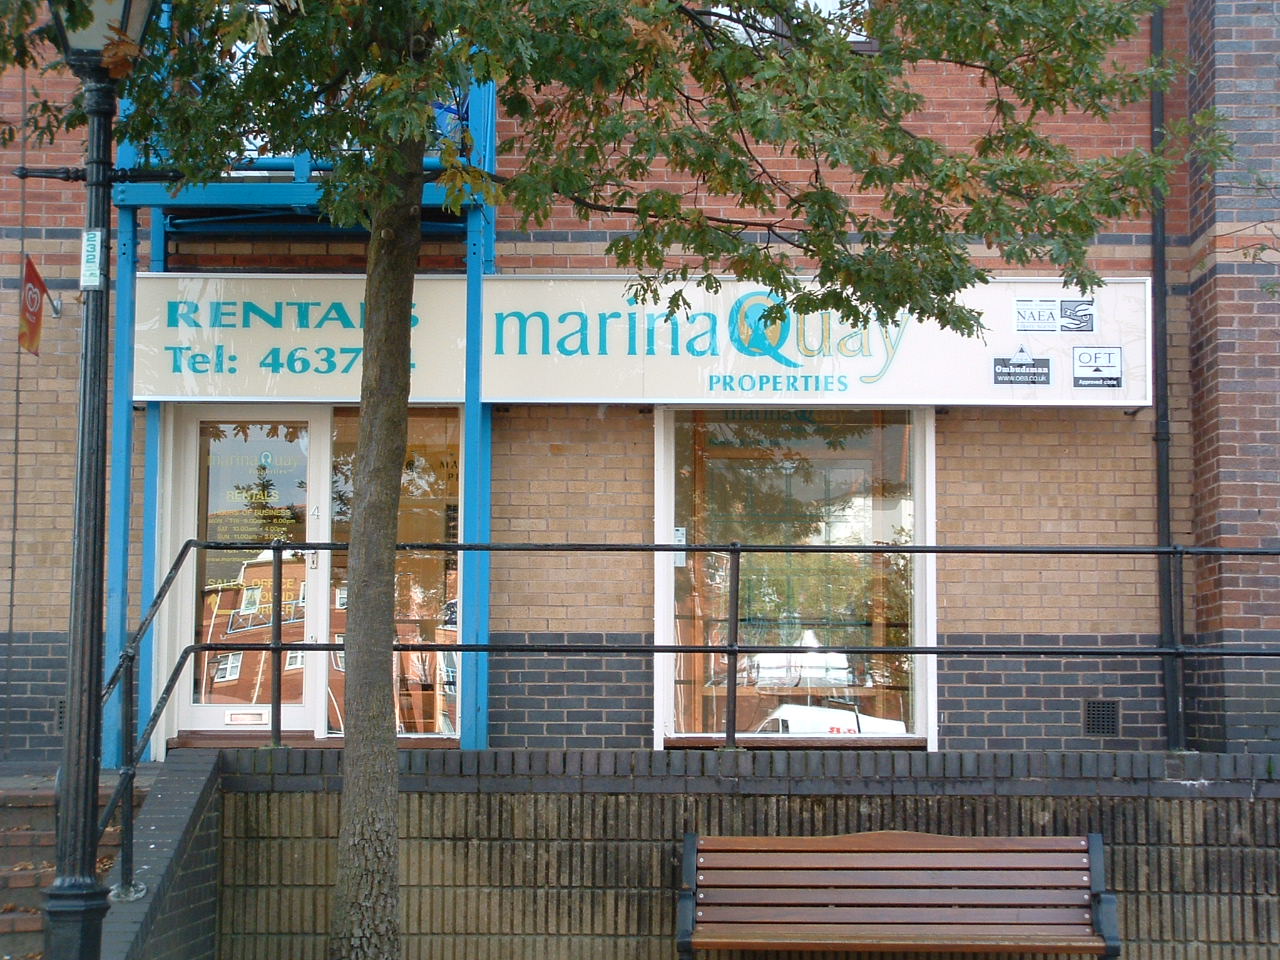
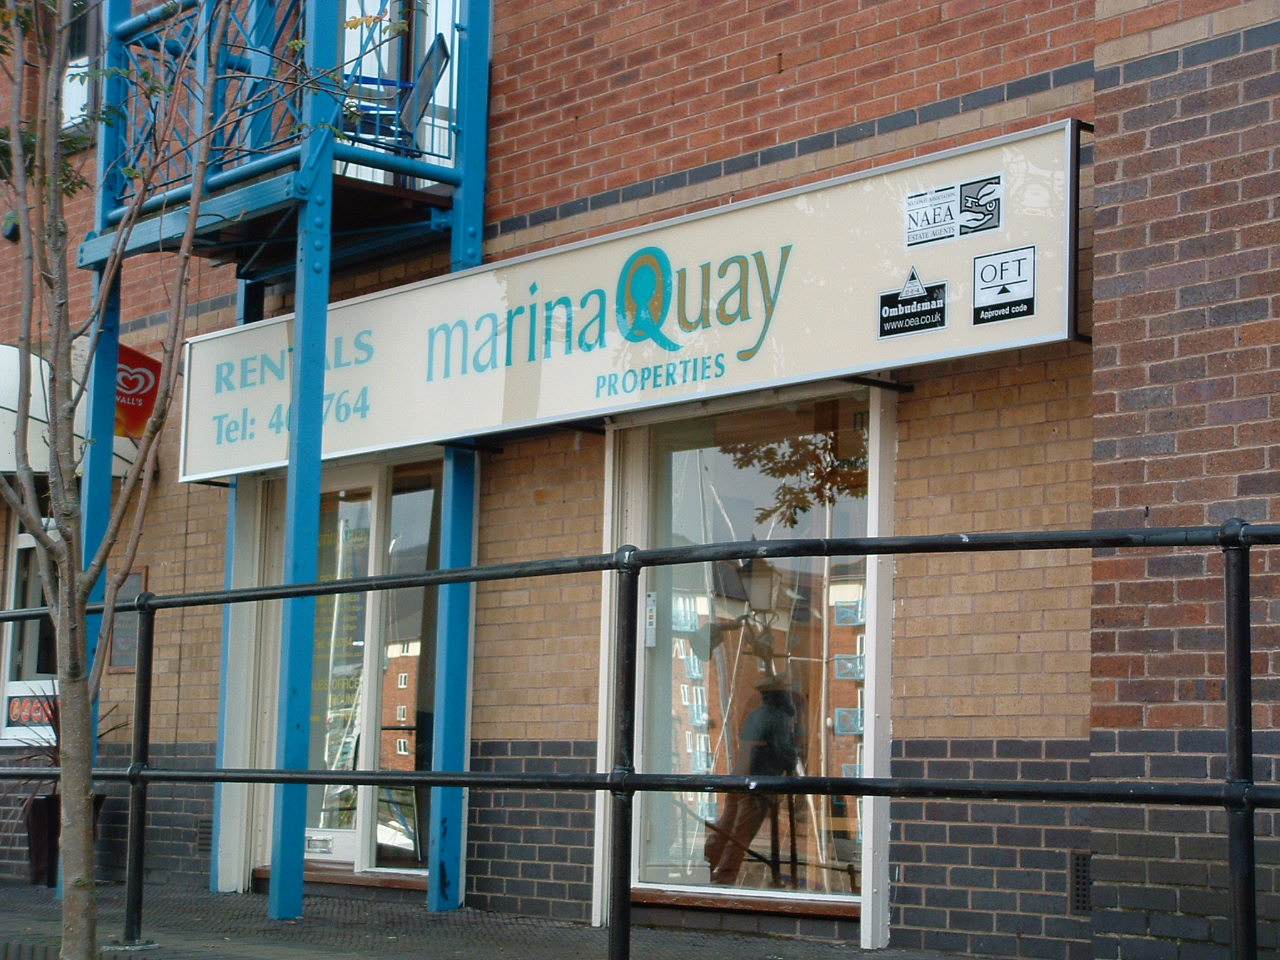
I have used Panatrim frame. The acrylic face was reverse sprayed because the sign is right next to the quayside and wanted the best for such a hostile environment.
1" square steel tube was painted with hammerite.It would be simple enough to clad the frame with a Dibond pan if that type of sign was required.
Attachments:


 Ezekiel Ikhinmiwn replied 14 years, 3 months ago 15 Members · 25 Replies
 -
25 Replies
-
 quote Mike Grant:There maybe some mounting/fixing tips in here for someone.
I agree, always interesting to see how others go about jobs, especially with behind the scenes fabrication. Your 36 years experience shows through there Mike, really well done and a nice looking sign.
-

Mike nice work,
can I ask what you mean by reverse sprayed though?peter
-

Pete, everything is first vinyl masked then sprayed with paint. All artworks are cut in reverse and applied to the rear. This leaves the face with a shiny mirror like surface. Long life as there is no vinyl to fade and peel at a later date.
-
Mike,
correct me if I get this wrong, you have used clear acrylic, and applied the paint to the reverse side, using masks?
do you overspray, or in other words flood coat the design with a final coat as the background?
And a final question, what paints do you use?Peter
-
Pete, you have to carefully think through the order of spraying and the colours you spray. You can cut most of the lettering and spray that first then last of all you spray the background colour over everything.
For example, the small logos would be cut and applied. The black areas were then weeded and sprayed black. Then a quick bit of remasking with tape and you can spray the background of the logos white. Then after all is sprayed just spray the cream background over everything. Most jobs require no remasking its just a case of planning ahead in your mind.
Sometimes I cover the back of the sign in vinyl to protect the paint against scratches.I use cellulose paints or the nearest equivalent that my paint supplier can mix up.
I hope this all makes sense 😕
-
Perfect sense Mike
Thanks for sharing your knowledge.
Peter
-

you using hardeners in the paints Mike?….have to try that…thanks for the info.
-

We also use this technique a lot. Sometimes you apply the letters first (cut mirror, but not weeding in reverse), then spray the Background colour, remove lettering, then spray the Letter colour. A black BG with Gold text for example will have the black sprayed first, leaving the copy clear after removing, and then the gold is sprayed. Always vinyl on the back to protect the paint against damage when fitting.
I NEVER do a acrylic/perspex sign from the front. Always mirror from the back. Looks nice and classy that way.
-

If you are applying vinyl on the back to protect the paint are you not just doubling up on time and effort?
Could you not just flood coat vinyl in the background colour instead of spraying??
-

Great job Mike,
I’ll take a closer look next time I’m down the Bay.
Always refreshing to see paint being used, need to smell those fumes every once in a while to know your alive 😮
-

Thanks Peter and Mike for your suggestions.
Peter I use those screws quite a lot but they have not got the balls to go through a reasonable gauge mild steel.
Mike your job looks great and it will be suitable for future jobs, but because the sign panel has to sit above and away from lead flashing and fascia.
Peter -
quote Glenn Sharp:Could you not just flood coat vinyl in the background colour instead of spraying??
If you get the smallest bit of dirt or fluff under the vinyl it will stand out like a sore thumb. Any little air bubble will show. So unless you have clinicaly clean working area its best to spray. Anyway the idea is not to have any vinyl on the sign because of shrinkage and delamination with time.
-
quote Peter Cox:Thanks Peter and Mike for your suggestions.
Peter I use those screws quite a lot but they have not got the balls to go through a reasonable gauge mild steel.
Mike your job looks great and it will be suitable for future jobs, but because the sign panel has to sit above and away from lead flashing and fascia.
PeterPeter
I may have pointed to the wrong screws, but manly self drill c/s are available. After looking at your drawing, i still think you could do away with ply, extend the bracket and fold the dibond top and bottom.
Even normal self tappers would do the job, through ply, alignment is not a problem.
a pilot hole drilled through the ply into the steel is all you need to do.Trouble with ply, if will rot, eventually, if not treated.
I just think maybe you are over engineering?Peter
peter
-

Great looking sign! will have to call you when i have something like that to be done 🙂 im moving into a new premises not far from you at the mo, will have to call in and see if we can sort something 🙂 i often get asked about jobs like that, but dont tend to do them as i dont have the know how or ladders . lookforward to meeting you. 🙂
-
Great looking sign Mike, done a couple similar, clear then decorated front and back, which made the letters look like they were floating..
One thing.. did you not back the panatrim frame with ali sheet, i would say theres a good chance of the panels being blown out, especially if in exposed postion?
-

quite a bit of installing going on there lol!
Nice work tho. 😀 -

Sorry Simon – I have to take issue with that.
It’s a common misconception. Panels do not get blown out of sign frames they get "sucked" out!
Wind passing over a sign creates an area of low pressure which results in the panel being "sucked" out of the frame. It’s the same principle with an aircraft wing, whereby the lift is generated by the flow of air over the top of the wing being faster than the flow of air under the wing. This results in a pressure differential which produces lift in an aircraft.
With a sign it is more important to ensure the flow of air over the front and the back of the sign is equalised – which results in equal pressure so the sign stays in place.
Placing an Aluminium backing onto the rear of the sign in this situation means the air flow is zero at the rear of the sign – but high at the front this will increase the pressure differential making it more likely that the panels would be sucked out of the frame then they would if the backing was left off.
-
 quote Gert du Preez:I NEVER do a acrylic/perspex sign from the front. Always mirror from the back. Looks nice and classy that way.
Great sign mike.
Gert, I never do from the rear unless it is requested or it will be subject to vandals.
Most of the tourist strip that we work for complain that the reflection during the day reduces the effectiveness of the sign from a distance. So. most are signed on the outside on an opal perspex face.
I agree it looks much better and would my first choice if given the opportunity.
Do all mine in 7 year translucent computer cut though. Not fussed on using paint unless it is over 1200mm wide.
-
No Phill your wrong not all panels are sucked out, i think you’ll find its only over sized ones around 3′ and above with a big surface area that have been made out of too thin a material or haven’t been reinforced to stop the flexing motion,
Most are in fact blown out where the wind has penetrated behind the sign panels normally through gaping joints,where the edge of the panel is exposed causing it to flex.What happens when the wind hits the sign square on? will it not try and push the sign panels out backwards, sorry i forgot according to you the wind only travels in one direction from left to right
Having a back panel in my opinion, one makes the back of the sign look neater, as it can easily be seen from inside the shop and two will stop any chance of the wind either pushing the panels inwards or if by any small chance (i know theres only a 2′ void behind it) the wind getting up behind the sign and pushing it outwards.
i know this, coz i spent 5 years designing all types of signs then 2 years as a surveyor/installation engineer and then 18 years making and installing signs.
Sorry Mike!
-
There is a very simple answer to this problem………………
Just put a "hanging strip" along the bottom edge as well. SIMPLES!
:bow: :funky2: :2thumbs: :tongue:
-
Hey Mike
That sign looks 101%
With signs like that I’m sure the demand for this kind of work wont be drying up any time in the future.Well done and keep up the good work.
:appl: :appl: :appl:
Ezekiel
Log in to reply.
