Activity Feed › Forums › Printing Discussions › General Printing Topics › Setting Up a Laminator Correctly – Advice needed.
-
Setting Up a Laminator Correctly – Advice needed.
Posted by NeilFox on May 1, 2013 at 6:06 pmHi,
I have had a Royal Sovereign Laminator for a number of years now and it has always slighlty crept over with the resultant wrinkling effect 3 or 4 meters into the print being laminated. With a constant pulling it could be managed so as not to affect the image. I always left a good gap between prints so that we could cut them and re-align everything and off we would go again.
However I had a brainwave (????) to adjust the pressure of the top roller. This only made the sitauation worse, so over the past couple of days I have been trying the get it correct.
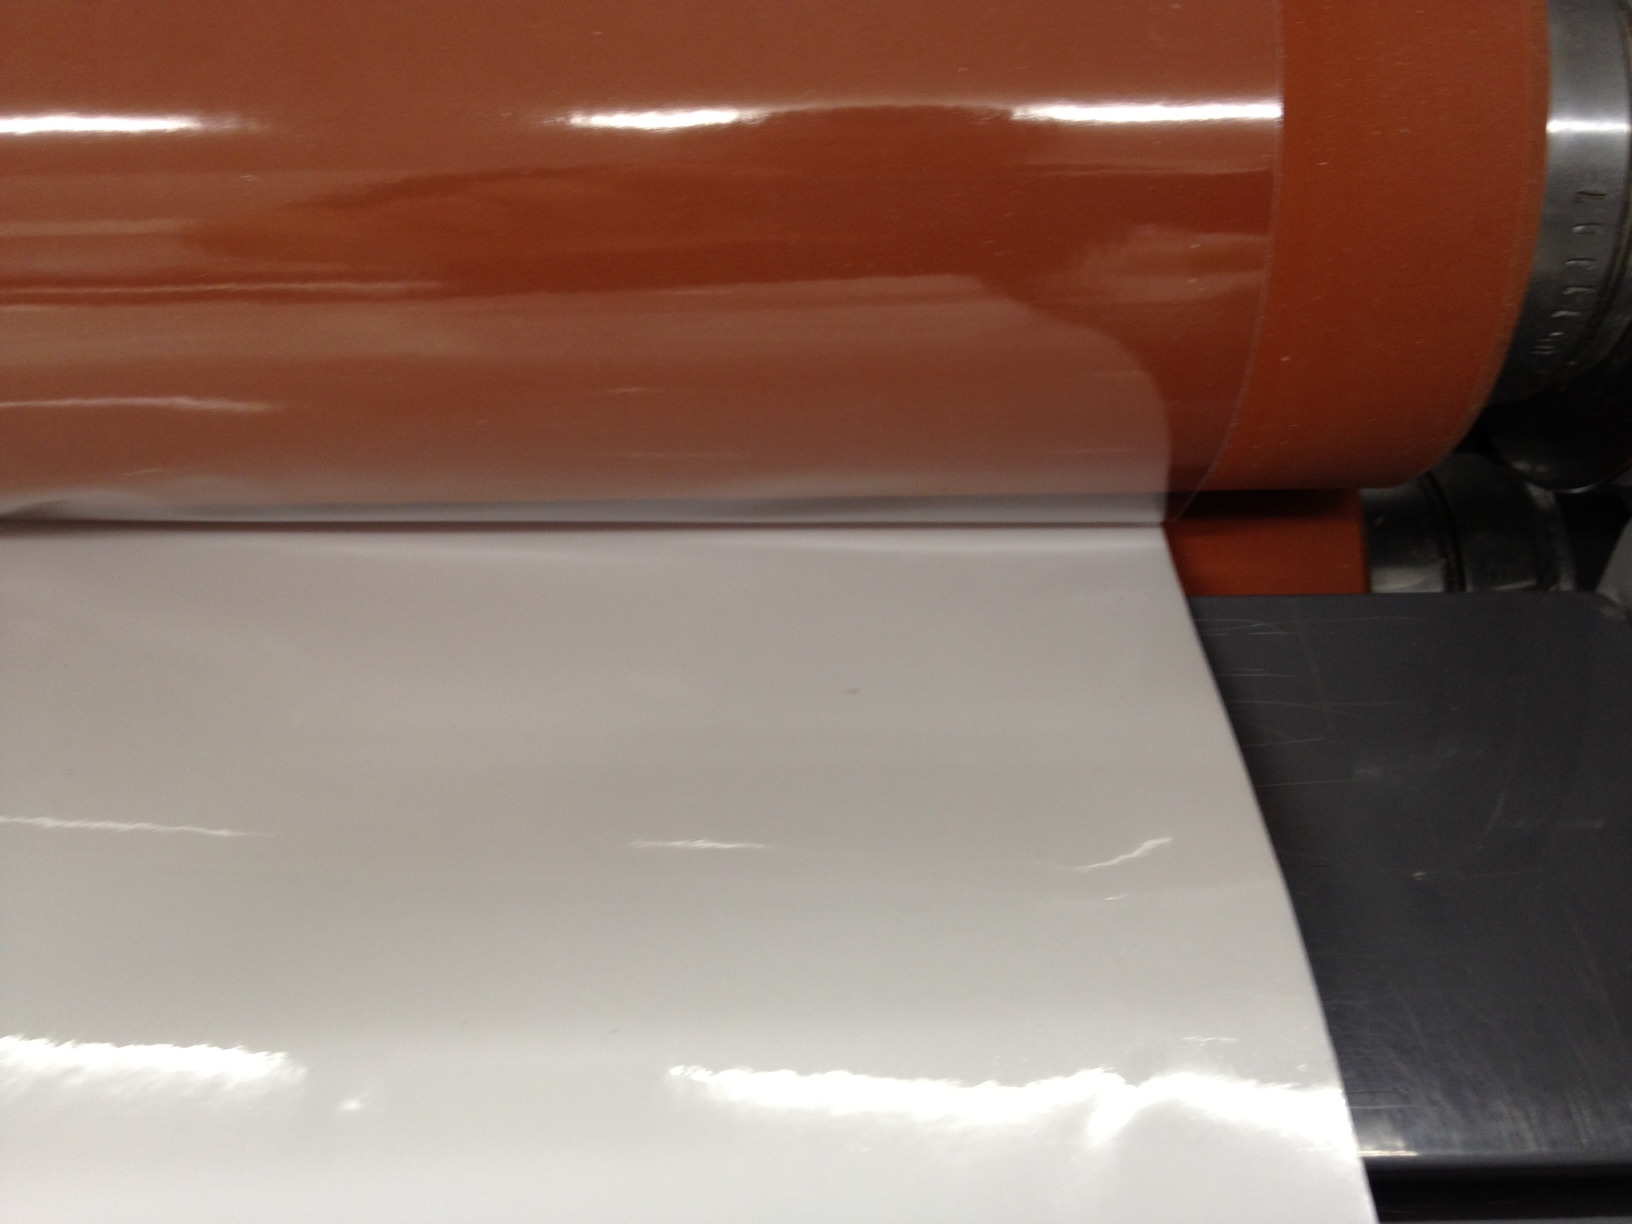
I now have the situation where the wrinkling is consistent at either side of the roller, both left and right. (See Photos)
However my thinking is that the pressure is too high at the centre. Based on the photos, can someone give me some advise on how best to get the laminator working correctly?
Many thanks for reading this and any advice offered would be greatly appreciated.
Thanks,
Neil
Attachments:

 Neil Fox replied 10 years, 12 months ago 8 Members · 16 Replies
 -
16 Replies
-

My feeling for top roller pressure has ALWAYS been…just the weight of the roller and absolutely NO additional down force…just wound down until the weight is off.
Been doing it that way for years and been wrinkle free for most of that!
-

Use a feeder board.
A length of 5mm foamex, wider than the laminate.
Raise the rollers, place the film as you would if laminating a print, lower the roller onto the board sticking the laminate to it.
I then loosen raise the roller, and twist, push the board until the laminate is in contact across the top roller.
Set to forward, then feed in the graphics.
-

David R, thanks for that.
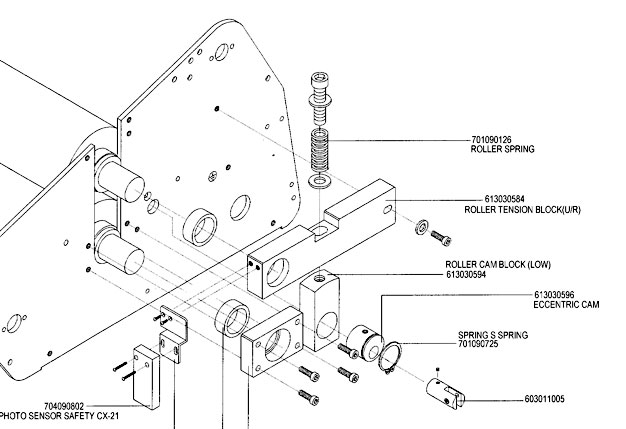
The RS machine has notches , the last being closed, but I think it is too tight. I will try to put it down then lut on a slight pressure.David H, I always use a foamex feeder board to start it, but the wrinkling starts about 500mm in at present. Due to the pressure on my RS being set by a nothched increments, I cannot regulate the pressure by slight increments. (see photo)
Thanks for the advice.
Neil
Attachments:
-

Just experiment with the pressure. Ease it right off until it slips then tighten just enough to move it. Just a minimum pressure is all it needs.
-

I feel your pain Neil, Laminators are the most temperamental machines going
imo, one minute all is good then the next it all creases up..and you don’t know why 🙁As Martin says it really is down to pressure and trial and error.
Have you tried using a a roll of old backing paper fed through from the back so it feeds through over the bottom roller….so the print to be laminated is sandwiched between the laminate top roller and paper on the bottom…hope this make sense 😕
This might help solve your problem. I had the same trouble as you when laminating wrap vinyl and laminate, drove me mad..but ran a roll of old backing paper through at at same time over bottom roller and it solved the problem..worth a punt.
-

Sometimes a little bit of extra tension on the bottom media feed helps. Not too much
though, as this will introduce curl into the finished product. -
A good tip that we use is always put a flat piece of vinyl in first so you have about six or seven inches sticking out which is flat and tuck the job under this to start and that will keep it flat. Use a piece which has been laminated several times so its thicker. We have a pile of eight inch strips which we always put in first.
-

Both Martins and Jamie, thanks for the comments.
I have eased back on the pressure of the roller and it is better. The only problem I started to find was that there were (not bubles) but air patches between the print and lamiante ( a mottled effect) on the left and right 9 inches of the print. That led me to think that that the pressure of the top roller was now to light. I increased the pressure using the grub screws in the roller mechanism by 1/2 a turn on each side. Pressure now seems to be pretty good.
One thing I have noticed is that the waste backing sheet seems to be ‘walking’ to te left by about 1mm per revolution. This is causing the print / laminate to drift sightly and thefore creating a wrickle effect on the right side of the roller. Any ideas?
This is back to my original problem. which I tried to fix and ended up messing up the pressure.
Just as a matter of interest, how much tension should be on the top roll (laminate) and bottom fed roll (print). I have a slight amount of tension on both. If I put too much, the print curls after laminating. I use that as a measure of the tension I should use, but is their another way of guaging it?
Thanks again to all of you for your helpful comments, I really appreciate it.
Neil
-
I think the roller pressure needs adjusting each end as it seams its not running level so I think the pressure is more one end than the other.
-
Do you think the pressure is greater then on the end that is wrinkling?
-
Yes…You need to set it up with some kind of feeler guage….A piece of 3mm foamex or something.
-

Hi all. I have a GMP Excelam cold laminator (basically the same machine as the Arctic Titan) which also needs its nip pressure increasing, and has the same notched control with lever as NeilFox’s machine. Can’t call out anyone to look at it since we’re way, way offshore!
(The reason it needs the nip pressure increasing is that the lower roller had to come off after a massive jam, and ever since we’ve had silvering, air bubbles, you name it.)
Removing the end covers shows a large spring at each end held down by a big Allen bolt, which I would guess can somehow be used to increase the nip pressure, but I’m reluctant to start mucking about willy nilly….
Attachments:
-
Mike, That is the Grub Screw I have used to alter the pressure. It has got me into deep trouble but we seem to be getting things together again. I am going to spend the weekend adgisuting it as Martin suggested with some thin foamex to try and get the pressures correct.
It is a real pain to try and tweek but it is the only way to sort it out.
Neil
-
Thanks Neil, nice to have my guess confirmed. That plus the other comments in this thread should get me off to a good start.
-
The machine need eot have a complete overhall. It looks like the transfer bar (that moves the camms on each side) has twisted. When the rolloer touches the bottom roller on the right side (looking from front) there is a 2mm gap on the left side between the top and bottom rollers.
Decided that it is time to get another laminator, so I have purchsed a Seal 62 Base, due to be delivered and installed on Monday.
Neil
Log in to reply.
