Activity Feed › Forums › Printing Discussions › General Printing Topics › S/A Wallpaper lifting issues
Tagged: back-cutter, back-slitter, butt-join, joins, overlap, wallpaper
-
S/A Wallpaper lifting issues
Posted by Warren Beard on April 8, 2022 at 3:06 pmHi All
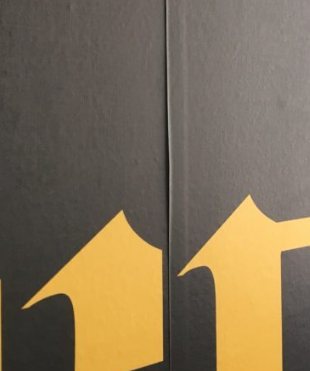
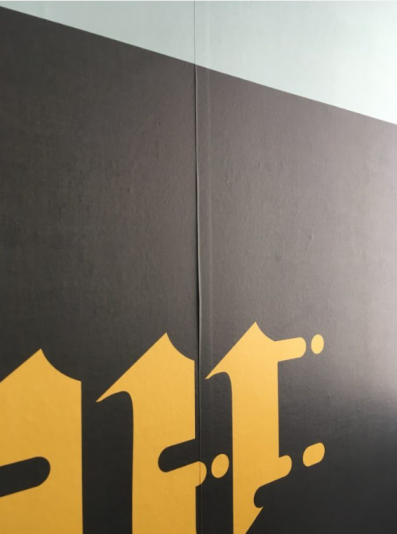
We started having issues with overlaps peeling up as per image attached a while ago, we upgraded to a High Tack media and are still having the same problems. The supplier specs states installation is acceptable with overlaps (yes I know we can splice but that’s a topic for another day lol) Apparently there should be no reason for this happening ….. but it is ….. continuously and also with various brands so possibly there is another issue somewhere.
We are printing with Eco-Sol Max 2 inks and it looks as though it won’t stick well to the inked surface so this could be one possibility, we are currently testing it on unprinted media but the supplier said this should not make any difference.
I wondered if anybody had similar issues and any possible solutions.
Cheers
Warren
-
This discussion was modified 2 years, 3 months ago by
 Warren Beard.
David Hammond replied 2 years, 3 months ago 8 Members · 17 Replies -
This discussion was modified 2 years, 3 months ago by
-
17 Replies
-
-
Hi Warren,
Not sure what you’ve already tried to eliminate the issue, if it’s vinyl your using
1. Print the vinyl.
2. Allow gassing off time to eliminate trapped solvent
3. Laminate
3. Allow a standing time to allow print media and laminate to get to know each other
4. Apply drop 1, remember to clean the edge of the media you’ve been touching then apply drop 2, clean the edge of the media you’ve been touching then drop 3 etc
Vinyl should have no problem sticking to itself, as long as it’s gassed off and it’s a clean surface
Unless of course you’ve used a textured laminate and in that case a rethink is needed.
If you’ve done all the above, in my opinion the vinyl shouldn’t fail. Of course there’s a possibility it will fail over time as the vinyl starts to shrink back, but this could take years
If it’s another media let me know
-
This reply was modified 2 years, 3 months ago by
 Graham Scanlan.
-
Hi Graham
It’s high tack, reposition fabric wall paper. We always used to use the standard one and then these issues began, the supplier suggested we use the high tack version and we are still having the issues even with a higher tack, they said they have not seen this issue before but we seem to be getting it on every job. It’s worse on darker colours but we can’t seem to solve it and it’s beginning to cost us a lot in time, money and reputation 🙁
Thanks for your reply though.
Cheers
Warren
-
-
Textured, but this shouldn’t cause this … as per the supplier and their data sheet and their installation specs also say overlap in acceptable, they don’t know why and say they have not seen it before but we get it every time.
We are using Genuine Roland inks too
Cheers
Warren
-
-
-
-
This reply was modified 2 years, 3 months ago by
-
Could be a gasing out issue. Dark colours take longer or need longer.
-
Obviously, I am doing this blind, but let’s assume there is no shrinkage because it’s a fabric.
So, If we go purely on the photo that you have attached, there is a couple of noticeable things.
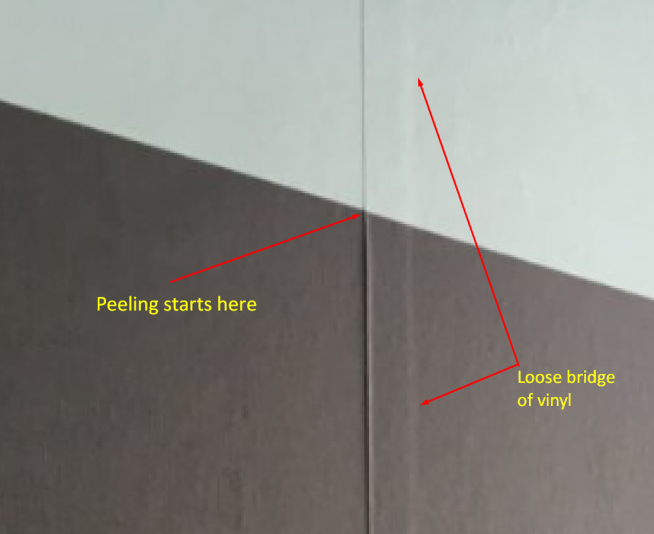
1, The fail clearly starts to happen right where the ink starts! (see attached)
If this is the case, and the areas with zero ink are bonded fine, then the issue is the “ink”, not the material.2, if this is a fabric material with a texture, the adhesion on the overlap will be reduced to about 30% of what it would be bonding to a gloss material. If it has a repositionable adhesive, then the initial bond will reduce even further because it takes time to build up to its optimal bond.
3, Add ink saturation to the surface and you are adding another possible element that may reduce adhesion.
4, If the room is cool/cold then the adhesion will be reduced again. Taking longer to build up its bond.
5, look at the bridge area of the overlap. it appears loose with no sign of a proper bond.
This could be the person that is fitting the material, simply not tidying up the seam or applying any real pressure in the areas where it needs it most.Personally, I think that the only way to properly eliminate the possibility of a failure happening is right at the point of application. This would mean carrying out the following “as the installation happens” but you could try this and see if it helps with the current issue.
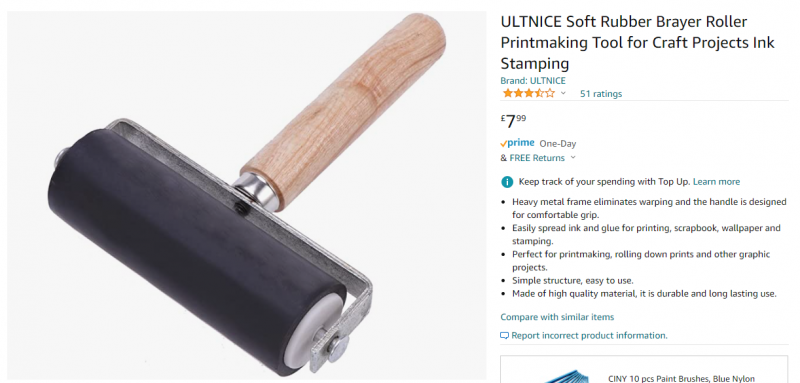
Using a heat gun, warm up the seam in increments of about 12-16 inches and whilst doing so, roll over the join/seam firmly using a rubber roller.
If the bridge area still doesn’t bond, then use a thumb in a wrapping glove or similar.
The heat will help soften the adhesive and material and the pressure will allow the adhesive to bond better and conform to the micro surface texture of the material.As I said initial;y though, look closely at the job on the whole. If the failure is happening in the areas with ink, then the bonding issue is the ink!
-
Hi Rob
Thanks as always for your detailed reply and this is exactly where we are right now and testing this to see if it helps. We are trying with and without heat as again the supplier said heat is not necessary but we need to find a solid solution so trying multiple things to see how each perform.
Hopefully these tests lead to a final solution once and for all.
Many thanks
Warren
-
-
No problem mate, hope you get to the bottom of it. nothing worse than something like this happening.
Second thought, I’ve shown a 100mm wide roller as I prefer them for hemming banners etc.
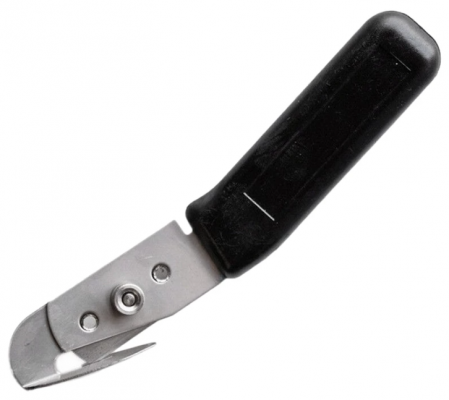
but if you do buy some, get a 50mm for the overlap. the reason is, if you heat and apply pressure, you might create a very slight impression on the material the width of the roller. so it is best to use a narrow one to roll over the overlap only. it’s not one of those things you will notice as you do it. but when you stand back at an angle or in a certain light, you may see roller ghosting on the surface. hope that makes sense.You will probably have seen these, but depending on the application or media I am using, I will use overlaps or double-layer cut the overlap joins by scalpel or back slitter knife.
-
Thanks Rob, yeah we have ordered a few 40mm rollers as we’ve also had roller marks from the rubber before so got a few to try. We also have those slitters which are great, I think my fitters just need a little training to do a better job.
Thanks again
Cheers
Warren
-
-
Hi Warren
Do you seal your walls before applying the wall covering ?
-
No we don’t, the only lifting is the overlap and not on the paint itself.
-
-
Same issue on one of our walls in office. Have another wall done and there’s no issues. Same roll.
Log in to reply.


