Activity Feed Forums Sign Making Discussions Gallery LED Halo Letters & Edgelit acrylic shop sign

  • LED Halo Letters & Edgelit acrylic shop sign

    Posted by David McDonald on January 10, 2006 at 9:45 am

    Hello All

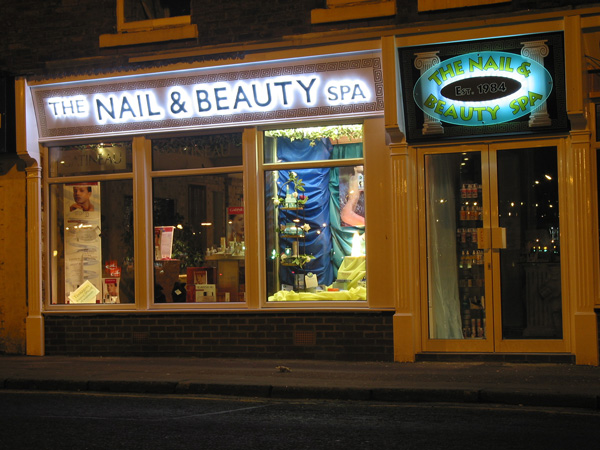
    Not posted for a while but thought I’d show you whats kept me busy over the last few days. I will have to take some more photo’s in the daylight as it has an entirely different look.

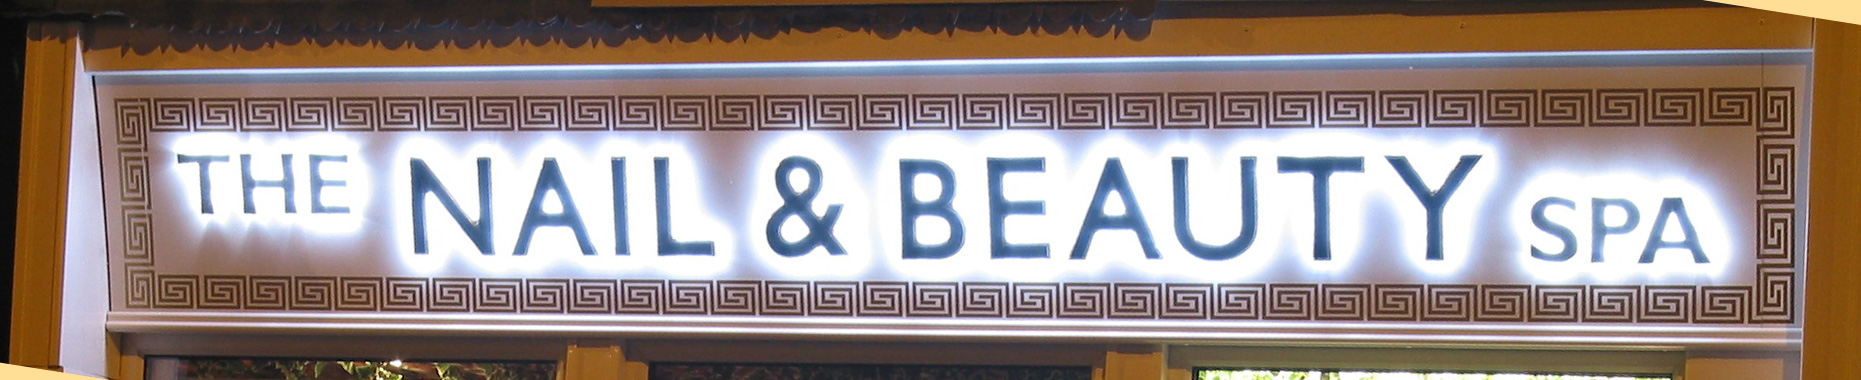
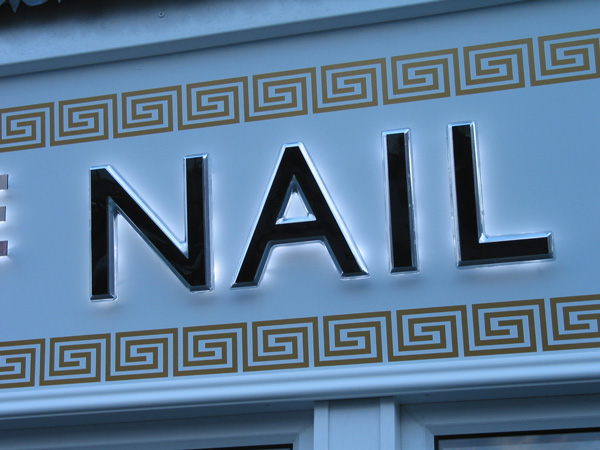
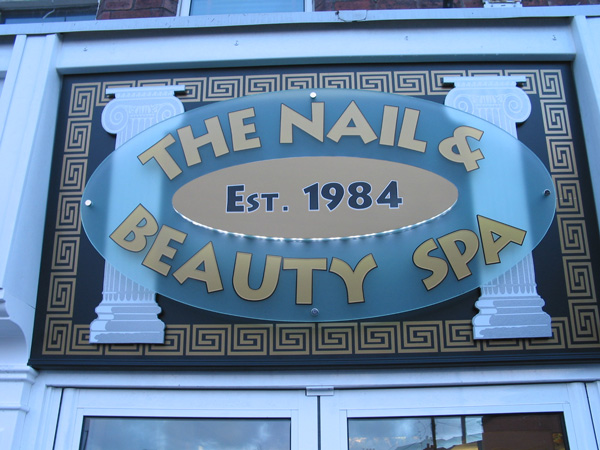
    The stand off letters are mirror chrome bevelled with gloss black acrylic faces and white LED’s on the back for a halo effect, mounted onto a 4m white Dibond panel with gold vinyl pattern border. The feature design is a 2m wide doughnut of 10mm frosted acrylic – rough polished on the outer edge and flame polished on the inner edge. Edge lit from inside the doughnut with more white LED’s (packed loads in), the LEDS and the doughnut hole are sandwiched back and front with slightly larger acrylic ovals – again polished edges. The oval stands off on 5cm chrome connectors. Two stand off doric pillars in 10mm Forrex sprayed in silver Hammerite with white vinyl details. All mounted on Dibond covered in matt black vinyl with gold pattern border.

    Need to finish a slightly smaller panel to go on the right of the feature design – same format as the Nail & Beauty halo letters but just with the telno.

    Hope you like it.

    Macky


    Attachments:

    Dave Bruce replied 18 years, 3 months ago 4 Members · 14 Replies
  • 14 Replies
  • David McDonald

    Member
    January 10, 2006 at 9:45 am

    another shot


    Attachments:

  • David McDonald

    Member
    January 10, 2006 at 9:46 am


    Attachments:

  • David McDonald

    Member
    January 10, 2006 at 9:46 am


    Attachments:

  • Dave Bruce

    Member
    January 10, 2006 at 10:12 am

    WOW Macky that is some impressive LED Halo, which ones did you use to get such a glow? The oval sign sounds like a lot of fiddly work but with great end result.

    Love them, thanks for showing.

    Dave

  • David McDonald

    Member
    January 10, 2006 at 10:22 am

    Hi Dave

    Used Twisters from Applelec and for the edgelit spaced them about 50% closer than normal spacing and for the letters I spaced them for the next size up, ie. the largest letters are approx 10.5″ and I used the amount of LED’s recommended for a 12″ letter. Wanted to make sure the overall sign really stands out.

    Cheers
    Macky

  • Dave Bruce

    Member
    January 10, 2006 at 11:03 am

    Were they the super twisters or just ordinary ones?

    How big a space did you put between the board and the lettering?

    Sorry for the questions just learning for the next one I do, as my first did not work out brilliantly.

    Cheers

    Dave

  • David McDonald

    Member
    January 10, 2006 at 11:58 am

    Hi Dave

    They were the normal Twisters and on the edgelit oval they were about 2cm spaced and on the letter backs they were about 4-5cm spaced. I used their on-line layout tool as a general guide as to where to put each module.

    The actual letters were on normal medium sized plastic locators – think these are about 15mm?

    Having read other posts on the subject I used matt vinyl and dibond to reduce LED reflection points and to help diffuse the light.

    The other thing I did was get the moulded letters backed in clear acrylic rather than normal white. The letters look chrome from the front but inside they are white – backing in clear allows light to reflect off all the different angles on the inside of the letter to again spread out and diffuse the light.

    The backing board is about 15 degrees leaning forward from the vertical and from the pavement immediately below this again helps obscure the LED reflection points.

    I don’t think you can totally get away from the ‘spots’ but I’ve tried to obscure and minimise them on this sign and it has worked out really well.

    Macky

  • Dave Bruce

    Member
    January 10, 2006 at 12:05 pm

    Thanks Macky. I did consider painting the inside of my letters white to help with reflection, but left them stainless steel. They were mounted on a matt dark brown facia (against my advice), which is getting painted cream soon to improve the halo effect, just scared the effect is not improved enough. I wonder if the depth of the letters effect the halo, as your letters look quite slim, mine had 50mm returns.

    Thanks for the info

    Dave.com.com.com

  • David McDonald

    Member
    January 10, 2006 at 10:16 pm

    Hi Dave

    The text “THE” and SPA” are actually flat cuts with no returns at all, NAIL & BEAUTY have a moulded depth of about 1cm – albeit they are flat backed with clear acrylic. The Twisters are bonded using their sticky pads, the wires are then folded backwards and forwards to keep them flat on the letter backs and then the wires are held permanently with translucent exterior silicon. From ground level you can’t see any modules or wiring even though there are no letter returns. Wherever I have cut any modules from the roles then the exposed ends are weather proofed again with dabs of clear silicon.

    Macky

  • Robert Lambie

    Member
    January 10, 2006 at 11:44 pm

    a bit unusual that one mate… very nice work! 😉

  • David McDonald

    Member
    January 11, 2006 at 9:42 am

    Just taken a few shots in the daylight


    Attachments:

  • David McDonald

    Member
    January 11, 2006 at 9:43 am


    Attachments:

  • Lorraine Clinch

    Member
    January 11, 2006 at 9:52 am

    Excellent work Macky, extremely professional finish.

    Proves to me that I am right to leave work of this type well alone 😳 I wouldn’t know where to start even!

    BTW, even without the LED’s, the signs are FAB!

  • Dave Bruce

    Member
    January 11, 2006 at 1:52 pm

    Now the daylight picture is how my job looks at night (that level of halo) 🙁

    Just had the shop on the phone they want me to quote for replacing the facia with new material rather than the decorator painting the old one, might spray the inside white while Im at it.

    Cheers

    Dave.com.com.com

Log in to reply.