Activity Feed › Forums › Sign Making Discussions › Gallery › Jetski Graphics: Yamaha
-
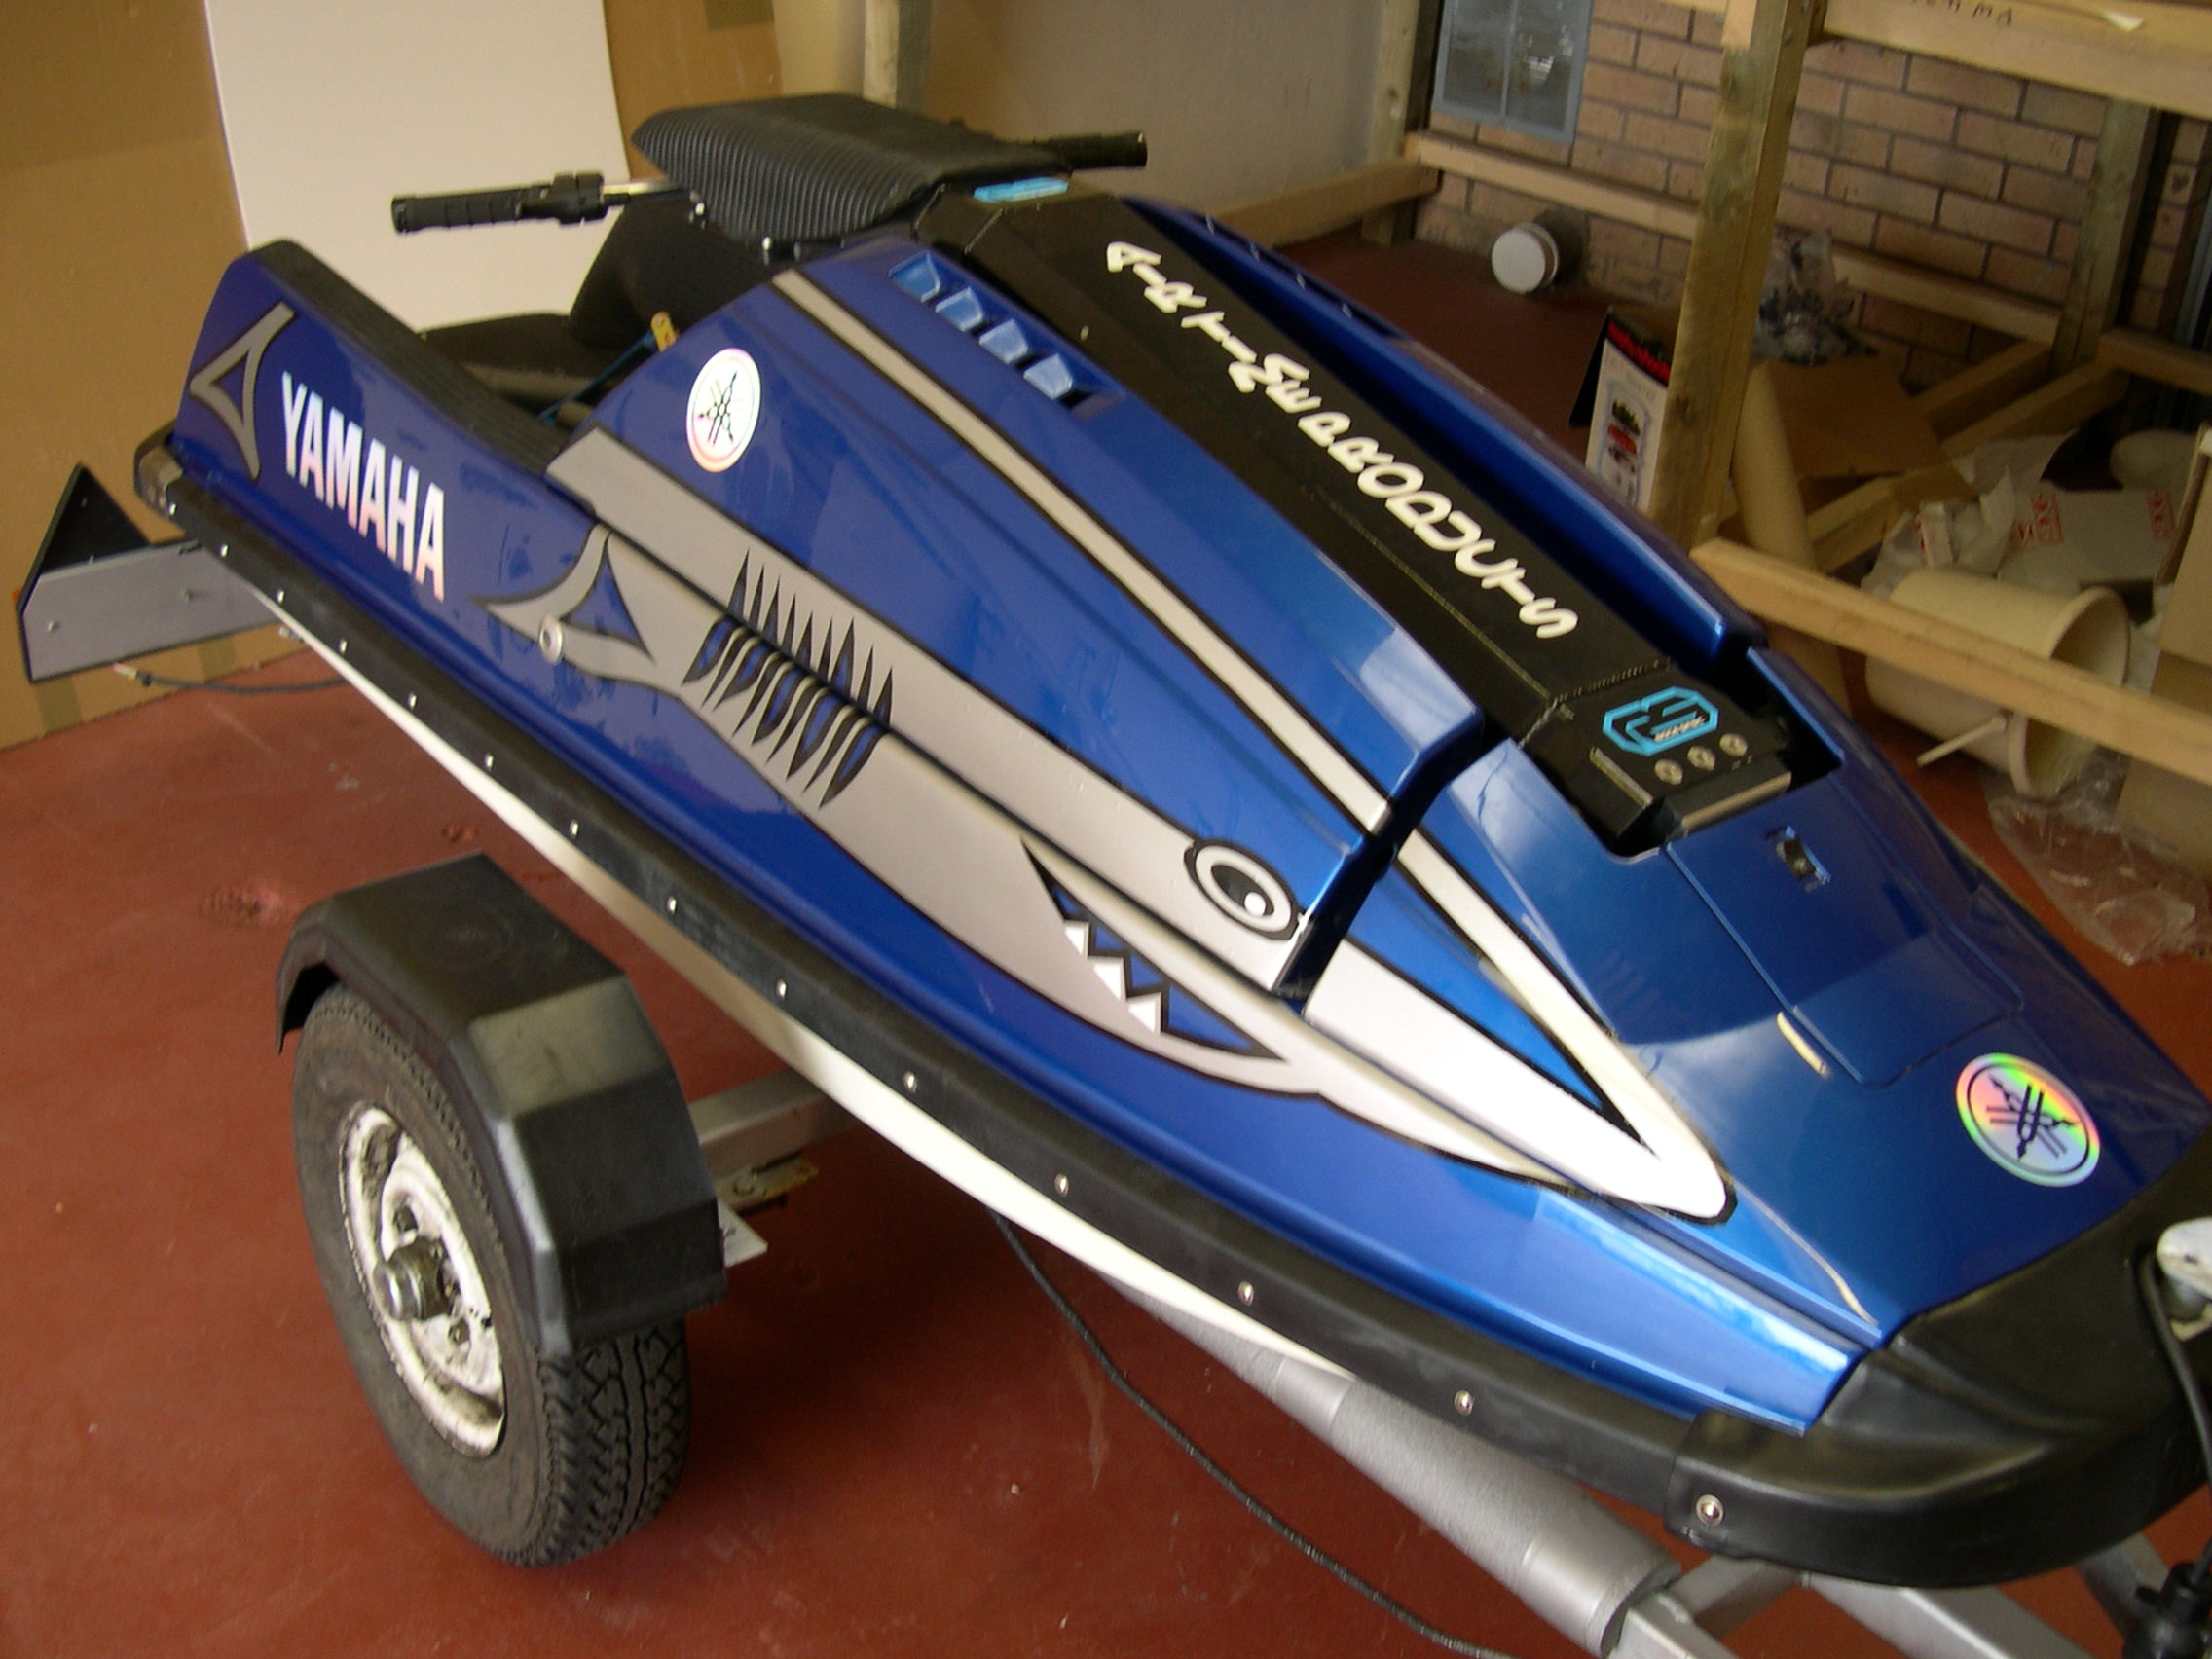
Jetski Graphics: Yamaha
Posted by Alex Crosbie on August 1, 2005 at 1:31 pmPersonally i hate the design but the client was chuffed to bits with it!
done in gloss black with metallic silver over-layed and holographic vinyl for the logos.
something a bit different to the transit vans and foamex signs though!
Attachments:
 Carrie Brown replied 18 years, 9 months ago 7 Members · 9 Replies
 -
9 Replies
-

looks good mate.
Hope you told him the holographic stuff has a short life in this environment tho.
If they are anything like my clients they’ll change the graphics every 6 months.
Cheers, and well done
Shane
-

yeah no worries on the holographic. i charged enough in to the original price that when i have to replace the holographic i’ll do it for free. gotta keep the customer happy 😉
-

really nice work. As you say a bit different from doing a transit!
-

I actually like that design.
It’s fun!
The colors look nice against the background too.
Love….Jill -

He should have the “Jaws” theme playing whenever they are on the water. 😀
Looks good.
-Marek -

Looks good, definitely a change from a van or shop sign …. nice to see something a bit different.
😀
-

Looks good, can I ask how you sized it up? did you take a photo or do a drawing?
Peter -
you want me to give away my secrets! im just good thats all! 😉
in all seriousness i did the design over a side-on photo in coreldraw, gave this to the customer as a proof, then just measured with a tape measure the rough size i wanted from top to bottom and end to end with a tape measure, then back to the computer to re-size it…… ended up having to squash it slightly from the design but not so as anyone would notice!
then cut the black and weeded it, cut the silver and weeded it, put application tape on the silver and lay it up on the black on the bench so that you have two layers of vinyl with application tape on top.
roughly cut around the design and take to jet ski. work out exactly where you want the design and tape it with masking tape in the middle from top to bottom.
peel back one half of the backing paper and cut off with scissors then apply from the middle outwards. do the same for the other side and bobs your uncle!
then the cutting and working in comes…. took me best part of a day to do from start to finish!
wow that was a lot of typing! my fingers hurt now… did all that make sense?!
-
quote alexc40:wow that was a lot of typing! my fingers hurt now… did all that make sense?!
Hmmmm Im not really sure ….. could you go over it all one more time???
:lol1: :lol1: Only joking!!
Log in to reply.
