Activity Feed › Forums › Sign Making Discussions › Graphic Design Help › How do I crop in signlab?
-
How do I crop in signlab?
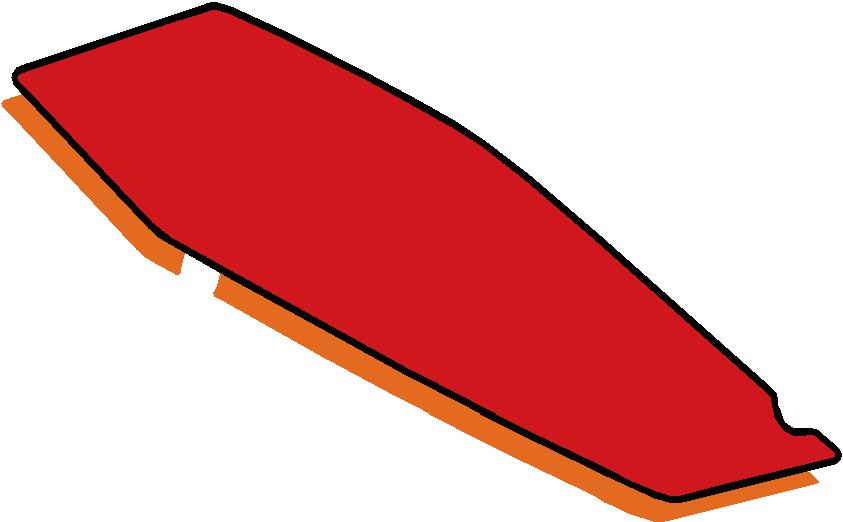
Posted by Scott.Evans on July 13, 2009 at 8:16 amHi Here I have 2 photos showing before and after.
Iam looking for the quickest posible way of getting to the "after" photo?
So I basically want to crop out the red and black bits from around the orange shape.
Iam using Sign lab 8.
I have posted here so that I could upload photos
Attachments:

 Scott.Evans replied 14 years, 9 months ago 4 Members · 7 Replies
 -
7 Replies
-

shortcut keys:-
Ctrl + b will move layers back.
Ctrl + f will move layers forward.
Ctrl + d will duplicate a layer.1, Create your red coffin shape first.
2, select coffin shape and click outline and apply a black outline.
3, select only the black outline and duplicate it and turn it orange.
4, select the orange shape and move that layer to back.5, at this point you should have picture one on your screen. (forget about the little notches out the layers at this point.)
here i would really need to show pictures and things to explain. but its pretty easy to do…
6, for easy talking sake, create ANY type of shape and make it white. make sure the white layer is at the front.
7, move the white shape/layer half over your other layers.
8, now select them all and click your weld icon in signlab. this is the blue and red icon about 6 down on toolbar. it will drop out 4 more welds. just select the first one and it will chop the layers up and disgard the white completely. job done…now with that in mind. using your pen/digitising tool just create those little notchies and even a strip of white for top and right of coffin. place them over the top of the layers and hit the weld icon. it will just keep chopping away the bits you dont want and disgarding them.
the whole procedure just took me about a few minutes in signlab 5, rev12 so you might find a quicker route. -

You could use the ginsu knife to trim the black and red together
Peter
-
the weld tool will do all layers, and all sections needing chopped in one go peter. or do you just mean as an alternative?
-

You could also mask the areas you wish to crop and paint this the same colour as the background (i.e white) then carry out a weld operation.
-

Thanks Rob
Mastered it now with you’re help 😀
I should of mentioned this is a motobike panel template, so i start with the orange layer.
When you said everything white chops away at colour when welded it sparked a thought.
So what i done.
As you see Pitcher 1
1, Click orange layer
2, Shift + Right Click on center nub of layer (brings up guide lines)
3, Duplicate orange layer and turn it green
4, Center green layer with guide lines
5, Make a rectangle a bit bigger than all the graphic and make it blue
6, Center the blue rectangle to the guide lines
7, Make the green layer white
8, Select the white layer and blue rectangle and then weld
9, Make the blue rectangle white and bring to front
10, Select all and weldDone
If anyone can show me a quicker way be glad to here
Attachments:

-
quote Robert Lambie:the weld tool will do all layers, and all sections needing chopped in one go peter. or do you just mean as an alternative?
I dont think you have the Ginsu knife in signlab 5 Rob
It is a handy tool when used in conjunction with welds,Peter
-
The Ginsu knife i very rarely use if never.
I will have to have a play with that tool to see where it will come in handy.
Log in to reply.
