Activity Feed › Forums › Sign Making Discussions › Traditional › hand painted signage: costumes for santa
-
hand painted signage: costumes for santa
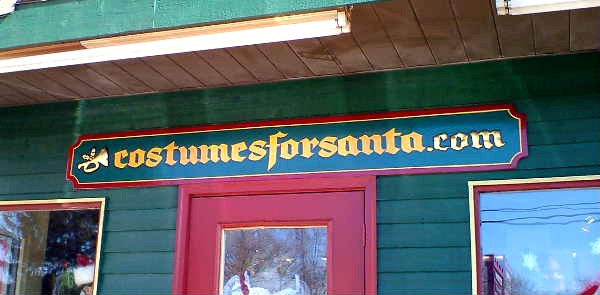
Posted by Jill Marie Welsh on November 19, 2005 at 8:46 pmHere is one I did this week.
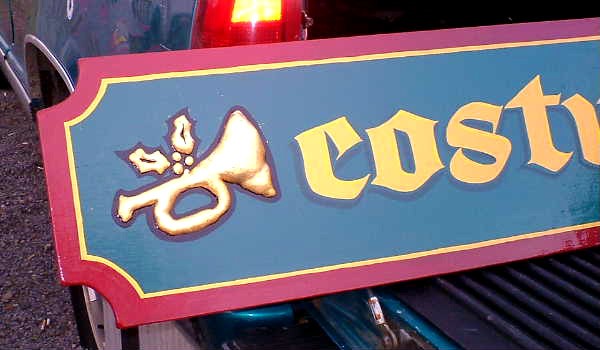
At a Letterhead meet I learned the technique of mixing Gorilla glue with a bit of water and applying it to a sign.
(You’re supposed to use a mask)
It puffs up and adds dimension.
The puffy parts on this one are gilded with 23kt gold.
The rest is all hand-painted.
The alphabet is Stratford by Arthur Vanson.
Love…..jill
Attachments:
 CHRISTIAN HARWELL replied 18 years, 6 months ago 14 Members · 21 Replies
 -
21 Replies
-

nice sign jill 😀 those colours always work together 😀
i always wondered what gorilla glue was for….i’ll have to find out more, one of the reasons im going to the meet in may 2006 😀
nik
-

Thats cool Jill.
Is the gorilla glue a bit like foam when it expands, or is it denser?
Peter
-

nice job jill. never heard of gorilla glue. looks interestng tho
-

Great work Jill. Love the font too. Pure Class.
Neil 😀
-

I’ve never heard of gorilla glue either! So much to learn….
Nice job Jill.
How do you get customers to pay up for real gold?
-

My 4 yr old does the same thing with snot.
D’ya think I could market it. It’s definately a green concept.
By the way. Nice sign. 😀
-
quote Simon Kay:My 4 yr old does the same thing with snot.
D’ya think I could market it. It’s definately a green concept.
By the way. Nice sign. 😀
😮 I’ll never look at your 4 year old the same again Simon 😛 I think you have been living in OZ too long mate, your developing our weird sense of humour, your aussie wife must be pleased 😕
-

great work jill, i really like that effect with the glue mixture & gold leaf.
does the glue go rock solid when mised like that?thanks for taking the time to post your work… 😉
i heard about gorrila glue back in 2002 from signcraft. just done a search for the post i made…
https://www.uksignboards.com/viewtopic.p … sc&start=0
-

Looks great Jill!!
What a neat technique to add some dimension to a sign.
Gotta love those Arthur Vanson alphabets.Stevo
-

Here is Gorilla Glues website http://www.gorillaglue.com/
Stuff is in every DYI and Craft store here.Jill great stuff as always. Love the color combo and the textured look of the gorilla glue. Can you give us more details on how to mix and apply the gorilla glue? Sounds like a demo in the making.
Bryan
-
Bryan, now you mention it I’ve seen it here to, but is that the same that jill has used, I would have thought that an expanding glue would force the two parts away, Im I missing something?
Peter -
I think that is the stuff. It does expand. The FAQ (#5) on the site says you have to clamp it in order to counter-act the expansion.
-
Bryan,
I missed that but found it quite humorous, ( try books rubber bands etc.)
Peter -

Would never have thought of using gorilla glue for that, but I guess it’s perfect for it…since it expands so much and gets that nice glossy type skin
Could you give us some details Jill
on how to mix it and apply pleaseSign looks great!
Leigh
-

Here is a how-to written by my friend Sal Cabrera (also appeared in SignCraft) who pioneered the technique:
quote :TEXTURE EFFECT WITH GORILLA GLUE1 So here is a very simple step by step.
This is what you’re going to need – Gorilla Glue, water, some wood sticks, sable or stiff brush,
paper towels, Xacto, sand paper, cups or anything similar, gold leaf, aluminum metal leaf,
variegated leaf, quick size.
Depends which you are going to use for gild, the reason I mention it is because you can gild
silver and variegated just as soon as the glue gets tacks without to use the size, but I will primed
the letters and use the side if I planing to gilding with Gold Leaf.2 Cut out on paint mask 5” letter or any size you would like, weed the inside of the letters and
with your Xacto cut around each letter, apply transfer tape to you paint mask and transfer your
design where you planning to have, after that take the transfer tape off and make sure th paint
mask if place it correctly.
I would like to mention that it will be a little difficult to keep the consistency of the mix for long
term. If you have big letters, So be prepared to mix the glue quite often.3 Since this letters are 5” tall I’ll begin with 1 ½ oz of Gorilla Glue and 6 to 8 drops of water,
mixing till gets the color of H.D.U foam, then drain the water that is left, applying the glue by
using sable or stiff brush. I apply the glue to the first letter, the glue is laid in the center as evenly
as possible and try not to brush over the mask in order to achieve good relief, it should be
applied in fairly thick layer depending on the texture you try to achieve.4 Do the same to the second letter and so on till you are finished, I go back and check the
first letter and make sure it is beginning to settle. A quill handles or with weeding tweezer being
used in a continual scrubbing motion to create little circular stokes, if the mix is not ready it’ll
flow out again, too late, and the texture will have shape edges and deep pits that will be
difficult to gild. After you have finished all the letters make sure the glue begins to expanding, if i
is so with a Xacto take the mask off the first letter gently and do the same with the rest of the letters.5 Let the design settle a couple of hours and go back and check if it is tacky, if you are planning
to gild with Aluminum Metal Leaf or Variegated Leaf you can do it right on while is tack without
to primer, But if you are going to use 23 Karat Gold I will recommend to prime. Since the Gold
is not thicker as Aluminum or Variegated Leaf you’ll need to primer the Glue. Then use your
quick size to gild, so you will get a rich color gold.If you ever get sharp edged trim any excess of glue when it is dry, I use 200 or 300 grid sand
paper and sand down over sharp edges. After you have sanded it done, dusted out then
primed, let it dry to the next day apply side mixing with 2 drops of imitation gold, test the tack of
gold size with a knuckle, if it is ready, the apply your gold leaf.I did not use a mask tho.
Love…..Jill -
gorilla glue is available in by mail order in lots of craft magazines
-
Much to my surprise I found a small bottle of Gorilla Glue in my local hardware shop. The salesman was singing it’s praises!
Needless to say I bought a bottle, haven’t tried it yet though.
-
Remember that even when using it as a glue (it is a great product)
to use SPARINGLY as it has a tendency to foam up.
If youn are using it with the added water for a dimensional look, really go sparingly till you know its properties.
On my project, I put on a layer that looked a lot like honey.
A half-hour later it had swelled to ½” thick in spots!
Love…..Jill -
HI THERE EVERYONE THIS IS MY FIRST POST. NICE SIGN JILL LOVED THE EFFECT OF THE GORILLA GLUE.IN CASE ANYONE NEEDED ANY GORILLA GLUE IS AVAILABLE AT RUTLANDS.CO.UK
-
Its also available at my local tool shop….
Welcome to the boards David,
Would be nice if you could tell us a bit about yourself, and your experiences with gorilla glue,
Peter
-
That’s a beauty of a sign Jill! Good job!!! :whasupp: Another newbie here with a first time post. I have used Gorilla glue & Elmers (Pro Bond) in the constuction trade for several years. Both products chase moisture & are very similar in end result. When using these glues for general application you should pre-moisten all porous objects & scuff or grind any smooth objects. The results are usually permanent & objects break before coming apart. When butting two objects, like hand rail or closet pole, I like to drill little holes @ an angle to receive more glue for extra hold. For best results, remove loose debris, secure or clamp objects well, clean excess glue with lite scraping & lite solvent wiping before completely dry. Things I’ve secured include various woods, plastics, metals, ceramic tiles, masonry blocks & concrete. I never thought of using it like that though, SWEET!
Log in to reply.
