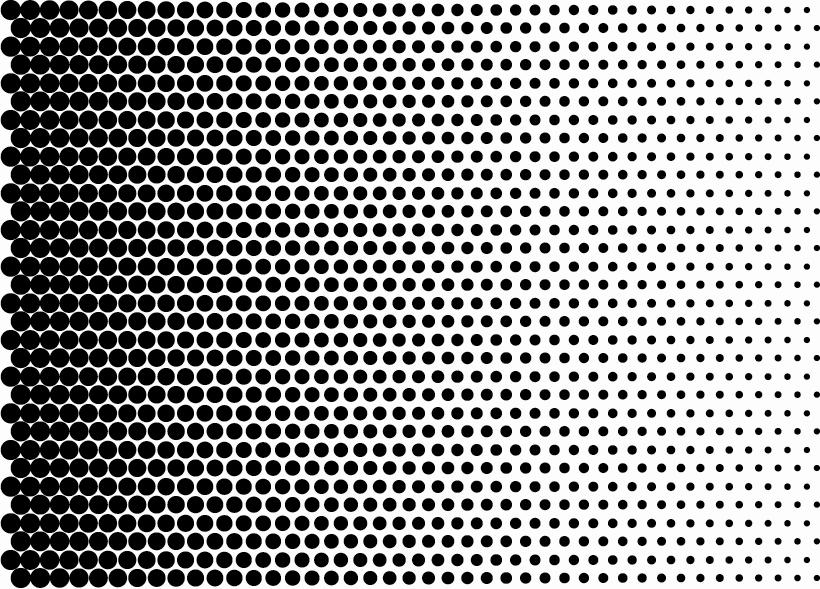
• fading dot design

    Posted by Neil Churchman on November 20, 2009 at 4:03 pm

    Hi everyone,

    got a bit of a rush job on – the customer wants a dot image stuck to a window to hide a stain, and the dots need to cover up most of the glass at the bottom and gradualy open up near the top, fading away.

    it seemed pretty straight forward when I sold him the idea, but now we’re trying to make up a vectored artwork of dots that fade out it’s proving to be harder to make the design than we thought

    the design is pretty flexable and so far we’ve tried starting off with 20mm dots and decreasing the size down to 6mm while opening up the gaps

    this works to a point but when the design is done it looks a bit too linier and doesn’t seem to flow enough

    were trying to cover an area of 1800mm x 1200mm if any one has an ideas please, as we need to cut this job on Monday !

    thanks

    Neil

    Jon Marshall replied 14 years, 5 months ago 10 Members · 13 Replies
  • 13 Replies
  • Warren Beard

    Member
    November 20, 2009 at 4:20 pm

    Hi Neil

    what about stripes starting thick and getting thinner

    or

    triangles starting wide at the bottom (even overlapping to make solid) and getting thinner at the top. you could even start getting more creative and add waved or patterns to it.

    just thoughts off the top of my head 😕

    cheers

    Warren

  • Neil Churchman

    Member
    November 20, 2009 at 4:41 pm

    Good ideas Warren, but it’s a modern office and the customers likes the idea of the fading out circles

  • Gary Jones

    Member
    November 20, 2009 at 4:51 pm

    We’ve done a fair amount of these. I can’t describe the process we use as I’m terrible at explaining things but the basic idea is to stagger a line of dots in between what you already have.

    For example, you start off with a 10mm dot and repeat it across over 2000mm where it gradually diminishes down to say 2mm so you have a single line of dots gradually getting smaller. Now repeat this line next to itself with say…no gap. Shuffle the entire new line across so the it’s a little infront of the other and simply repeat the 2 lines. I know I’m terrible at explaining this!

    I hope this attachment makes sense! 🙂
    [/img]


    Attachments:

  • Paul Humble

    Member
    November 20, 2009 at 5:19 pm

    Its a dot dither, I needed one before and the guys here helped me out.

  • Peter Normington

    Member
    November 20, 2009 at 8:15 pm

    i doubt if you can cut it and weed it efficiently
    but here it is anyway, you will need to repeat the dots, which are not really a true halftone.
    this really needs to be printed

    Peter


    Attachments:

  • Andrew Boyle

    Member
    November 20, 2009 at 8:46 pm

    Here’s one ….Cheers

    Just had a whole week of dots 😀


    Attachments:

  • Robert Lambie

    Member
    November 20, 2009 at 9:01 pm

    here is a tutorial on creating this sort of thing.

    https://www.uksignboards.com/viewtopic.php?t=17625

  • Andrew Boyle

    Member
    November 20, 2009 at 9:01 pm

    just read post properly…here you go…Cheers


    Attachments:

  • Alan Drury

    Member
    November 21, 2009 at 9:25 am

    This may not be suitable for this job but is a good way to get dots printed with a non postscript device

    In Corel draw a rectangle the size required and fountain fill.
    Select the ‘Device independent postscript file’ printer option.
    In the post script tab change your screen frequency to a low number
    Download Ghostscript if not already on system and install
    From Ghostscript open ps file and print

    Alan D

  • Neil Churchman

    Member
    November 21, 2009 at 9:37 am

    Just want to thank all you guys that put yourself out to help us, especially taking the time to make up the dot grid at the right size – cheers

    Also, just want to say that all the peeps who use this forum and contribute in a positive way, make it a great resource to us humble sign makers, and it’s good to know that there’s still some decent folks around in these troubled times.

    Hope I’ll be able to return the favour one day 🙂

  • Earl Smith

    Member
    November 21, 2009 at 10:01 am

    Try using the blend tool in Corel. Large circle at bottom, smallest at the top. Highlight both, click on blend tool and choose how many steps you want it to create. Enter, and you get a line of ever decreasing circles. Duplicate across the page to the width you want. Or stagger them as Peter as done.
    Earl.

  • Neil Churchman

    Member
    November 23, 2009 at 8:30 am

    Hi Earl,

    Took you advice and re-drew it in Corel and it looks perfect!

    Never ceases to amaze me how many features there are in Corel, just
    wish I had them time to play around and learn them all.

    thanks again for everyone’s help

    Neil
    😀

  • Jon Marshall

    Member
    November 23, 2009 at 11:06 am

    ot, do a search for ‘vector half tone pattern’ on google. There are lots of free vector sites out there now.

Log in to reply.