Activity Feed › Forums › Sign Making Discussions › Vinyl › Covering over graphics for 6 weeks- lorry trailer
-
Covering over graphics for 6 weeks- lorry trailer
Posted by Martyn Heath on May 6, 2024 at 1:39 pmHi guys, would appreciate any fast responses.
I have a customer that wants the graphics covered up for 6 weeks and obviously as cheap as possible.
Now i’m not sure what to do because i dont want to buy a roll of media (i know you can get “removable”)
and on one hand if i used i cheap wrap/air release material costs are high but its easy to remove. If i use a cheap monomeric material costs are cheap but removal could take much longer.
i only stock polymeric but how would this remove in 6 weeks?
I’m guessing grey back would be better.
thanks in advance, not something i have come across before.
 Martyn Heath replied 2 months, 2 weeks ago 2 Members · 3 Replies
 -
3 Replies
-

Hi Martyn
“Problem-solving” for a customer and “cheap”, should never really come together, mate.
If this is truly a six-week job, then you obviously want an easily removable film or a film that is not going to adhere to and damage the existing graphics that you are covering temporarily.
Keep in mind:
- Grey adhesive-backed vinyl will better block out the existing graphics.
- Do you laminate or paper application tape to help install it.
- Do you print onto it first or apply vinyl graphics on top.
- White vinyl is not a match to any vehicle, particularly a GRP truck side. so the areas you cover will be seen as large “whiter” panels.
Personally, I would push towards Option One and charge accordingly.
1, Check with your supplier, and see if they offer this in “part-rolls”.
Depending on the type of material and the supplier, you may be able to buy it in 15m – 25m and 50m rolls. varies though, if at all.OPTION TWO: this is just an Idea you might consider…
2, Around 2010, Oracal was testing an application liquid that sped up the installation of short-term wraps. I was given some to try and although I never needed it other than for a temporary glass shopfront window job I did, Oracal did begin promoting and selling it for a period. The trouble I have here, is that I cannot remember the name of it and I looked on their site and cannot locate it, so perhaps it is no longer available.
However, what I know was, that it was originally launched by KODAK for mounting photographs or protecting them with a laminate or something like that, I’m not 100%, but the principle of it was simple…
you spray the liquid onto a cloth or paper towel. and rubbed it over the surface area that you “did not” want the film to stick to. everywhere the liquid had NOT been applied to, would adhere the vinyl adhesive.Hope this makes sense, so far! 🤓
the liquid from the application fluid was almost like a very weak diluted liquid soap when being applied. Once dried, it had a VERY SLIGHT greasy residue. you could not feel it on the surface, as such, but you could see your finger mark if you swiped your finger across it. I would say it was very close to Mr Sheen’s furniture polish, which is where I am taking you, next…
The purpose of the fluid is to reduce the vinyl from adhering to specific areas of a vehicle wrap.
EXAMPLE:
If you wrap the bonnet of a car and it’s totally flat. you would wipe the entire bonnet with the liquid on a cloth but do not touch 100mm all around the perimeter of the bonnet.
when you apply the wrap to the bonnet, you apply all the middle areas of the bonnet working out to the edges. once the vinyl has been applied to the edges, it will bond to the 100mm area all around the perimeter, sealing the wrap until removed.
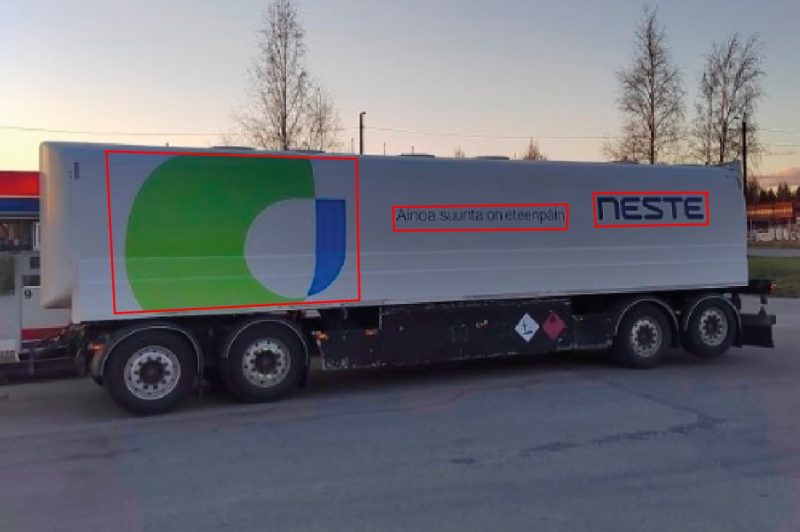
when the wrap is removed, the 100mm will remove like normal wrap vinyl would, but all the areas with the dry application fluid, will peel away in one go with very little adhesion at all.I’ve attached an image, indicating areas you will probably cover with white vinyl.
You would wipe the existing graphics only, with the liquid on a cloth. nowhere else. this will prevent the vinyl from bonding to the existing graphics on the truck.
All other areas of the white panels will be sticking to the vehicle as normal.
Remember, there must be a 360-degree area around the graphic for the vinyl to bond onto and seal the graphic from any contaminants from getting in behind the vinyl.you might have some Mr sheen in a cupboard at home, or buy some, it’s only £2. give it a try on some vinyl on a composite panel and see how you get it. it is possibly a cheap solution for you.
Once you apply it, make sure to leave it for 10-15 minutes to properly dry and form a coating on the surface.What I will add…
if you are applying graphics on top of the white. be sure to remove the application tape flat on the surface and do not yank at it. the last thing you want is to pull the white away from the surface where the graphics have been coated underneath.
-
Looking at the truck side. you will definitely need the white vinyl panel to go onto the frame of the truck top and bottom by a minimum of an inch or more to seal it. ide apply some heat along those areas to promote a proper bond.
-

Thanks for the informative post Rob, some great options there. The mr sheen method is an interesting one.
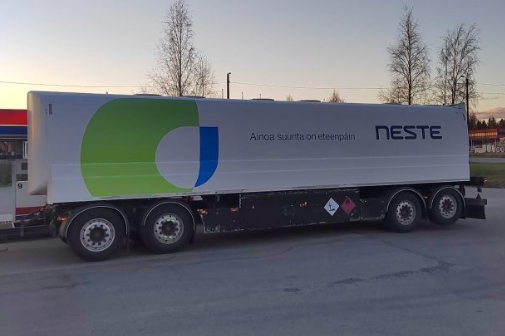
Its purely a cover up with white, no graphics on it.
The customer phoned and sent through pics yesterday afternoon around 14.00. i put my thinking cap on and would get back to him this morning with a price and a plan to fit in coming days.
8 o’clock last night he sent a message that he has found someone to do the job tomorrow!
Maybe i’m getting slow in my old age 😂.
Thanks again for the reply.

Log in to reply.