Easily build your own vinyl racks

Vinyl Racks! What more can I say.. A necessity for any workshop to keep organised & a safe place to store expensive vinyl.
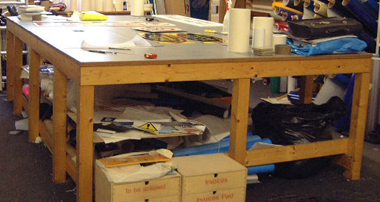
Below you will see one wall of my vinyl production room. Floor-to-ceiling wall racks holding 48-inch wide rolls. Each rack will hold about 18-19 rolls of vinyl.
The racks shown were very inexpensive to make & have been up in place for over five years now.
Never any problems…
The rack I am about to show you how to make is made from MDF.
(Please use eyes & breathing protection if using this material as opposed to wood)
Materials needed are as follows:
1 sheet of 8’x4′ MDF or Plywood minimum of half an inch thick.
The sheet of MDF I am using costs about £9 from good timber merchants
Or B&Q warehouse
6 pack of roof Tile batons. 1.5 inch x .75 inch x 16 feet long.
Approx £6-7 a pack from good timber merchants
Wall Racks for vinyl rolls
The picture below shows the materials and the necessary equipment.
(A) = Shows 1 tile baton. Tile batons come in 16-foot lengths. The tile batons will become your pegs/rungs of your rack to hang the vinyl rolls on.
(B) = Shows the 8’x4’ sheet of MDF. You can see I have already started to cut this into lengths. The lengths will be 8’long x 6 inches wide.
(C) = Jigsaw for cutting the MDF
(D) = Cordless drill. “If you do not have a cordless a handheld one will do equally as good.
(E) = Screws, Im using 1.25-inch screws
(F) = Tape measure or steel rule, using both is handy.
(G) = Set-square
(H) = Pen/pencil

Marking out the wood.
Below shows you the bottom of one length of MDF. The piece measures 6 inch wide by 8 foot long.
Picture 1 “Marking out”
1st come in from one side of the length 3 inches and draw A pencil line right up the centre, as shown.
2nd as shown in picture “a” below using a rule or tape. From the bottom come up 3 inches make a mark next to the line you have drawn up the middle. Then come up 4.5 inches & make a mark.
3rd as shown in picture “b” below, using the rule or tape.. From the bottom come up 4 inches then 5.5 inches.
4th using your rule, connect these marks at an angle as shown… fill the area between as these are the areas you will cut away.

Picture 2 “marking out”
Below resembles the above pictures and directions. They should do, as you are doing the exact same thing but this time you will use the last marks up from the bottom as you start marks. As shown…
(It is always best to scribble in the measured area to indicate were the cutout will be)

Picture 3 “marking out”
As you can see from the picture below. Once continued all the way along. Your length of MDF should look like this. Ready to be cut.

The next group of pictures show the way I cut the MDF to form the grooves/shelf’s for the pegs/rungs to sit onto.
As you can see in pic A, I simply doubled up 2 lengths, clamped in two places & proceeded to cut.
(Clamps are not necessary.. I have really only used them to speed up the cutting time.)
Picture B & C
This picture shows a single groove/shelf cut from the MDF.
You can see from pic B that I have not cut to straight lines, but to cut the lower line straight. When cutting the next, I get 2/3rds the way down and I start to turn towards the corner of the first cut. This is easily done & doesn’t need a marked guideline. I have just done it by eye.

Next shown are the support straps & corner strengtheners.
They are very easily cut.
Triangle corner pieces.
1st using scrap wood or a part of one of you lengths of MDF.
Measure in 8 inches and draw a line across. Then repeat.
2nd from corner to corner draw a line diagonal.
3rd using your jigsaw, cut the triangle shapes as shown.

Support straps.
Using one of your lengths of MDF cut 3 pieces at 26 inches, as shown below.
After “all” the cutting you should be left with the pieces shown in the picture below.
A = Sides
B = Bottom, Middle, Straps.
C = Corner pieces

Before assembling the frame I would strongly suggest you drill 3mm pilot holes were you would put your screws. This will prevent the wood/MDF splitting.
Using the cordless drill and 1.25 inch screws I start to assemble the rack…
If you can get hold of someone for a few moments at this point it would be handy.
Getting the first few screws in place can be tricky if done alone.

Once the rack has its 4 sides joined & the middle brace.
I flip it onto its face and fix the corner brackets to it.
These brackets are going to be were you will drill & attached the structure to the wall.
With this in mind I have drilled 2 5mm holes even spaced for this purpose.
See image below.
The rack that I have shown being built here is only 4 foot high. If you decide to make it full length, 8 foot high. it maybe an idea to put a few more triangles joining to the middle support/braces.

Below you can see the completed vinyl rack viewed from the rear.

Same rack, different angle.

Last of all we have the complete rack, complete with pegs/ rungs.
All it really needs now is a coat of paint!

So there you have it..
The rack demonstrated is obviously only 4 foot high. I choose to make it this size simply to help speed up the demo.
From the materials used in this demo you could probably get 3no. 8-foot complete racks for 24-inch wide rolls. These racks could hold 54-60 rolls of vinyl, depending on how you decide to space. if you dont hold allot of full rolls of vinyl you can afford the spaces to be closer.
Using the materials & method I have in this demo I would estimate you being under £20 & a couple of hours labour all in..
not a bad investment, i would say..
Robert Lambie