Creating a Vehicle Wrap Artwork Visual

Ok, So you’ve got this brilliant concept in mind for a vehicle wrap?
You want to cover the vehicle in a pattern or photograph and can visualise the end result. But how do you go about producing a visual?
In this example, I will be using Corel Draw to demonstrate how the use of layers and masks can be used to set out your vision. Although in this example the software used is Corel – the principles used are the same as in other vector drawing packages such as Signlab.
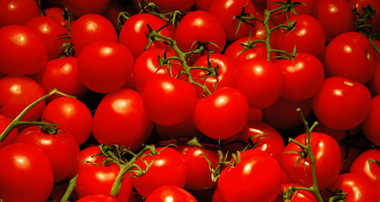
Beginning with a vehicle outline and the photo you wish to wrap the vehicle with:-

First select the photo and place it on top of the vehicle as shown:-

Now, with the photo still selected arrange the two layers (van and photo) so that the photo is positioned behind the van:-

Here you can see the effect of the “layers”. The bottom layer (the photo) is now sitting behind the vehicle outline. And is now partially obscured by the vehicle itself.

Now we must alter the colour of the van from “red” to “Clear” so that the photographic image can be seen on the vehicle’s bodywork.
We do this by first selecting the vehicle contour that represents the colour of the bodywork.

(At this stage we must make a copy of this contour and move it away as shown – this will be used later)


Now go back and select the contour representing the “red” van body as before.
Next click on the “clear” colour in the colour palette (this is the white box with the cross (X) through it)
The result of “painting” the bodywork from “red” to “clear” is shown next.

The next step is to obscure the parts of the photo that run off the bodywork and therefore should not be seen.
We do this by creating a “mask” to place in the foreground (Top layer).
First the duplicated contour created earlier is placed in a box as shown.

The two shapes are now “combined” by first selecting both objects and then “combining” them as shown.

Once “Combined” the shape of the van inside the box appears as a “hole” in the box allowing us to see through. This is the mask we will use to cover up the parts of the photo we do not wish to be seen. (Note we have not simply painted the van shape white – the van shape is now effectively a hole in the black rectangle).

Note that because this mask is the latest object to be created it will automatically be the top layer on our desktop. If this is not the case, the mask must be brought to
the front by arranging it to the front.

Next, the mask is placed on top of the photo and vehicle outline.
(The mask now covers up everything apart from the section of the van corresponding to the “hole” in the mask)

Some parts of the van are now no longer visible (e.g. the wheels and the Arial). This is because the vehicle outline
is now sandwiched between the photograph (at the back) and the mask (at the front).
To make the missing sections appear visible, the vehicle outline must be brought in front of the mask.
We do this by selecting the vehicle itself (without selecting the photo at the back – or the mask at the front).
The vehicle is now moved to the front (this process is more easily seen using a wireframe view to show the objects selected).

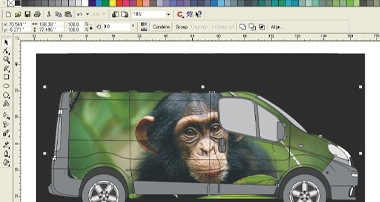
With the van now brought to the front you can see we are nearly there now:-

Now select the mask again:-

And to make the mask appear “invisible” , simply paint it white. The effect is as shown:-

To complete the layout add on the usual logos and contact information required.
Recap
Essentially the final image is made up from three distinct layers as follows:-
By placing one layer on top of another, and by masking excess information (the parts of the photograph that would be trimmed away when the print was applied to the van) the final visual is built up