Creating a free-standing sign with a concrete base

Free standing sign with concrete base: by Robert Lambie
This next demo is more a quick fire problem solver/idea that may come in handy for some folk at some point. Not for necessarily making the same sign, but the concept used in your own way to create your own free standing sign.
In this case, we had just completed a huge concrete plants new depot with various signage. As you can imagine these days, health and safety is paramount & companies of this size are hit hard by every rule in the book.
On completing the depots signage we had a call the next day… apparently they had to have a temporary car park sign erected in time for:
A, the last health and safety inspection due in 2 days
B, the opening of the plant by some important local a few days after. Were directors from down south were coming to attend.
Straight forward enough, you would think… but the obvious way to erect a free standing sign is to dig a hole and concrete into place. Not possible… as i said this sign would have to temporary, but temporary with a twist in it… the sign would be moved back and forward every few months between two car parks. even if we could put a permanent one up, there was several feet of reinforced concrete and stone below loose chips reinforcing the ground for the huge concrete trucks coming in and out the plant continually. So that was out the question…
What i came up with was the quickest way i could come up with, with the materials available in house, while making sure there was no come back on how it had mean made.
Ill get on with it shall i?
I decided this sign should be made a bit like one of those forecourt signs you see in a petrol station. Normally with a round base and a steel frame, then the sign fitted to it.
I did not have time to create an attractive base nor did i actually want to use a custom made frame. I wanted to keep to the spec given with the exception of how the sign was kept standing. I also had to keep in mind the location. This concrete plant was situated in the middle of nowhere and subjected to high winds… my base had to be strong and heavy.
Picture 1
In picture one you will see i have went about creating a box from ¾ inch ply.
I have lined this box with some cheap 1mm metal i had lying around to prevent my mix from sticking to the walls of the box. Since doing that i was informed this wouldn’t be need as i was applying a liquid to the box to strop this from happening anyway.

Picture 2
In the picture to it shows you how I cut my poles to the required size.
In this case, I used 2-inch diameter, plastic-coated steel road sign poles.
I have also used a heavy-duty steel chopping saw, fitted with a stihl saw type blade.
Alternatively, a hand-held grinder with a cutting blade or a good hack saw may do the trick.

Picture 3 & 4
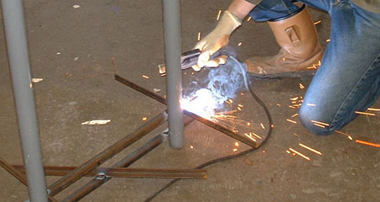
In this picture you see how i have went about tying the poles together using a frame type construction.
I did this using ¾” x ¾” steel, tacked together using some welds.
Before welding these L-shaped bars to the poles i first buffed off the plastic on the poles where necessary, then attached. I suppose you may get away without first creating this type of frame, but i wanted to reinforce the concrete because the sign will be getting moved occasionally. When doing this i suspect the sign to be getting rocked & banged back and forward into place, which could/can split the concrete.
I think if you decided not to use any sort of method in welding the poles together a wooden jig of some sort would have to be created to hole the poles square until the concrete dried.


Picture 5
In this picture you see the completed mix of cement, sand and stone chips on top of my mixing board. From here we proceeded to mix with water. I went for a wet mix but not too wet… too dry and the mix won’t settle filling any pockets as you back fill the box. Too wet and its going to take for ever to dry out & i only had till the next morning to have this complete.

Pictures 6 & 7
In these pictures you see how we applied the patination oil to the box. This oil will prevent the concrete from sticking to the sides & base of the box once dried. As i said earlier, i was informed the thin metal sheet i used to line the box wasn’t necessary. If it was applied directly to the would it should work equally as well.
I picked the patination oil up from the local builder’s yard 5 minutes from me.


Picture 8
This picture shows the box after it has been filled with the mix.
When filling the box, don’t just shovel it in any old way. Try aiming into the corners and around the poles to prevent pockets forming in the concrete. Pockets will only weaken areas. Once filled i took a small off cut of the wood, sat it on the cement and pressed my foot onto it to help mould the cement around the frame and poles.

Picture 9
As you may have noticed in picture 7, i never filled the box right up. I did this on purpose to allow for a smoother mix to be made up of cement, sand and water. I then topped the box up with the mix to the top & smoothed over it with a trowel.

Picture 10 & 11
The moment of truth… the next morning the concrete was completely dry, so we proceeded to remove the sides of the box bit by bit.
If you notice, i have screwed the box together rather than using nails. Nails can be used but breaking the sides off the mould may damage the mould, or, if the mould hasn’t completely set yet, you will have problems getting the sides back into place properly.


Picture 12 & 13
With the mould complete, all that is left to do is brush it down and give it a quick lick of masonry paint. Masonry paint dries pretty quickly so it was ready within the hour.
Once on site and into position a second coat of paint can be added if really necessary.


Picture 14 & 15
Here you see the sign in position with the sign fitted to the poles using sign channel and pole clips.


Picture 16
Job done, 24hrs hours from getting the call we had the sign made and in position in plenty time for the health and safety inspection.
The sign itself is shown incomplete. By that i mean the information was only temp for the inspections. It was later altered and company branding put in place.

Well i hope this demo may come in handy for some of you, or maybe even give a little inspiration at trying something new? Who knows…
Please note:
This pictures used in this demo are for illustration purposes only – always wear health and safety equipment and follow the necessary procedures.