How to create your own workbench
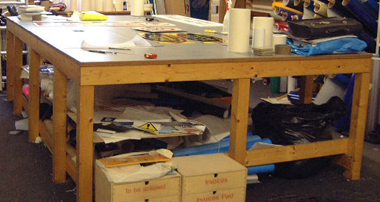

My workbench was designed for me by my late Father back in 1996 when I first set up my business. It measures 10ft x 6ft made from wood and mdf and is fitted with a grey 3mm plastic worktop made from grey Forex.
The design is deliberately simple (it had to be for me to be able to construct it) yet is very robust and cheap to make. (I regularly stand on it without any problems). The bench is now more than twelve years old and has served me well. I expect it to go on serving me for many more years without any problems.
What follows is my updated version of the same design:-
This would measure 8ft x 5ft (2440mm x 1540mm) which is a reasonable size. The design can easily be adapted to produce a workbench (or series of workbenches) of literally any size you choose.
Materials Required (per bench – measuring 8ft x 5ft)
Planed Timber
4 lengths of 2440mm x 16mm x 94mm
6 lengths of 1540mm x 16mm x 94mm timber
10 lengths of 800mm x 70mm x 70mm timber
MDF
1 sheet 2440mm x 1220mm x18mm mdf
1 sheet 2440mm x 320mm x 18mm mdf
Worksurface
1 sheet 2440mm x 1220mm x 3mm Grey pvc (e.g. Forex)
1 sheet 2440mm x 320mm x 3mm Grey pvc (e.g. Forex)
(The reason for specifying grey Forex is that the coloured Forex is tougher and more durable than ordinary whiteboard – it also looks better and is less likely to show up marks than whiteboard)
Step 1
The first job is to cut the 10 legs that will support the bench.. These are made from good quality planed timber each measuring 800mm x 70mm x 70mm. This size provides a very strong support and will result in a bench height that is ideal for someone of average height. (the resultant height off the ground of the completed bench will be 821mm).
Each leg must have “steps” cut into the top as shown in the diagram. (These “steps” are to support the perimeter rails). You will need six legs of one type (regular legs) and four of the other type (these fit at the four corners of the bench).
(Diagram showing the six regular and four corner legs that will support the workbench)
(Close up showing the “steps” that must be cut into the top of each leg)
Step 2
Take two corner legs, and one regular leg and attach these to a perimeter rail as shown. The perimeter rail is made from a length of planed timber measuring 1540mm x 94mm x 16mm. Each leg is screwed to the perimeter rails using two woodscrews (one at the top left, and one at the bottom right of each ”step”). Drill a pilot hole for each screw before inserting to prevent the wood from splitting. Also remember to counter sink each hole so that the top of the screw is level with the wood surface
once it has been fitted
Step 3
Repeat step 2 to produce the opposite end to the work bench as shown above.
Step 4
Now join the two opposite ends of the work bench by linking these together with two more perimeter rails this time measuring 2440mm x 94mm x 16mm. Then attach a further four (two on each side) regular legs one third and two thirds along the length of the perimeter rail as shown in the diagram above.
Step 5
Now attach lower rails along the two sides as shown. These measure 2440mm x 94mm x 16mm (i.e. same size as perimeter rails). They are screwed onto the inside of each leg approximately 4 to 6 inches up from ground level.
Step 6
Next attach lower rails measuring 1540mm x 94mm x 16mm running the width of the bench. These rails sit above the lower rails previously fitted as shown in the diagram above.
Step 7
To provide internal support to the work surface, attach two top rails running the length of the bench in the positions shown above.
Step 8
The bench is completed by placing the 18mm MDF on top of the workbenches frame. The flat mdf panels are held in place by woodscrews fastened along the perimeter of the bench.
At this stage the bench can be varnished (allow at least two coats – rubbing down between each coat). Then finally attach the top PVC grey top work surface (again using woodscrews along the perimeter of the bench).


.