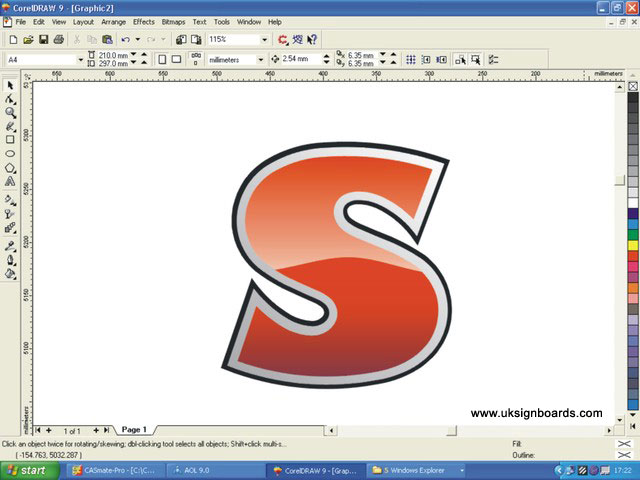
Creating Glass effect blends on text.


Step 1
Starting with a basic shape such as the letter “S” as shown here

Step 2
From this basic shape, create first an outline (middle image) and then an outline of the outline (left-hand image). The original shape then needs to be edited to produce two halves (top and bottom) of the original shape – this is shown on the right-hand side.
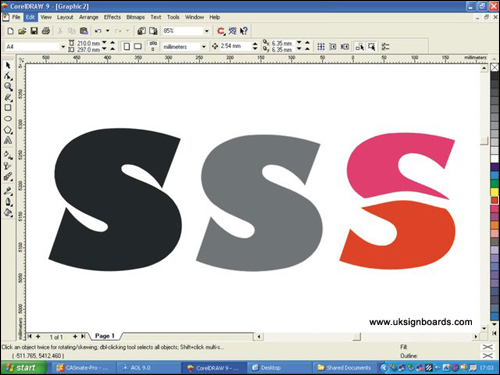
The same shapes shown are coloured in
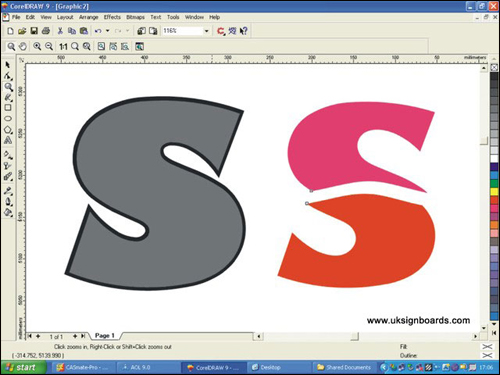
Step 3
Place the grey shape on top of the black
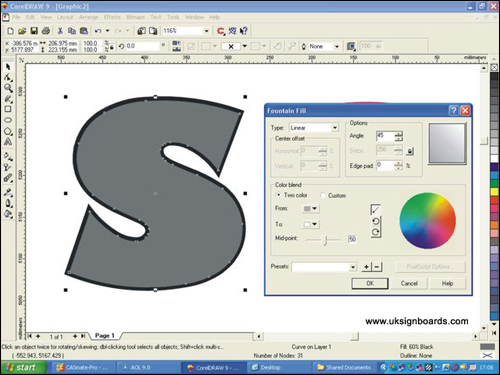
Step 4
Now give the grey shape a graduated fade from lower left (grey) to top right (white). First, select the shape as shown and enter the parameters as shown on the right-hand box (this is how it’s done in Corel – other software will have different methods for inserting the graduated fill
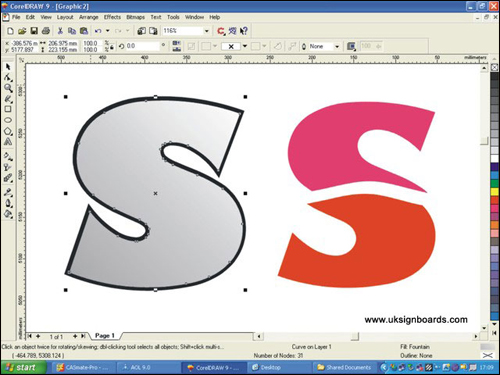
This shows the effect of inserting this fill
Step 5
Now place the upper and lower shapes of the “S” on top as shown
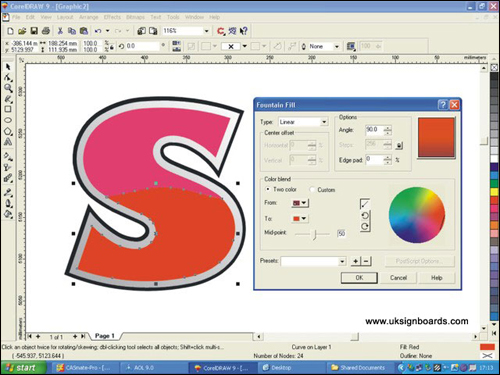
Step 6
Select the lower portion of the “S” and give this a graduated fill from dark red at the bottom to medium bright red at the top
The result should look like this
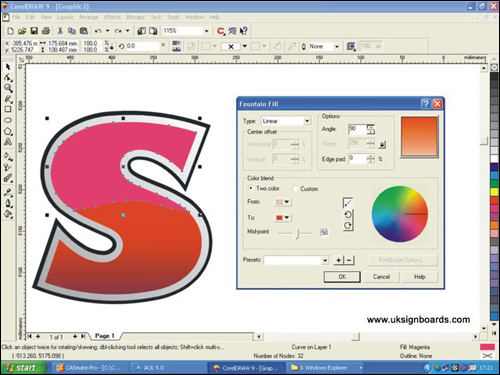
Step 7
Finally – select the upper portion of the letter “S” and give this a graduated fill from pink at the bottom to bright red at the top as shown


The final result will look like this
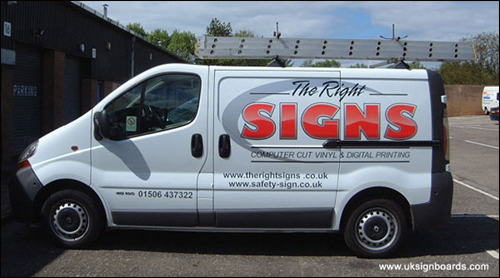
Lettering incorporated into our vehicle livery.