Working with (WMF) Windows Meta Files

Hi Gray…
With regards to the seaplane graphic and your email to me earlier about the fastest way to re-create it in cut vinyl – here goes…
Here’s the file of the seaplane in question:

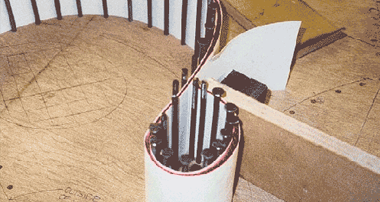
The trouble with *.WMF (Windows MetaFiles) and some other vector images is that they may contain a great many unconnected ‘hair’ lines and blocks of colour that simply don’t ‘belong’ to each other. If you try to separate these to send to the ‘cutter’ then you end up with a mess of lines and blocks of colour that can’t be recreated in cut vinyl. When ‘blown apart’ this is what they look like:

First, grab everything and change the ‘fill’ to white and the ‘line’ colour to black. Make sure you give the line an actual thickness rather than just ‘hairline’ – I used about 3mm

Weld the whole lot to create a single welded item (shown below on wireframe mode)

Then, ‘break the path’ of the entire thing – if you still have ‘White’ selected on the palette then you won’t see much until you select another colour – I chose black. Next, with everything still selected, give a dark grey ‘line’ to everything so you can see all the various pieces (you may have to increase the brightness or contrast on your monitor to see this on the images below).

Select those pieces that should be daylight (shown in pink – below left)) together with the actual large black outline of the entire plane and ‘connect the path’ of these items so they become one solid plane with the daylight pieces ‘cut-out’ (below right)
[Click image for bigger picture]
Slowly grab pieces that share a common colour and – colour them accordingly…first the two reds (below left), then the white pieces (below right)…
[Click image for bigger picture]
…then the dark grey (below left) and the mid grey (below right – struts to the skies, prop parts etc.)
[Click image for bigger picture]
…and finally the light grey for the body and wings (below left) and the blue windows (below right). At this point, correct any anomalies such as those pieces which remain in black – these can be removed, along with anything too small to cut. If you look closely, the image on the right looks cleaner than the one on the left – that’s because the dark grey ‘line’ has been removed from around all the pieces now that we’ve identified them by colour…
[Click image for bigger picture]
All that remains is to add some registration marks…

…and separate the colours ready to cut – each with at least two of the registration marks to enable a precise reconstruction on the sign…

The time taken to do all this (with practice) is less than 10 minutes…it’s a very quick way to prepare such a graphic and is particularly good for Corel and *.WFN type images…
hope that helps
P.S. I’ve just realised that on my version the door at the side has a Red top half as opposed to just a red band passing through it – you could change this by splicing the Red upper door in half with a weld line to create two parts and then re-colour the very upper part light Grey as it should be…oops!