Working with blend transitions in Corel.

Hi folks!
Here’s just a quick little Corel demo for you on how to use the blend tool. Bart Van Wassenhove had asked about how I achieved an effect for a graphic on Cheryl’s car graphics thread. Thought I would share with you how this is quite easily done.
Basic Blending Steps
Fig.1
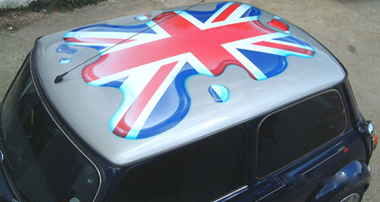
This is the graphic that was used for Cheryl’s car. I wanted to have some graphics that depicted some movement and made it looked like it was moving just sitting there. I placed it near the front of the car and filled it with white. Now I duplicated another on the same axis and uniformly reduced the size a little bit at the rear of the car. I filled it with a mixed red that is just a tad lighter than the car.

Fig. 2
All you have to do here is select them both, and click on Effects. then Blend and you’ll get a side menu. From here you can type in how many steps you would like. In this case, I choose 11. It will then blend the colour and size. Pretty easy! You’ll have to play around with how many steps you would like. There are also some options for the acceleration for the colour and spacing. This will give you more control on how you’d like it to look. I’ve mainly just played around with these options to get it to where I want it, but here the default setting worked for me. These will be grouped so to ungroup and separate these, you will have to go to Arrange> Break Blend Group Apart> back to Arrange> Ungroup. From there you can duplicate all of them and then weld them together for a cutline for digital output.

___________________________________________________________
Blending Trick for a Reflection
Here’s a trick I recently discovered. I was working on a pictorial for a sign and had to have a reflection in the water to have some realism to it. Instead of duplicating the object and assigning all the elements in it a lighter colour or using the transparency tool. I used the blend tool using the same procedure.
Fig.1
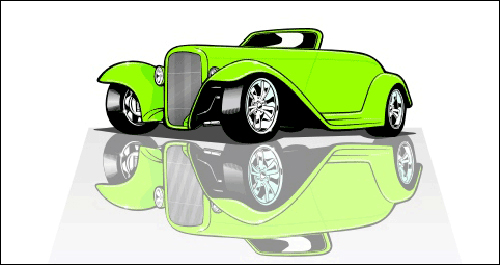
Here I’m using one of my illustrated hot rods. I used the same steps here as above. This time the graphic must be Grouped. I then duplicated it, but left it the same size and on the same axis. I filled it with white, I have a black outline on it so you can see it.

Fig. 2.
I’ve added my blends to it and have 6 steps. Adding more steps will have a more gradual colour change. I then went to Arrange>Break Blend Group Apart>then back up to Arrange>Ungroup. Another quick tip here DO NOT click on UNGROUP ALL. This will ungroup everything and you’ll be left to try and select every little element in the graphic. Learned that the hard way! CTRL Z is always your friend!! I then picked the one lighter-coloured car I liked out of the group, flipped it upside down and placed it underneath the car. I did a bit of fudging here and there to match it up better.
For other reflections, say for water. I’d fill in the last graphic with a shade of the water colour.


Of course, these techniques would only really be ideal for digital printing. I was using Corel Draw11 for this and some of the menus might be a bit different in older versions.
Happy Blending!!
Stevo


