Working with 3M Diamond Grade Chapter 8 Reflective vehicle graphics.

Some tips for working with Diamond grade Reflective:
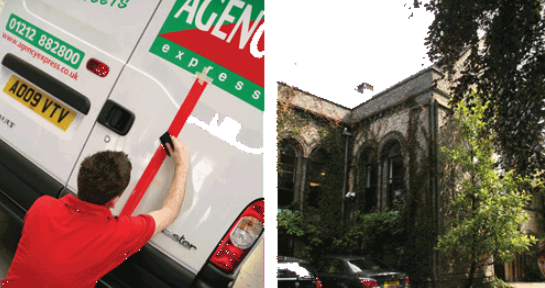
It is now law that road service vehicles should be branded with 3M Diamond Grade reflective films. This Micro-prismatic state-of-the-art sheeting for traffic control and guidance signs, Is highly reflective, durable, and visible at wide observation angles which gives it, its edge over others and makes it the industry standard.
Some may be wondering what the hell it is. well, I am sure every one of us sees it day to day on road signs, emergency vehicles, the rear of trucks etc, but have you ever had a customer request it?
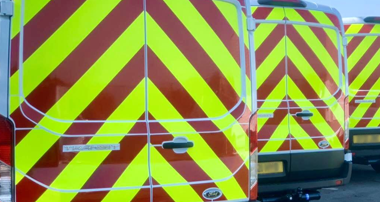
I often fit the common lower-grade reflective chevrons into vehicles. In fact… in the last two years, I’ve probably fitted 500+ vans with reflective chevrons. So I do have a bit of experience using/fitting reflective, but hardly any in the 3M Diamond grade, until recently!
One of our good customers stipulated a 3M Diamond grade. Any diamond grade I had used in the past had come in 4 or 5-inch wide rolls and had to be cut into strips. This is not easy & can be very time-consuming.
A roll of this material can cost a couple of thousand pounds, so I was reluctant to get involved when such a big outlay would have to be made. But having just completed a fleet of 50 vans for this same customer, i did not want to let him down.
In the end, I decided I would go about having a Chevron kit made up & do it right. Obviously, the prospect of more diamond-grade work was on my mind too… (good profit) so do it right, get a kit made up using a professional trade supplier of the material/kits and be sure to get any further work going. The biggest benefit of using a trade supplier is they only charge for what you use. So you don’t have the initial outlay for the material & they have the headaches of supplying it in kit form!
Some other things I would like to point out:
• This material is thick, and I mean thick… you cannot run it through your average everyday vinyl cutter; you must use a flatbed cutter. Flatbed cutters range from about £7k-£16k, so they are not ’t cheap.
• Once cut, the edges of this vinyl are exposed to rainwater and dirt that collects in the little honeycomb pockets that make up this vinyl and can cause it to fail. With this in mind, every single cut edge must be sealed. There are a couple of methods of doing this, but I would say the safest is having it high-frequency welded. Again, a specialist job offered by suppliers…
• To have a kit made up, you must first have a vector cut file for the supplier to use. If you don’t, you will have extra costs in having the initial one set up. We chose to make our own and e-mailed the file to the trade supplier.
• Diamond grade reflective should be fitted dry. Diamond-grade vinyl is extremely tacky and gives you very little play once initial surface contact is made. when applying always try starting from the middle of a section and working your way outwards, (shortest route)
Thoughts before fitting?
My initial thought on one of these kits is that a big (expensive) jigsaw would land on my doorstep.
This same jigsaw would have to be assembled on-site, onto a vehicle in a van centre. I was not looking forward to it simply because I hate working at a snail’s pace. Getting this right from the word go would be essential, why? You have many bits/sections to a chevron kit. You have to start someplace with the first bit. My thoughts were, start in the middle working my way out towards the end. But! What if my first bit was not 100% accurate? If it was at a very slight angle, by the time I add piece 2, then 3 and 4 and so on. It may be running up 5mm by the time I get to the right-hand side. That being the case, the left might be running off the bottom of the door! Trimming up on the vehicle is not recommended as you are most likely to damage the paintwork by digging deep while forcing the knife to cut this armoured vinyl.
Here is what I did to make life easier for myself….
The Chevrons arrive:
when you receive a chevron kit from your supplier, it will probably come in lots of odd-shaped pieces wrapped in polythene and selo-taped to keep each section as a group. The rear of each piece is numbered for identification purposes. (You can just see the numbers through the yellow pieces “Picture 1”)
Because I was only doing the rears of my vans, I did not have a massive amount of pieces, but still, plenty to cause me real bother should they get mixed up or one positioned wrong!
Picture 1
In picture 1 below, you see I have taken my jigsaw and roughly assembled one door worth of the reflective to check I have all the pieces.
Once I have checked my kit is 100% complete I take a large piece of “carrying paper” and lay it onto my bench.
“Carrying paper” is the backing paper that carries all times of vinyl. This silicon-type coated paper is normally discarded when vinyl has been removed from it. You can actually buy it very cheaply in its raw form from some suppliers. However, in my case, we keep stock of the stuff because we have a laminator in-house. Everything that’s laminated on the take-up roll reels in the carrying paper as it laminates. Once done we stick it in a box in case we need it for other jobs. So, in this case, we used the carrying paper shown on the table.
Picture 2
In picture two you see where I have begun.
I have taken the “centre” V-shaped chevron, removed its own carrying paper and laid it down onto my new carrying paper. While I lay it down I use a 4-inch rubber roller to help expel any air that may be trapped beneath.
Picture 3
In picture 3 you see I have moved to the left, applying the next tile.
I cannot stress enough how tight and aligned with the other tiles this needs to be to complete your jigsaw successfully. As I said before, if you run out slightly on one, the rest will exaggerate that by wondering way off!
Pictures 4, 5, 6
These pictures show close-ups of me applying each tile. notice once I have the tile aligned I follow it closely with the roller laying it completely flat, air-free and snug in place with the previous tile.
Pictures 7 & 8
These pictures show the completed section ready to be taped.
Pictures 9 & 10
These pictures show section 2 complete above section one. With section 3 about to be assembled in the same fashion.
One of the most important benefits of laying the diamond grade together like this is if you get it wrong/squint or something. You just lift it back off and re-align it. If this was onto the vehicle direct you would have problems!
Picture 11, 12 & 13
These pictures show the sections after having application tape applied.
The sections were trimmed up to make fitting easier and assembled into kits.
Pictures 14 & 15
These pictures show the completed vehicle.
Each of the 3 sections was applied dry using a felt squeegee. Once in place, they were rubbed over firm using a nylon squeegee.
Fitting took about 10 minutes or so per vehicle…. time saver or what?
For full technical specs on this product and other 3M brands visit: http://www.3m.com
Below are some emergency vehicles also using 3M Diamond Grade Vinyl.
None of these vehicles were created or installed by us. They are being shown for reference purposes only.