Re-creating a Compass Face using Signlab.

COMPASS
Re-creating an old compass face using Signlab. Using the process laid out below you can alter the shape, number and length of points around the compass to give endless combinations…
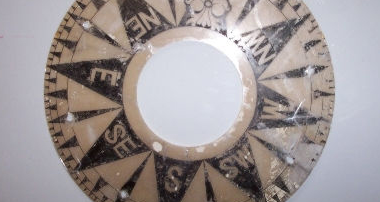
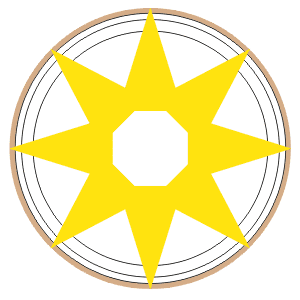
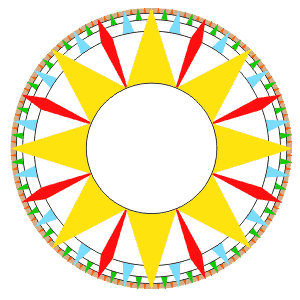
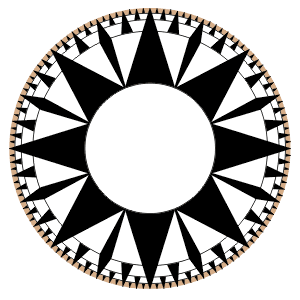
here is the old compass.
The first thing is to map out the profile or general shape of the compass to give us the overall proportions, then imitate the size and shape of the main elements of the design.
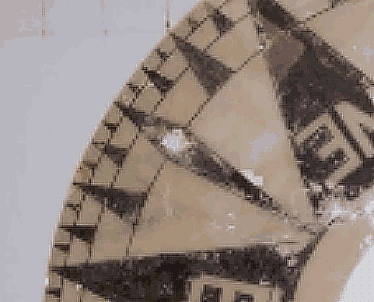
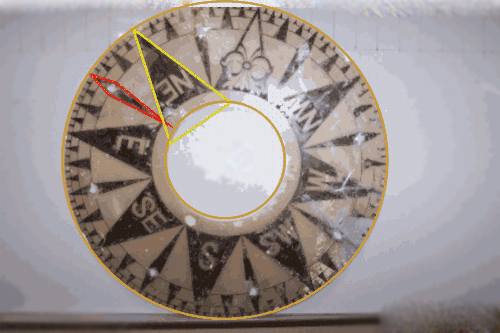
When you’re preparing to re-create a shape or design you should always take time to look ‘through’ the fancy veneer that is the design and try to see the simple geometry within. This compass is a case in point. When I first looked at it I thought I would have to create one of each of the three sizes of ‘tip’ or ‘point around the edge and then replicate them. Further inspection revealed that all these different-sized ‘tips’ were in fact the same ‘element’ (the red diamond shown in the previous photo) the only difference being you could see more of some than others!

With that little ‘ace up your sleeve,’ We can begin the process of re-creating the compass face beginning with the profile…
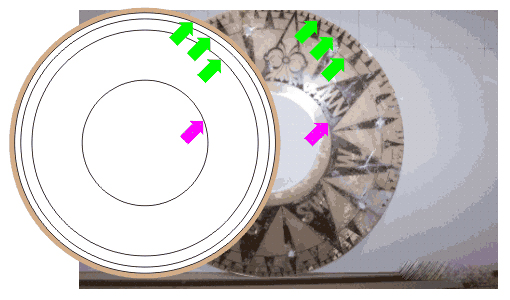
Next, add three circles to represent the three black pin-lines that run around the edge of the compass and a fourth where the eight main points of the compass come together. Fill each with solid white and give their edge lines an actual ‘thickness’ rather than just being ‘hairline’.
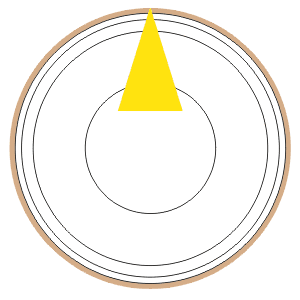
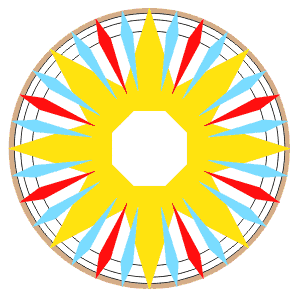
Place the first main point of the compass – due North! Remember to take the tip of the yellow point right up to the edge of the ‘Beige’ coloured outer profile!

Duplicate this shape, mirror it vertically and use a ‘fixed’ move to slide it down the page to the bottom of the compass face (the fixed move is so it doesn’t move left or right, just straight down). Zoom in to make sure your positioning of both the first and second points is accurate.
Group these two main points (to keep them together as a ‘fixed’ pairing). Next, create two copies, rotating one 45 degrees clockwise and the other 45 degrees anti-clockwise. Select all the Yellow points and ‘group’ them to keep things tidy.
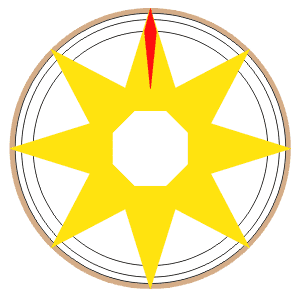
Now, do the same for those long ‘finger’ type points…place the first one straight up at due North!
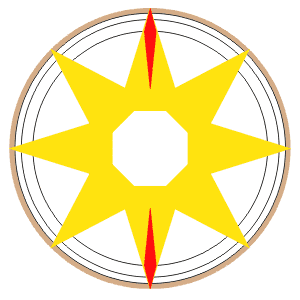
Copy, mirror and reposition it, as before, and group the two red points to give a ‘fixed’ pair.
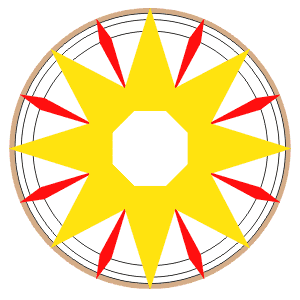
Duplicate and rotate these, as before, to create a set of eight. Select all the Red points and ‘group’ them to keep things tidy – then, rotate this group by 22.5 degrees clockwise so they end up in between the Yellow points. (Throughout we will be using different degrees of rotation – these figures are simply achieved by dividing previous ones by two!)
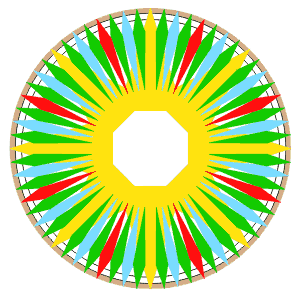
Select the Red group, make two copies and colour them both blue. Rotate one blue group 11.25 degrees clockwise and the other 11.25 degrees anticlockwise…
Don’t lose your nerve – keep going – it’ll all come good in just a minute…lol
Select all the Blue points and ‘group’ them to keep things tidy. Make two copies, colour them Green and rotate them 5.625 degrees clockwise and 5.625 degrees anticlockwise respectively.
No, You’re not losing your mind…this is why they teach you geometry at school!
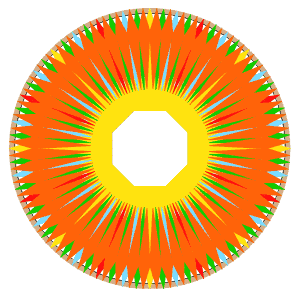
Select all the Green points and ‘group’ them to keep things tidy. Make two copies, colour them Orange and rotate them 2.8125 degrees clockwise and 2.8125 degrees anticlockwise respectively. PHEW! We now have 128 points of the compass neatly grouped into colours.
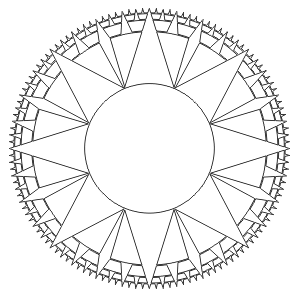
Now the rewarding bit – re-arrange the various coloured groups and white circles – moving some towards the top of the pile and some towards the back – until you get the correct order to the design as shown. – I told you it would come good!…lol
Change all the different coloured points to Black – Getting better all the time eh!
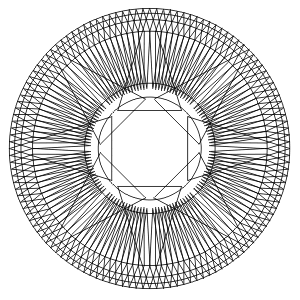
this is what it looks like in wire-frame view – scary eh!
Important!: select the ‘profile’ of the compass face (the Beige disc thing) and move it to one side…Grab everything else and weld it…the result is shown here in the wire-frame view for reference only…
NOTE: We have used white for the circles because in SignLab White is used as the default colour with which to weld away or ‘slice through’ other colours…your software may need a different colour or instruction…
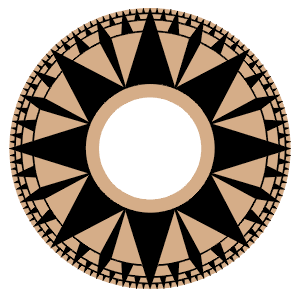
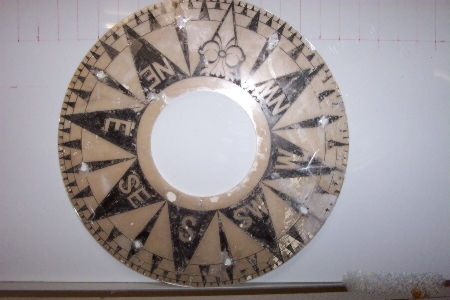
Bring the ‘Profile’ back and place it behind the finished compass face….DONE!
Don’t forget you can alter the size of the circles, the shape and the number of points to give you endless variations on this theme… You might even make some of the circles transparent with just an edge line and allow some of the points to protrude outside the profile for a different look.