Part Blocking Light on an Illuminated Sign
The following tutorial is how I overcame the problem I had with my customer who wanted their corporate image and colour-matched text onto a lightbox with only the graphics illuminated.

The first thing I needed to do was order a double-sided light box, the customer wanted the box to be curved and to match their matt blue colour. I bought these light boxes from Universal Aluminium Systems and this particular style is called a Dualcase and it has UCL129 beading around the edges. They also painted them to a RAL matt colour which matched the customer’s requirements.
The next thing was to match the background colour for the front and back graphics, to do this I waited for the light boxes to arrive so I could make sure the colour was as close as possible (the reason I ordered the boxes first) In this case a standard Metamark M4 matt colour matched the paintwork 99.9% accurately otherwise I was going to look at printing and matt laminating which would have been much harder to do so it is advisable to rather try to find a vinyl that matches.
So now I have my blue light box and my matching vinyl, the problem with the vinyl is that it is not a block-out vinyl and the light will come through which the customer did not want. What I did was buy the Bus Wrap vinyl from Metamark (MD-BW), it has a black adhesive and acts as a block-out layer even though is not classed as a block-out vinyl, but it does work as you will see. The only problem with this is you have to buy a full roll which isn’t ideal, however, it is a monomeric vinyl so is similar to the MD3 product which is a medium-term vinyl so I knew I could use it for other applications and with the block out properties would work well for covering previous graphics or even for rear window “one-way vision” graphics as detailed in one of the other tutorials available here as the black will help the see-through effect from inside, so based on this I wasn’t too upset about having to buy a full roll and didn’t have much of a choice anyway if I wanted to get this job done.
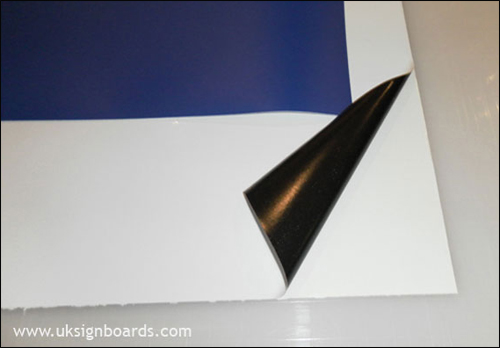
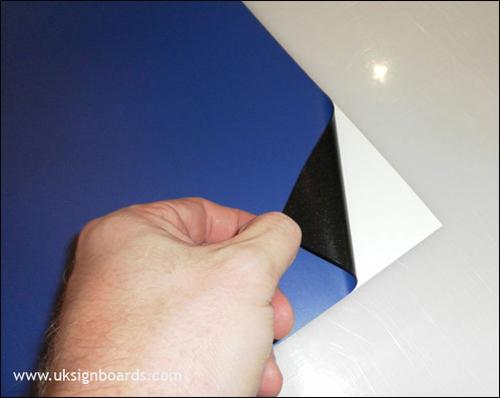
Picture 1
In this picture, you can see the normal matt vinyl together with the bus wrap vinyl which I have curled back so you can see the adhesive.
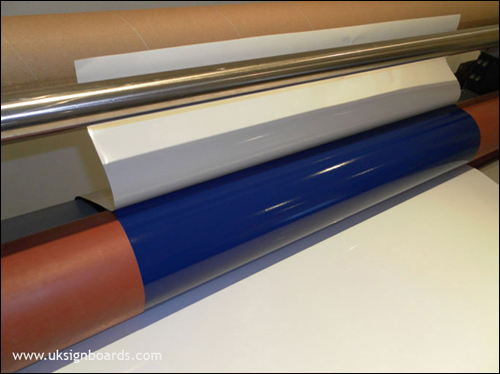
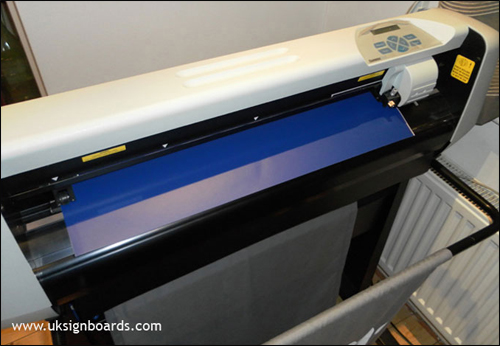
Picture 2
In this next picture it shows me laminating the blue vinyl onto the top of the bus wrap (block out) vinyl, this is now creating a block-out vinyl in the colour I need from a normal vinyl.
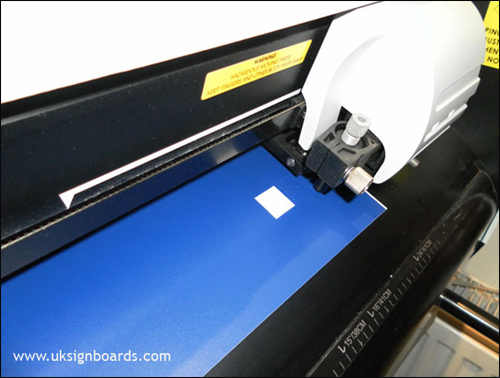
Picture 3
This next picture, it shows what the vinyl now looks like after being trimmed of excess white vinyl and ready for the next application.
Picture 4
What is now required is to load the vinyl into your cutter, you are now going to cut out the letters and images you want to be illuminated, so you need to remove the block-out vinyl from only these areas to allow the light through.
Picture 5
Don’t forget to do a cutting force check first as the 2 vinyls together are quite thick so you will have to increase the force to compensate for the extra thickness.
Picture 6
In this next picture, you will see the finished cut vinyl graphic with the weeding complete and ready to apply when required.
Picture 7
In this next picture, it shows a digital print on clear vinyl, it will be applied to an Opal acrylic panel (supplied with the lightbox from Universal) so printing on clear will be fine. In this picture, you can see the logo required as well as the text that needs to be light blue, the logo and text have been thickened up to allow for any movement when layering the vinyl onto the acrylic panel. I printed these in a double pass to increase the intensity of the colours. I also made a trim line around the graphic which is the same size as the piece of acrylic so I could just trim to the line and it would fit the acrylic sheet perfectly to aid alignment (I also did this on the block-out vinyl graphic shown above). You want both the vinyl and the print to be the same overall size as the acrylic otherwise you will see the edges of the pieces below.
Picture 8
The next picture shows the digital print applied to the acrylic, I would advise laminating the print to prolong its life especially if fitted outside although I didn’t do it in this case as it is indoors.
Picture 9
The next picture shows me now applying the block-out vinyl we “created” earlier over the digital print, you can see how it is the exact size of the panel so just line it up against each edge (as you did with the digital print) and it should fall into the correct position (you still have the bleed to help if a millimetre out)
Picture 10
The next picture shows the vinyl applied over the digital print and the application tape removed for your completed panel.
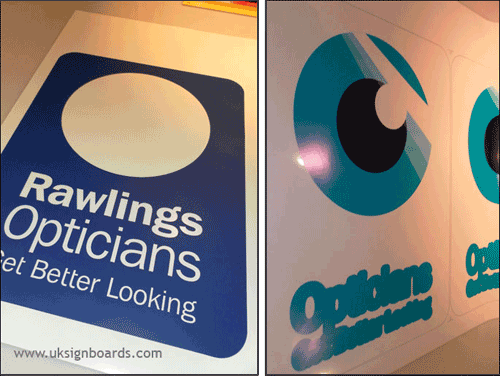
Picture 11
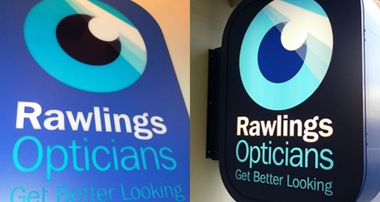
The next picture shows the completed light box with the panels inserted and fitted to the wall.
Picture 12
The next picture shows the completed job from the outside, you will see how I had to get the light boxes to match the front signage, as it is a listed building they had to do something inside to increase the appearance and this was their specification, it was up to me to figure out how to do it and this was the easiest method I could come up with to achieve the effect.
I hope you find this demo useful…