How to install Vehicle Window Tint

I hope this is understandable for everyone. Any questions, just email me & I’ll answer them. The following are the steps I took to tint this particular rear screen, there are variations of methods and techniques that are used from day to day, but this should get you started. Side windows to follow…
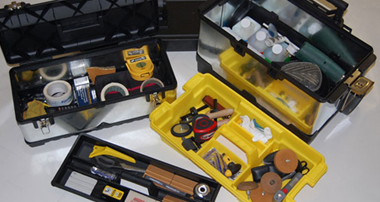
Tools Required
1. A Spray bottle with a soap mixture. 10ml baby shampoo to 1L of clean water.
2. Sponge. Non-scratching type
3. Application card.
4. Rubber squeegee about 4″
5. Nylon Squegee for hard pushing. (really great for vinyl installation)/
6. Snap-off type knife.
7. Single-edge blade scraper ( not needed here)
8. Door trim removing tool. ( not needed here)
9. Small file ( not needed here)
10. Plenty of spare snap-off blades
11. Spare scraper blades ( not needed here)
Window tinting a rear screen ( two-piece)
Make sure you have plenty of time to do this and plenty of film ( tint). Make sure the area you are going to tint it is dust free and clean. ( this includes the tinter) and for the first few cars it won’t hurt to give the car a hose off and chamois.
While you are learning, It is easier to do windows in more than one piece and from smaller rolls of film. This is in case you make a stuff up, you only damage one smaller piece of film instead of a whole rear screen.
I’d start off by buying some 20″ film with plenty of film for errors.
1. Clean the window properly. The outside that is. Using slightly soapy water ( baby shampoo is good ). Use a soft rubber squegee to clean fron the top centre out to the edges ( like when you clean your windscreen at a service station). Wipe edges dry with a clean cloth.
Tinting is best done by doing most of the prep work on the outside of the car and then installing inside. The most important thing is to make sure that when you put the film on the outside of the glass, that the backing sheet ( clear protector sheet) is facing up away from the car. The easiest way to determine the backing sheet from the film is to seperate at one corner using two pieces of tape. Place one piece on one side of the tint and the other on the opposite side. Pull both pieces apart, and the film and backing should seperate. DO NOT FULLY REMOVE just find out which side is backing.
2. Place the film on a wetted rear screen backing sheet up, overlapping top and side edges.
Using an applicating card( I use a gold 3M card, but anything you use to apply vinyl will do ), covered with a cloth, smooth out the film from the centre of the screen to the edges.
IT IS REALLY IMPORTANT THAT YOU ARE CAREFULL NOT TO CREASE THE FILM WHILE DOING THIS.
then smooth from the centre up to the top nd bottom edges creating an “H” effect. Trim edges . You’ll notice this leaves small uniform fingers or “spears” of tint pointing up and down.
Tricky part coming up…
3. Apply heat using heat gun starting at the bottom of a spear until it starts to wrinkle. When it does, move the heat up to the top, while gently smoothing up with your application card.
Don’t apply enough heat to melt the film
THIS IS THE REALLY TRICKY BIT You have to get a feel for how the film is shrinking ( wrinkling) heat, type of film and even the tempreature of the car and or shop affects this process. Take your time and get a feel for this. As you smooth up, is you get it right, the film will stay smooth to the shape of the glass with no creases or bubbles. When you have one down well, move on to the next one. Always working from the centre to the edges.
4. When you have done the top, do the same with the bottom,. Until one half of the screen is smooth and in shape. Then trim up the film to shape. This is important… you must allow for a join between both pieces of film. Pick a heater bar that will occur between both pieces. Cut your top piece 1/2″ below the heater bar.
Pic 4. shows one side smoothed , and trimmed. Notice on the top edge, I’ve allowed the film to overlap the inside “dot matrix” pattern inside the window. This will eliminate any gapping. I also allow extra film on the sides to remove any gapping. The amount to allow will differ from car to car. On rubber mounted rear screens usually older cars do not allow much overlap on tops or edges as you’ll have to trim while inside…A tricky thing sometimes.
5. Repeat this process 1 – 4 for the other side of the screen.

6. Lay up next piece of film. Overlapping the bottom of the screen and the sides. To help me , I usally allow 1 1/2″ over my joining heater bar and remove all film over this.

7. Make an “H” in the bottom piece. Make note that this piece is smaller than the top. I usually do this because the film is easier to handle while laying up inside. You have better control over the film and have less chance of contamination from the rear deck.

8. Shrink film to shape, trim as in previous steps.
9. Remove all obstrucions inside the car.
This includes head rests, speakers, rear brake lights etc. This could even mean removing the rear seat and deck in extreme cases.
10. Clean your hands… when tinting, a lot of film contamination actually comes from the tinter…Clean hands and fore arms are a must. You get all sorts of things stuck in tint,beard hear, eye brow hair,arm hair, if you’ve just patted your dog…Dog hair…I don’t know how Henry does it LOL. Anyway you get the picture, You have to be free of as much stuff as you can.
11. Clean the rear screen.
Remove any rear screen stickers and their glue. There are a lot of good glur removers on the market. I like to use the same one I use to remove old vinyl. It’s citrus based, non toxic and works ( and smells) really good.
Wet the rear screen with your soapy solution and scrub with a non scratching ceramic type cleaner. I usually buy these from the supermarket I use a Vileda Super scrubber. This type is good as it cleans well and doesn’t scratch the glass.
Squegee from top centre to edges in overlapping straight lines. Then repeat.
It is handy to have another person to help you with the next process, make sure their hands are clean and they haven’t just been sand blasting.
This is easy to do but difficult to explain… We need to remove the backing from the film without touching dry tint glue with dry fingers and with keeping every thing wet ( to keep down contamination).
Get your assistant to hold the film well above the ground backing sheet facing away from them. you remove one corner of backing sheet and immediately wet with your soapy solution. the helper can now hold the tint in this area. Slowly remove backing sheet while spraying until helpers fingertips are holding film at the top. slowly remove all backing sheet whilst spraying. When backing is removed, Wet the film…I mean WET.
Wet the inside rear screen.
12. Lay up film
It is better to do this with two people at first. grab the bottom edge of film with finger tips and back slowly in to car. the film must not touch anything at all. Both people offer up the film into place ( always work from top to bottom). This part should be easy for all vinyl applicators…It’s virtually the same except you have to be more concerned about contamination.
slide film into place taking care not to crease the film.
Wet the film with a spray. Squegee out using the pattern shown in Pic 8, both left and right.

13. do the same for the second piece, making sure the inside window is wet including up to 2″ above the “join” bar. Note the overlap in picture 9. This is where we are going to join the film.

14. Squegee out bottom piece but not too hard over the join bar.
15. Lets cut… the join is made using a fresh blade and cutting through both layers of film leaving an almost invisible cut.
this cut once started has to be done in one stroke…The full length of the screen.
Start your cut directly UNDER the heater bar. In one smooth and slow stroke follow the line fron ( in my case) left to right. If you’re left handed this will be right to left. Only cut on clear glass, do not cut on heater element or on black dot matrix as this will immediately blunt the blade. If you have to cut into a matrix or heater bar, do this after you’ve finished this first cut. Please be sure not to cut through the heater bars or the side grid…This kinda upsets the customers.

16. Remove the top piece .

Here you can see the line I took with my cut. The top part of the join has been removed, leaving the under piece.

17. Remove the bottom layer of join film. To get this you have to lift the bottom bit of film at the join away from the window and grab the waste piece. While you remove this, spray into the join gently.

18. Squegee the join and re squegee the rear screen

19. Replace all speakers etc. Wipe the window very softly with a very soft clean cloth to remove all squegee marks ( Avoid the join).
20. If there are any other imperfections like spears left, some gentle heat and a cloth-covered application card should fix these.
21.There will be bubbles…These come free of charge…No seriously as the film dries out it (like vinyl) will have water trapped inside which takes time to dry out. Even in Australia, this can take up to six weeks to fully dry it is really unusual for it to take this long, usually a week and it’s dry.
more tips on tinting http://www.tintdude.com/
The above content is the property of Lee Atewell & is protected by © Copyright 2006; all rights reserved.
The above text and associated pictures are copyrighted material and may not be altered or reproduced in whole, in part, in any print or electronic form without direct written permission from Lee Atewell of Graphics Jam.