Home › Forums › Sign Making Discussions › Vinyl › What is the best way to fit perforated on glass?
-
What is the best way to fit perforated on glass?
Posted by Peter Dee on 9 March 2011 at 11:13I have got to fit some printed perforated vinyl on to car windows. As it isn’t laminated, is it best not to use application tape to avoid damaging the print?
Part of the job includes 2 door side windows, is it best to squeegee down then trim the edges with a knife against the glass or cut a paper pattern first?
Any advice welcome .Matt Boyd replied 14 years, 7 months ago 5 Members · 10 Replies -
10 Replies
-

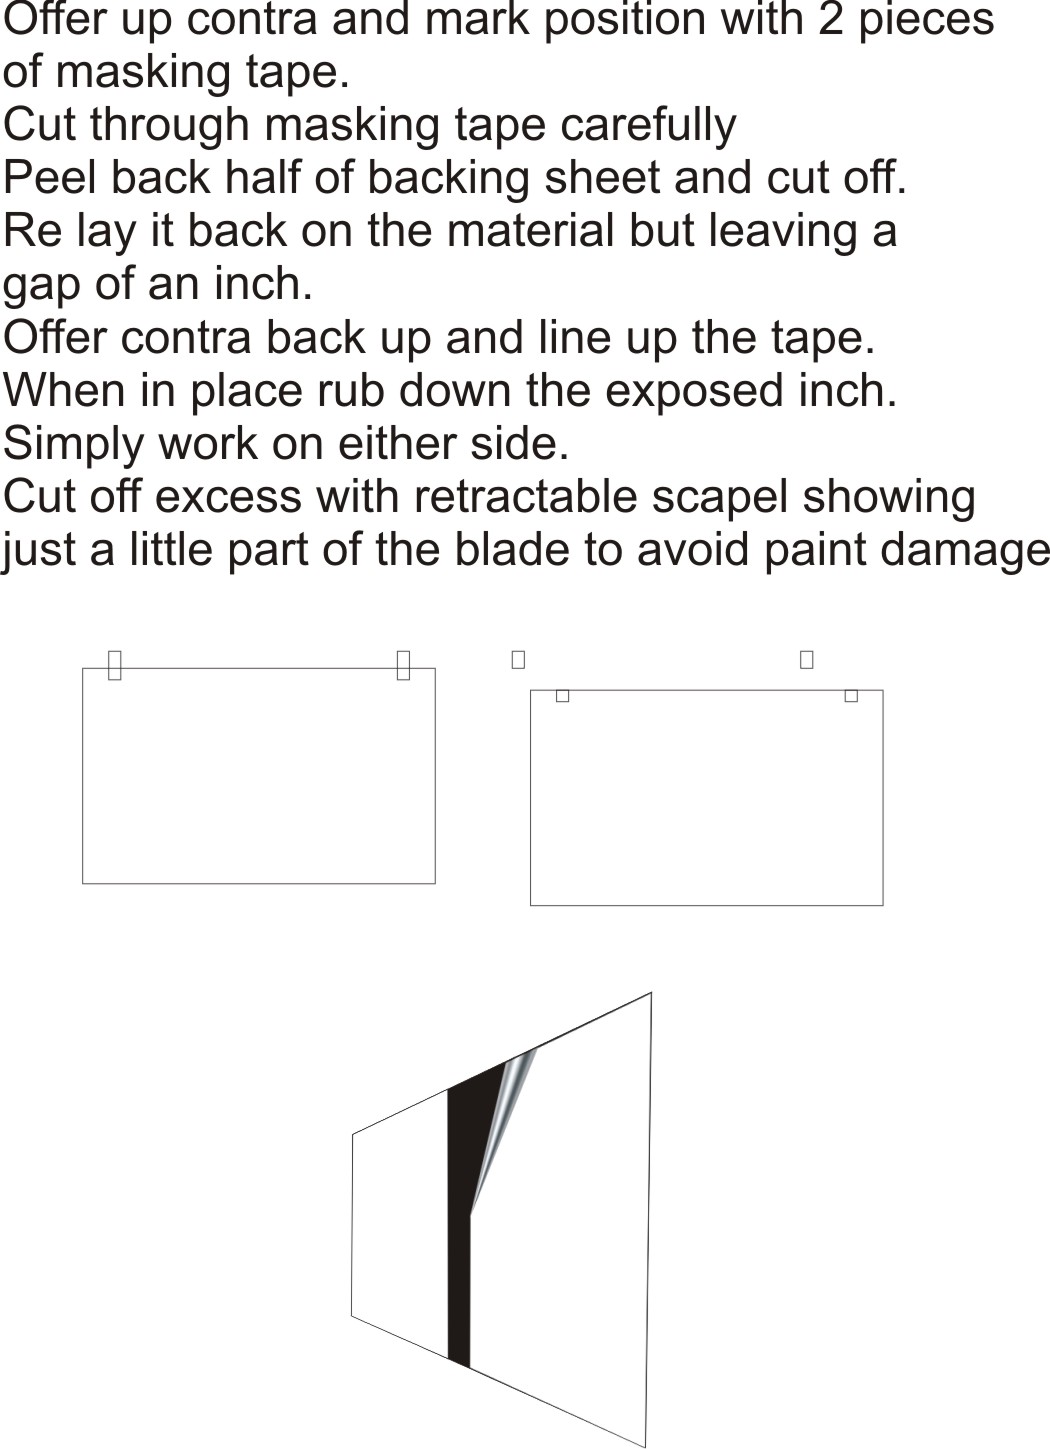
here’s how I do it on rear and side windows
Attachments:
-

Thanks Chris, very helpful.
I guess not many here use perforated vinyl? -

Cover your squeegee with the soft velcro. That will stop your print scratching.
I use a vertical hinge and apply it that way. I trim down the one way vision on the glass. Make sure you don’t cut into the rubber moldings. Sharp blade light pressure.
With unlaminated one way vision don’t use a lot of pressure you will risk pushing your squeegee through the print and tearing it. Because its unlaminated you reduce the risk of bubbles because there is plenty of holes for the air to escape. Just make sure you lay it flat so you get no creases. If you have a window thats curved on both axis if you need to use heat be very careful not to pull and stretch the film or your circles will turn into ovals and it looks unsightly.
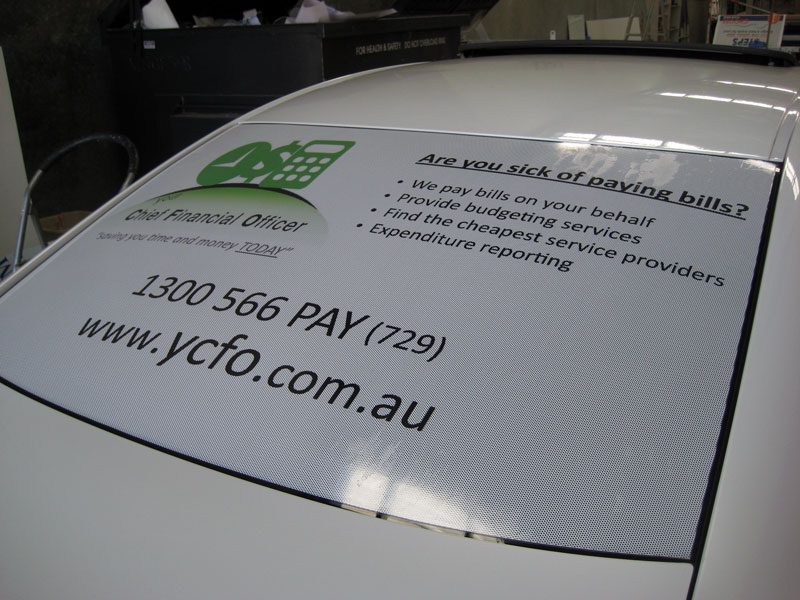
Heres one I just finished installing. Its laminated and edge sealed. Prep, install, trim and edge seal in 30 minutes. Nice and easy.
Attachments:
-

hey jason, whats your method of reducing air bubbles when you laminate the window perf?
cheers
matt -
quote Matt Boyd:hey jason, whats your method of reducing air bubbles when you laminate the window perf?
cheers
mattTake it slow. Make sure you let the squeegee apply the film and don’t let the film touch the glass then squeegee over it. Another trick is on some windows that curve on both axis its impossible to squeegee in vertical lines. You will end up forcing the vinyl in the middle to touch before you actually squeegee it.
So my application line is actually an arc like this:
from the middle to the left my arc is like so
(((((((((( till I get to the corners.
From the middle to the right my arc is like this:
))))))))))))))))))
If that makes sense. Also make sure your using small overlapping strokes. Don’t try to bite off a whole squeegee width to go faster. I don’t like to pin air bubbles in one way vision because it just invites failures down the line. If you do see bubble lift your vinyl back and reapply.
Sometimes an extra pair of hands makes it a lot easier.
If your alone when I create my vertical hinge and apply the left first I only apply like 20%. Less exposed vinyl to handle. Then when you apply the other 80% only peel back another 20% of the backing paper and using magnets to hold down the graphic. The folded over backing paper should create enough of a ridge to hold the vinyl off the glass. Apply with your squeegee and repeat another 20% till you finish applying.
I also trim back all laminated one way vision and apply strips of over laminate to seal all the edges. I don’t really care what anyone says I haven’t had one come back with this method. I have in my earlier days had vehicles come back that weren’t edge sealed that had moisture get under the film and ruin it.
Hope that helps.
-
I think I just miss read your question. Did you mean during the laminating process? like in the machine? I’ve never had bubbles. I laminate it like I laminate everything else.
Do you get air bubbles with everything? or just the optically clear laminate?
-

Jason, well described mate 🙂
I use 3M edge sealer on my windows. Lets me go to the edge, and it seals a treat. Never had one come back. Or, I lift the rubber seal with the leading edge of the squeegee, and force the edge of the print under.
-
quote Shane Drew:Jason, well described mate 🙂
I use 3M edge sealer on my windows. Lets me go to the edge, and it seals a treat. Never had one come back. Or, I lift the rubber seal with the leading edge of the squeegee, and force the edge of the print under.
You had to remove any with the 3M edge sealer?
Hope its better then removing primer 94.
-
cheers jason, i did actually mean your method of applying the material to the window. excellent description mate
cheers
matt

Log in to reply.