Home › Forums › Sign Making Discussions › Graphic Design Help › Wavy line for etch window design
-
Wavy line for etch window design
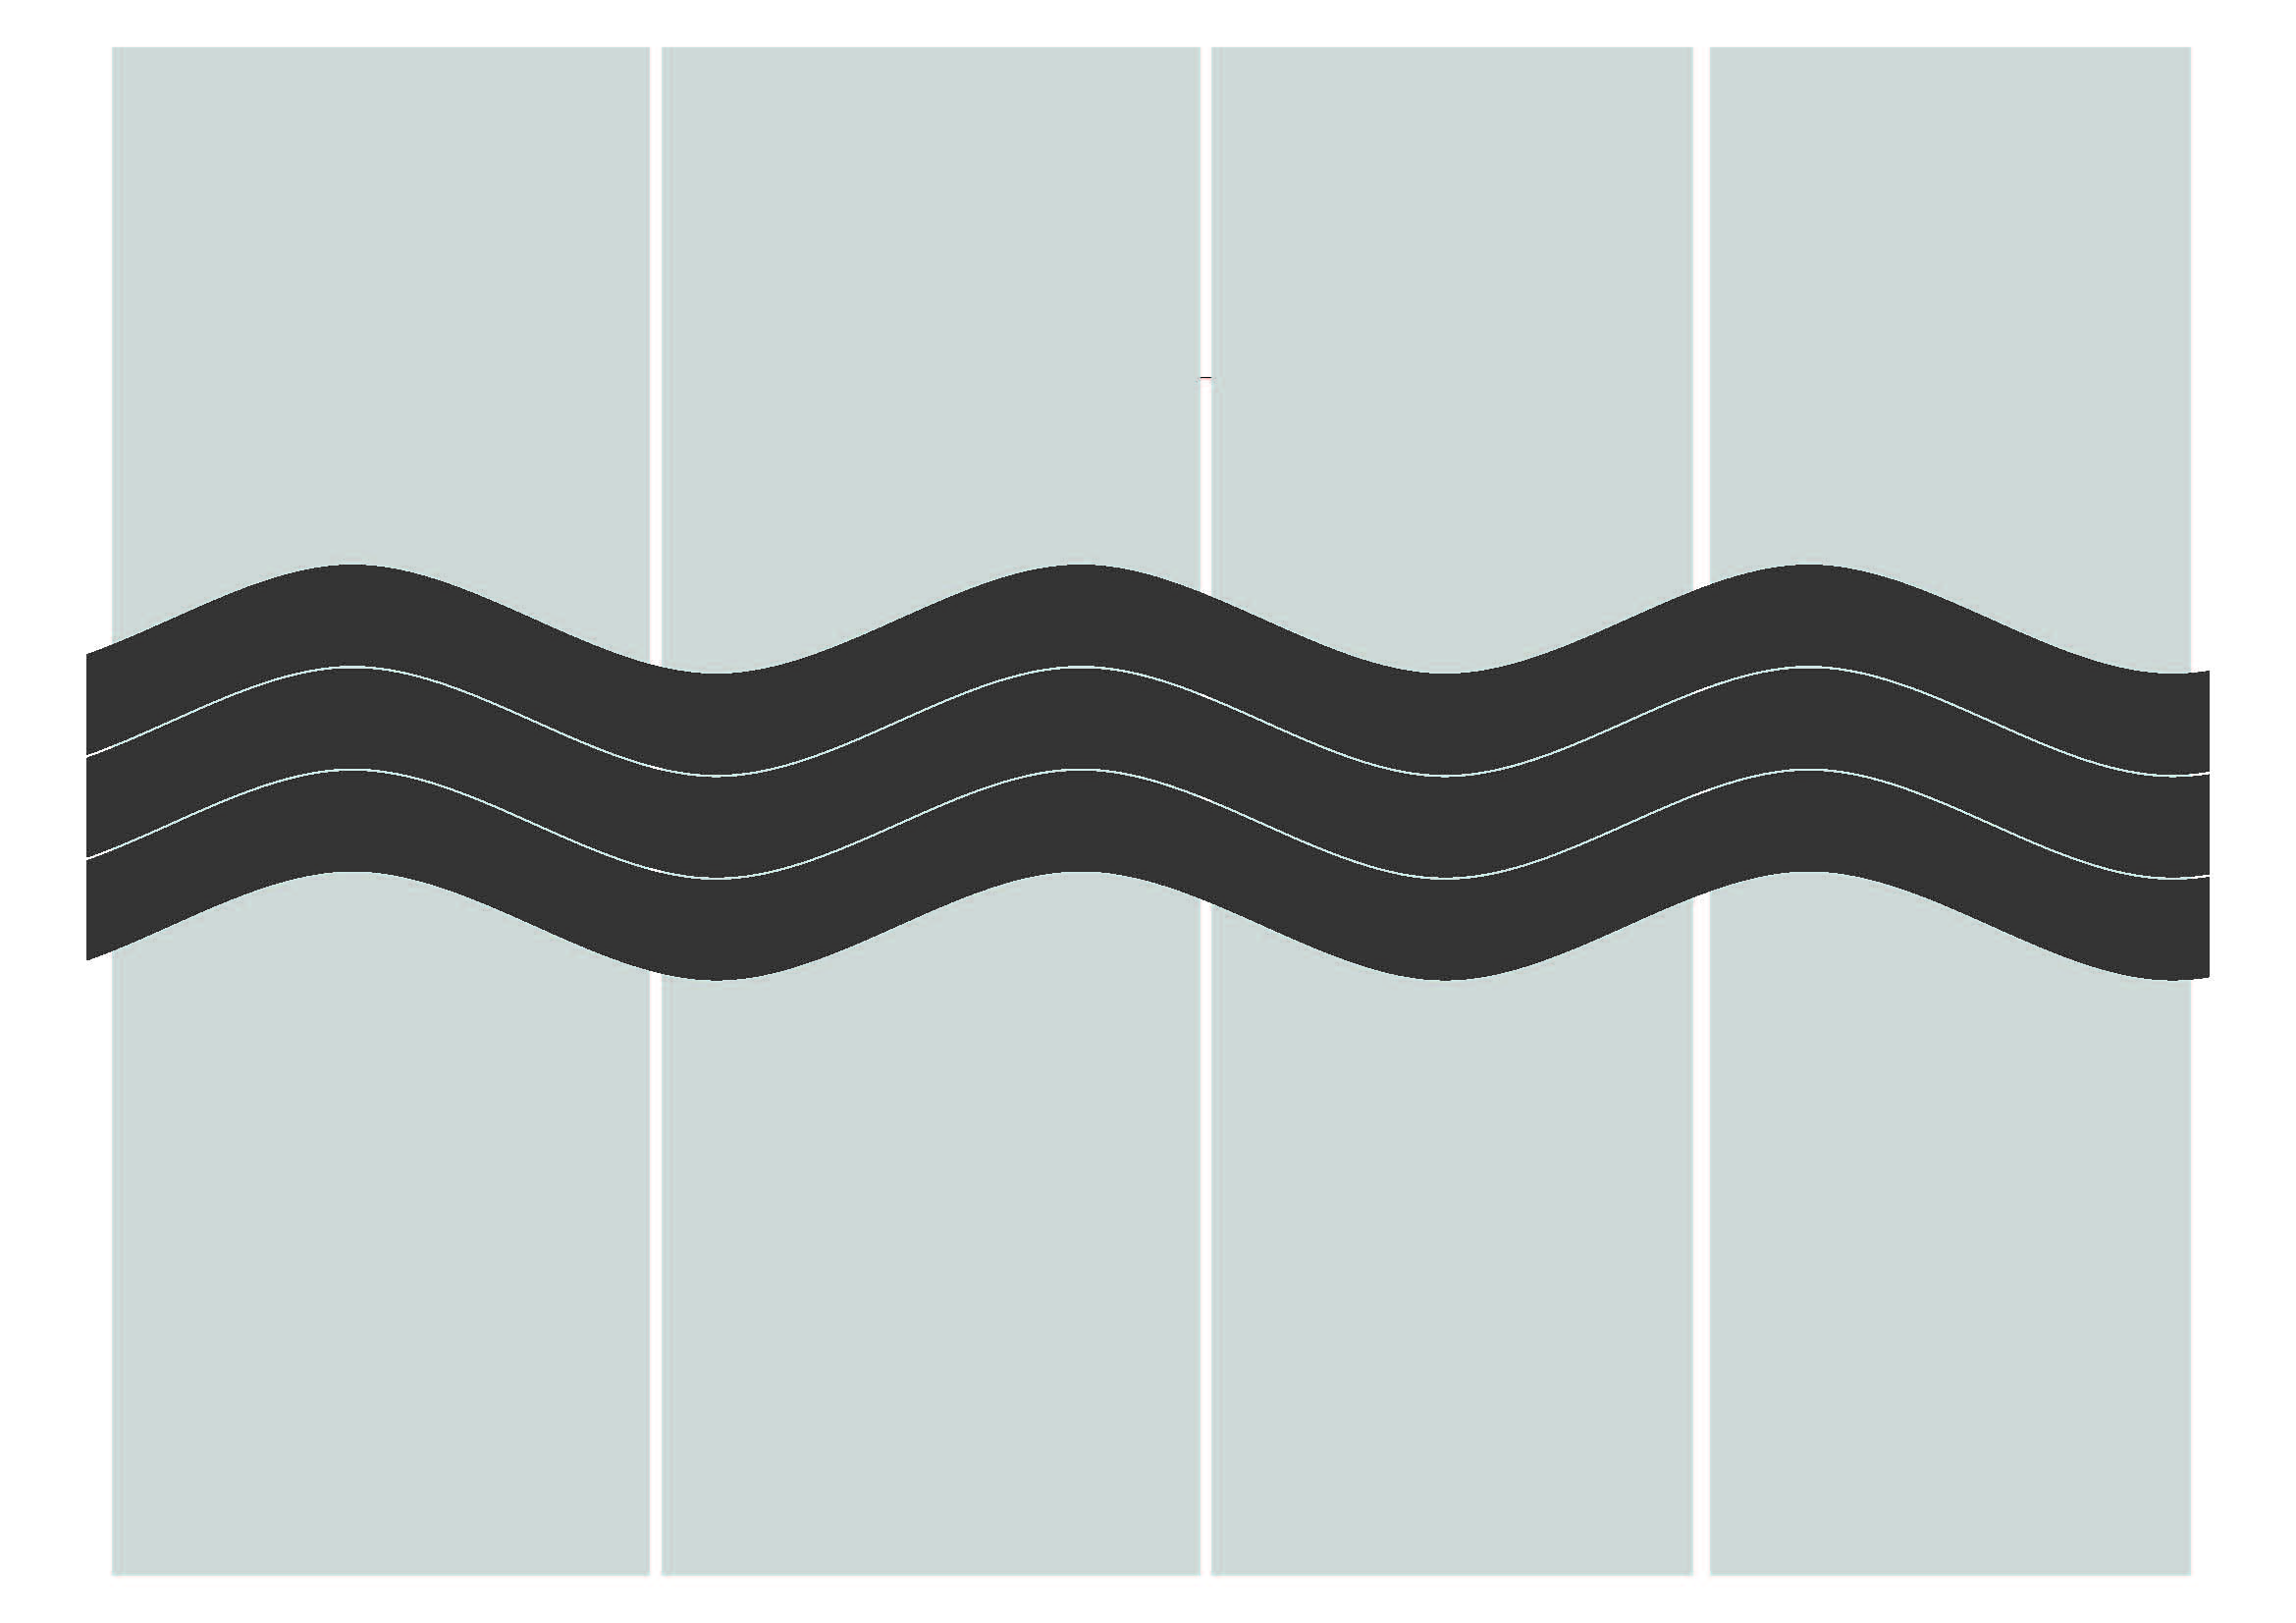
Posted by Richard Urquhart on 19 January 2011 at 16:23Hi all having a few problems in creating this file, its probably quite simple but not for me, please could I have some help. the design needs to be like this but only 3 wavy lines taking up around 730mm and to include 5mm gaps, thanks for looking rich
Attachments:
 Richard Urquhart replied 14 years, 11 months ago 13 Members · 22 Replies
 -
22 Replies
-

I would be doing it in corel like this.
Measure one complete wave cycle, height and width.
draw a box this size
draw a horizontal line at the bottom of the box and a center vertical guide line
Convert the horizontal to a curve, and add a node in the middle.
Drag the center node to the top and you should now have one wave line to cut, paste, and weld to form the pattern.If all else fails, a sharp scalpel and a steady hand should see you right…… :lol1:
-

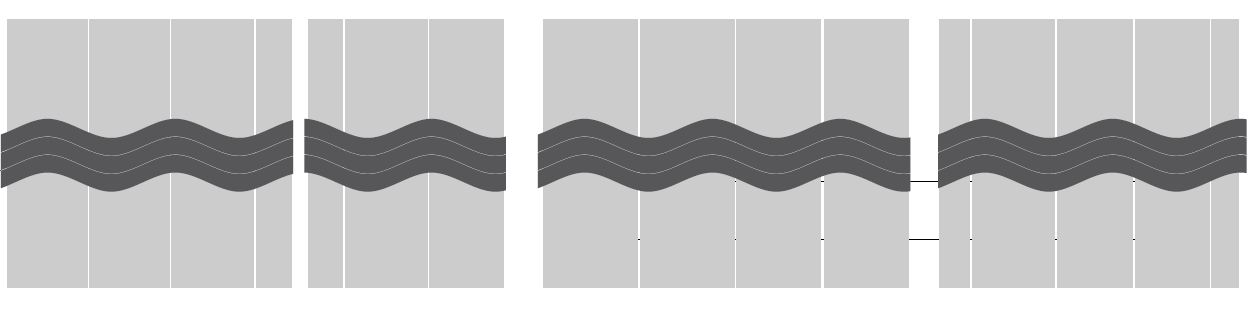
This is symmetrical Richard, Just repeat as necessary, stretch or squash it, the expand stroke to 5mm.
-

Hi Ian thanks but nothing when I open the file mate? any ideas Rich
-
Sorry mate opened in flexi Thanks Rich
That perfect many thanks Rich will post when job complete !
-

In Flexi you can just draw a rectangle and use the wave distortion effect.
-

You can also do it in Illustrator using the zig-zag filter and smooth points. When you
are happy with the look, expand the path to give a cuttable vector. -

In Corel;
Make a rectangle the width of of one curve plus half of another either side, say 500mm X 10mm.
Convert to curves
Click shape tools (2nd icon down)
Select nodes and press the green ‘add nodes; icon on the top toolbar – nodes will be added exactly halfway
Select all nodes and change to curves
Select the middle two and with the control key pressed and drag up or down to the required height.
With object selected press the + key
Hold the control key and from the middle left node drag to the right – your duplicated object will have a reflection to the right. You can repeat this as often as required.
Select both objects and weld
Alan D -

Brilliant, thank Alan. Trying to work that out for ages, so simple.
Earl -

…and my thanks to Jamie. Have been doing it a long-winded way in Illustrator until now.
Learn something new every day…
Martin
-
Thanks so much to all that have helped, install on Tuesday next week, soon as I have more time I will have a go at the corel option thanks again Rich 😀 😀 😀
-
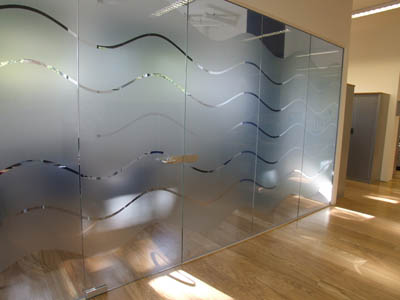
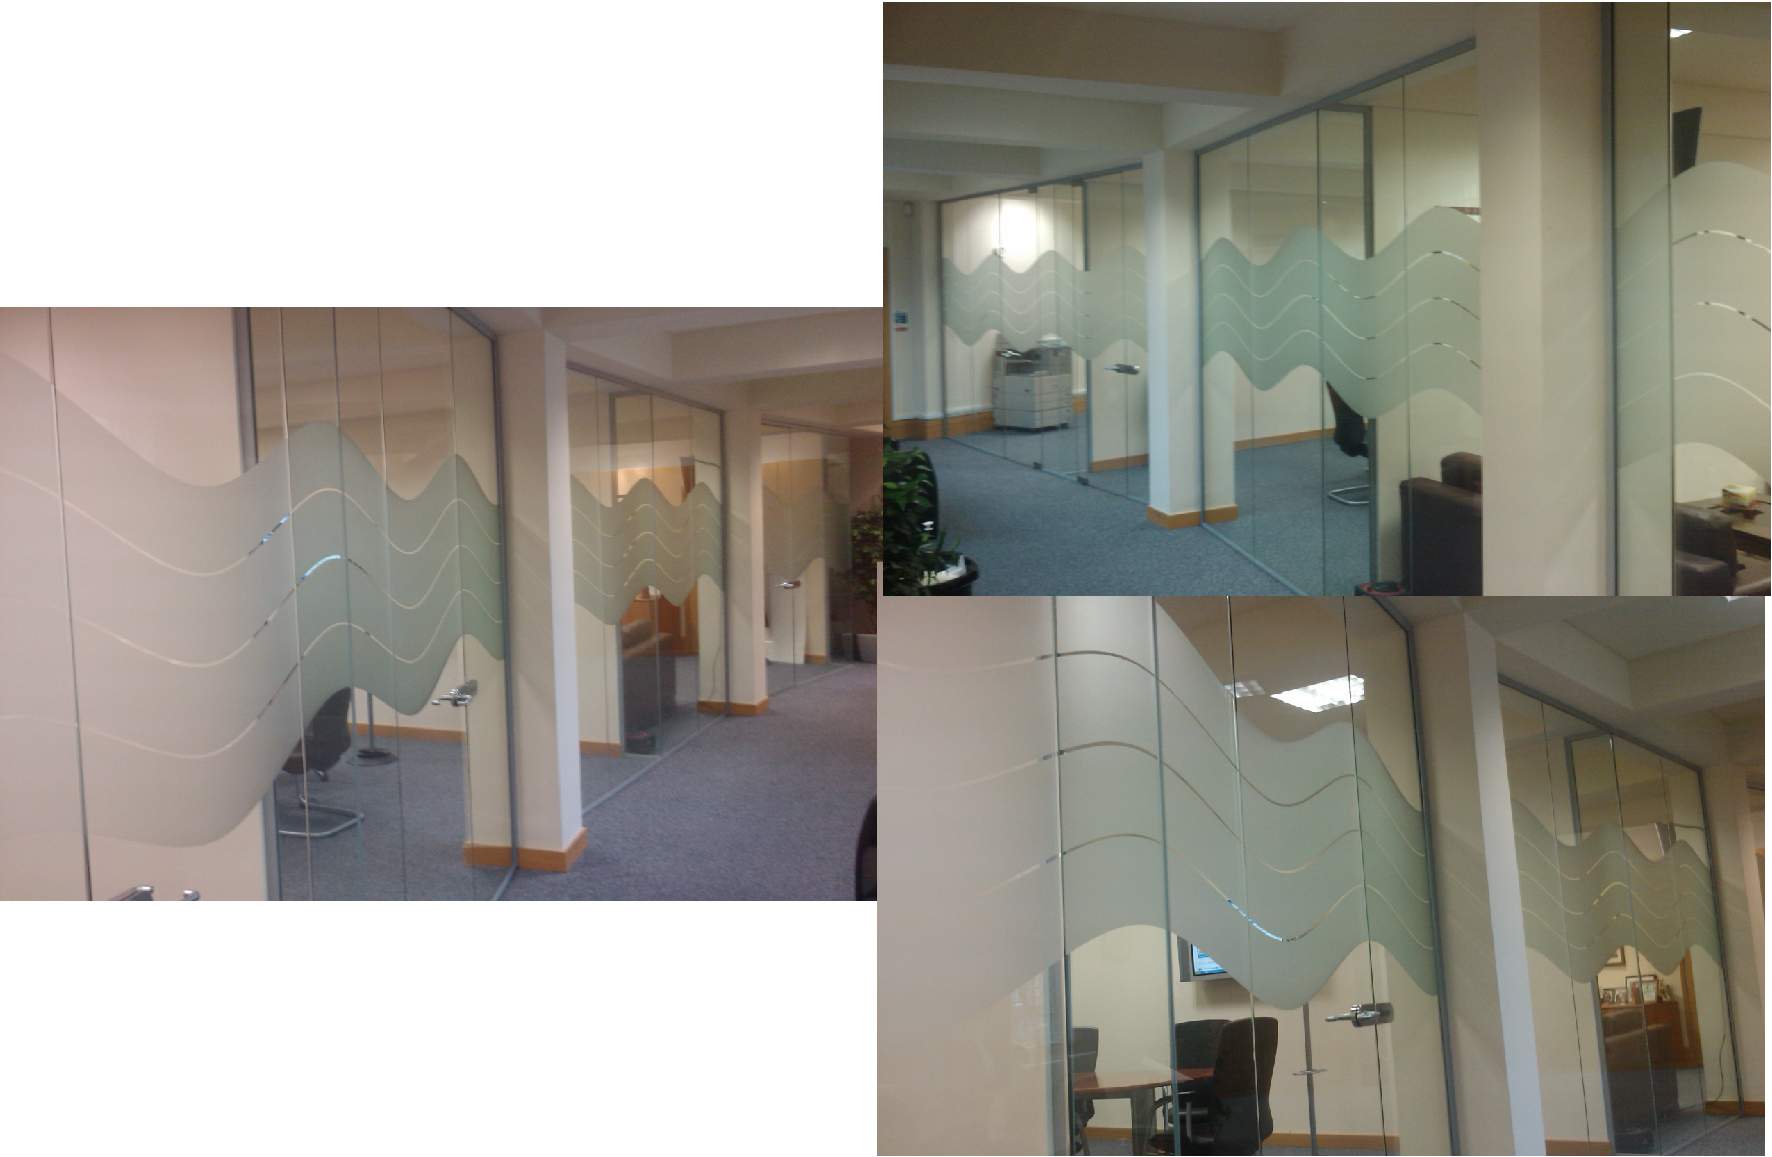
Well just a quick update, fitted this today as per customer spec, very happy with result, thanks again Rich
Attachments:
-

Looks good Rich.
In X5 there is a 3point curve tool which is a doddle to use for this kind of thing too. Creates the curve in a single operation.
Cheers
Gary
-
Thanks Guys, Gary I have X3, flexisign and Signlab but I could not get my hear round the line having to be completely symmetrical , the width of this is around 930mm now and had to cut on 610 plotter, with the gap that small I had no room for error and even when fitting it had to be spot on! Now I have more time I can start to experiment with creating the line so thanks again everyone for your help Rich
-

That looks really smart Rich.
Did you fit each stripe individually?
Wet or dry? -
Peter thanks I did this in bands of 2 app taped together. Set laser for top line and fitted the 2 bands wet and worked along complete length, then went back to start and applied the other 2 bands wet again, one run was just over 4 meters and was a bit tricky. I didn’t trim in between glass joints until all applied so as to make sure when looking down the lines matched up.
Rich -
No problem removing the app tape after wet application then?
Yep, I that would need some care to get the 2nd set equal gap.
I expect you’ll be back in a year to replace bits that people pick at. -
Peter I have found that wet application using just water works well with etch NO soap, even quicker than rapid tac 2 .
Dont think it will get damaged as this is for the 2 directors in each office, yes big offices .

Log in to reply.