Home › Forums › Sign Making Discussions › Gallery › shop signage: roc communications
-
shop signage: roc communications
Posted by Hugh Potter on 27 March 2007 at 22:07this job isnt quite finished yet, i’ve done the majority of the work required, but thought i’d post the job from the start, i followed mr normingtons advice with regards the frame for the pan sign, it may be of help to others to see how i did it ??
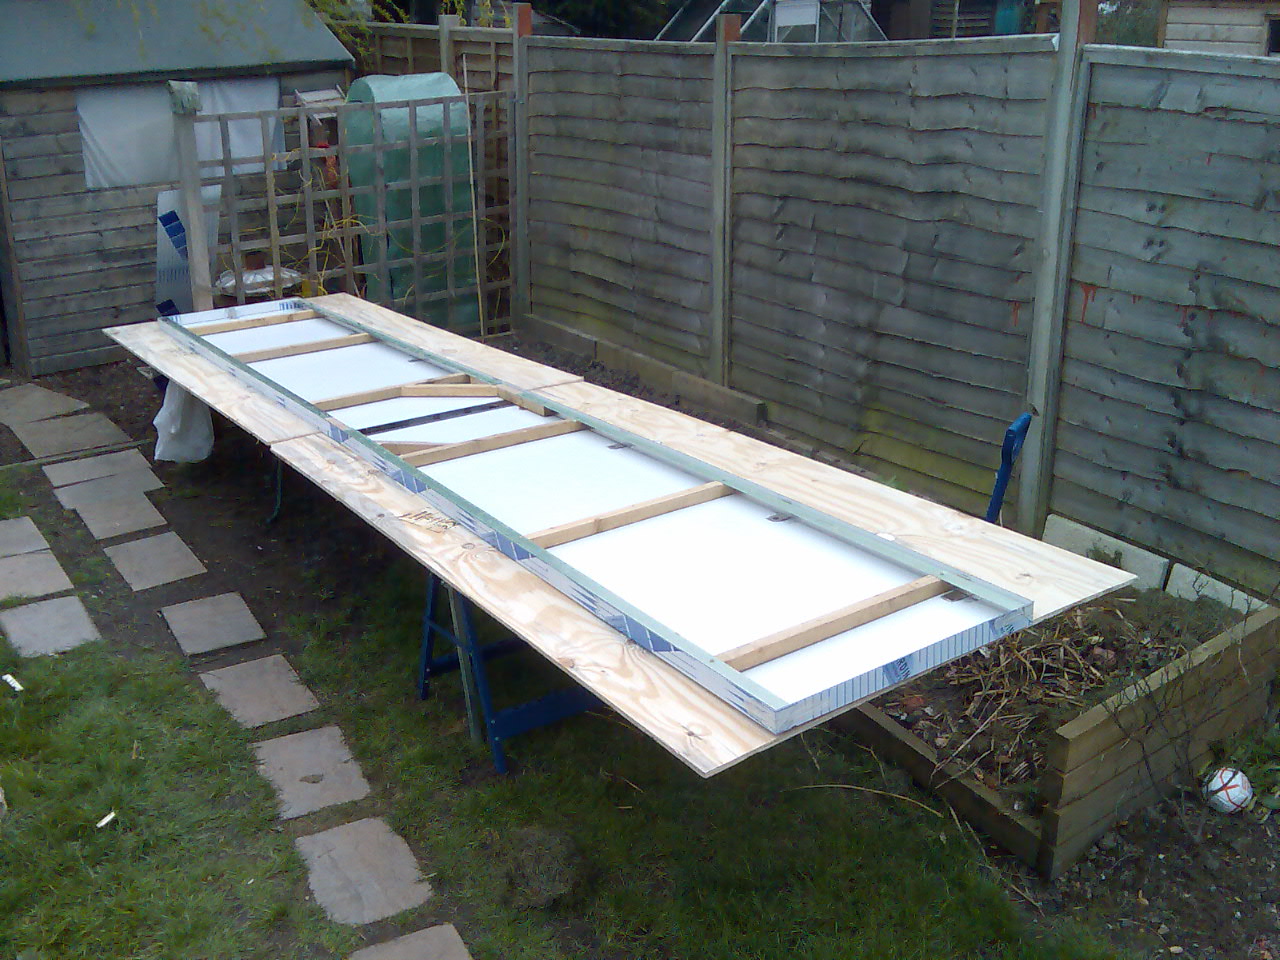
the sign is 4.8m x .70m, 2 section dibond tray, i bought it thru my local sign supplies place for about £30 more than the two sheets woulda cost in the first place, so not worth the hassle of making my own !
i lay the rails inside the tray and cut some 38×38 wood to go across as spacers, then drilled thru the wood and just enough to mark the ali rails, then removed and drilled the rails, then turned it all upside down (as it will actually be when fitted), made sure everything measured ok, and screwed the frame together, then just added a couple of diagonal braces for support and to keep it square,
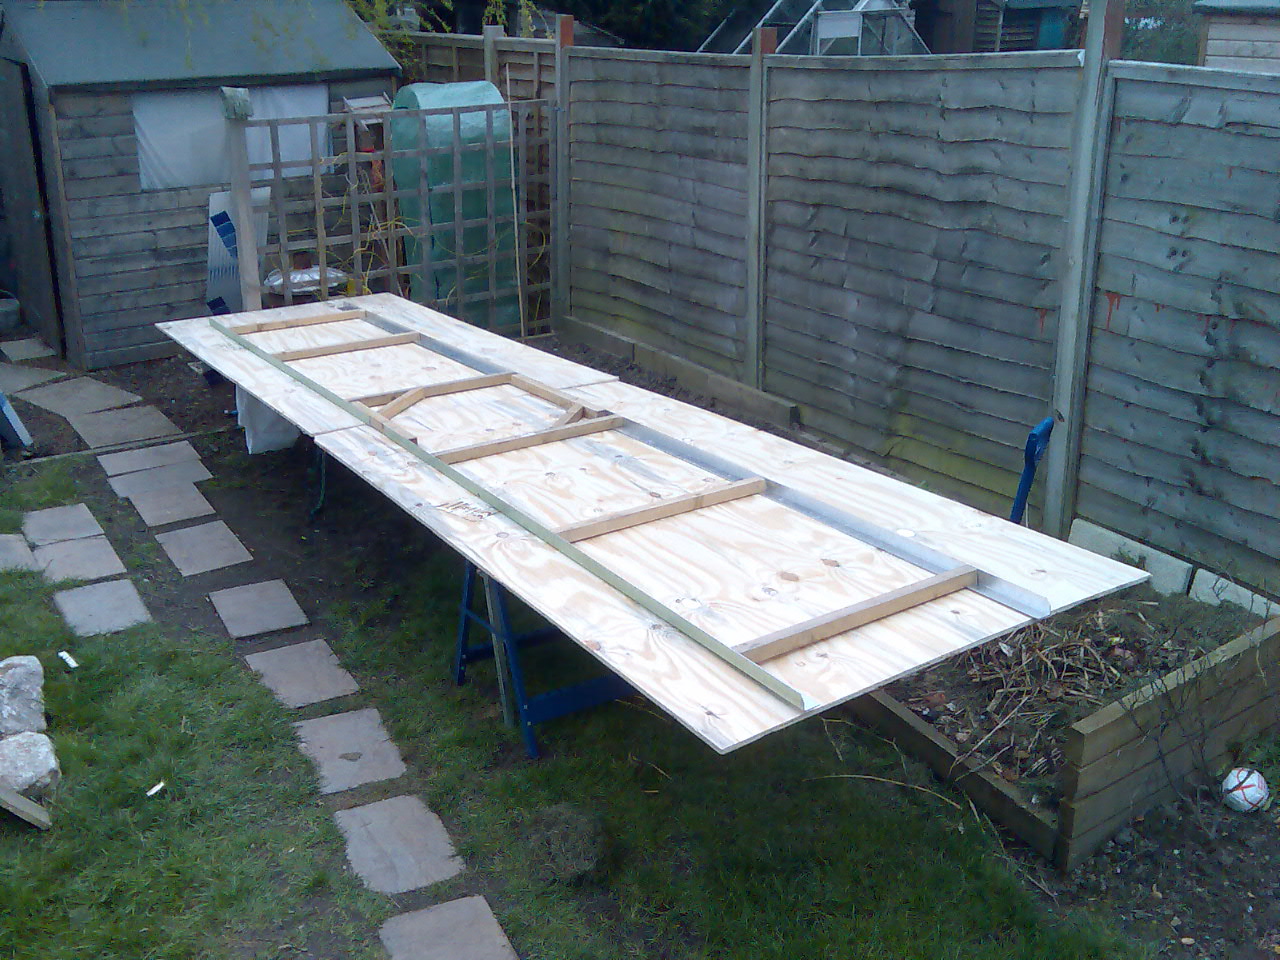
the the whole frame comes apart in two peices for ease of transport,
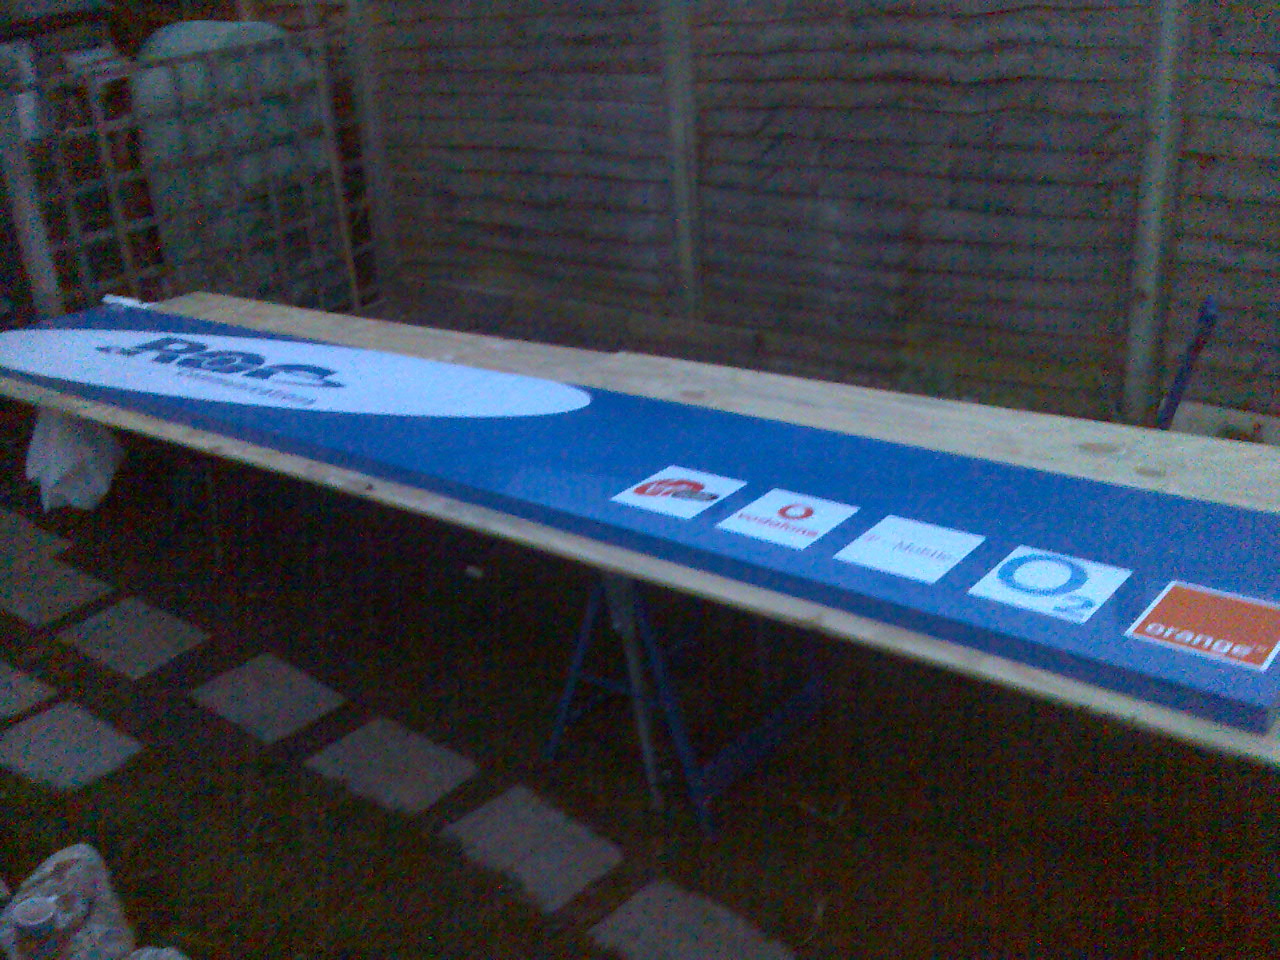
the main sign is flood-coated blue, which was a nightmare, the panel, despite my best efforts, was sagging slightly in the middle, causing air to be trapped at the edges, causing me to lose me rag a bit, and more than one atempt on the second half after i stuck me felt squeegee (new) thru the vinyl (why dont they put a rounded corner on them ?) !
the real pig of a thing here, is that if i’d known the customer wanted this shade of blue, rather than the turquoise originally requested, i coulda had the dibond pan made in almost the same colour with no need to flood !
all done in oracle 751c. all logo’s drawn with the exception of orange and vodaphone.
one tip i’ll give (hope not teaching ya’ll to suck eggs here !) is at the join, fold the flood into the join, i’ve noticed of late, alot of 2pc pan signs where the vinyl has shrunk back from the edge, leaving a white line right thru the middle of the sign, also where the trays might not have been butted up too well, or have somehow moved apart over time, the same result occurs, in anticipation of this possibly happening, i matched the colour of the vinyl seen on top, on the upper lip which slips into the other panel, this way if the sign ever moves apart (got knows how), then the same colours will show, as opposed to a dodgy white line !
i’ll post the completed job when it’s up and fitted, the pics, again, are the camera phone, so not brilliant !
well i think that covers it !
for now !
ps, had to make a new workbench for this one ! 2x 12mm shuttering ply, 2x 4.8m 50×100 timbers, one tressle and a patio table !
Attachments:
 Hugh Potter replied 18 years, 7 months ago 17 Members · 37 Replies
 -
37 Replies
-

Nice one Hugh 😀
Question is – how are you going to transport that sign to the site for installation in that three wheeler Reliant of yours 😛 😉
-

Hugh, looks good, and a very helpful walk through.
Just a minor issue, the timbers twixt the top and bottom rails, that I suggested, were meant to be a temporary spacing aid, and to be removed, before fitting the tray, dont really think it matters if they are left in situe though,
Peter
-

ah! phil,.. where there’s a will there’s a dead relative, ooops i mean ‘a way’ ! ..we just bought a toyota lucida, big enough (just) to get 8×4 sheets of ply in 😀 , so it should manage these, the scaffold tower i’m hiring might be a different tale though !!
Hi Pete, i hadn’t decided whether or not to leave it in or not, but i think (based on your comments) that i’ll screw it up, take it off again, remove the frame, and then just put the rails back using the screw holes as my guides, took about 2hrs to make the frame (amongst phone calls and setting the plotter going again) will easily save that in installation time now, the pan sign is drilled ready, so all i have to do is offer up the sign, drill thru the hole and thru the rail, and rivet it in place, 😀
-
Hugh mate, the idea is to use the timber as a spacer, screw the aly to the wall using knock through plugs, then remove the timber, or not as the case may be. no need to remove and refit, just fit once.
Peter
-
the way i’ve made this one, it’ll have to come off again to take the screws out that hold the timber on, will only take 20 mins ! it’s gonna take longer to get the scaffold up and down than to fit the sign !
the next o i do, i’ll consider easy removal first !
-
Ok I see what you mean the timber spacers should have been fixed with screws into the end grain, that way they are just removed after fixing the frame, not with the screws from the wall side. Sorry for not explaining a bit better,
Peter
-

Very nice hugh. To stop the sagging in the middle during application couldn’t you just use timber like you have used in the frame to stop it sagging and keep it flat?
-

Good one Hugh.
I always get my ali composite cut on all edges to get a nice tight butt joint, otherwise the factory edge can be a bit bevelled.Where do people get ali angle for the frame from? I have a local supplier but they are a bit dear.
-
Pete, i realise my mistake in the frame’s construction now, won’t happen again !
Andy,
i’m not sure of the best place to get the ali angle, i have bought it from various metal workshops before now, but price varies between "give us a tenner mate" to "that’ll be £18 + vat mate " (fill in yer own prices !)this pan came with the rails ready fitted, and a neat little tongue / groove on either end (where it joins) so it holds it firm.
jxuereb tried that, but only had enough timber left to support the centre, which, i may add, i thought would be enough, but the pressure of the squeegee simply bowed it either side of the timber, it was ok where i realied it was happeneing, but that was after half a sheet was already laid down 😕
thanks all.
-

Hugh nice to see I’m not the only one with less than ideal working conditions 😀
Good job mate, looking good, did you say you are going to rivet the tray to the angle ? why not use self drilling sheet metal screws. . they are expensive but save a hell of a lot of time, no pilot holes no pre-drilling nada ! Get the hex-head ones and they look nice without caps too !Make sure you post some pictures of the finished job !
-
 quote Andy Gorman:Good one Hugh.
I always get my ali composite cut on all edges to get a nice tight butt joint, otherwise the factory edge can be a bit bevelled.Where do people get ali angle for the frame from? I have a local supplier but they are a bit dear.
Andy,
I have a friend who has a metal working shop. They keep all their 3mm ali off cuts and bend them in 35mm and 50mm angles for me. All different lengths but that is fine as they fit different tray sizes. They only charge me for the bending as the metal is being thrown anyway. It is really cheap and the supply is endless!Nice job by the way Hugh. Glad it seems to have worked out for you. Looking forward to seeing it installed.
Peter
-
 quote Andy Gorman:to get a nice tight butt .
nothing better Andy!
sorry……. am I on a different subject here?
-
Oh dear…once again what started out as an intelligent debate has been dragged down by Marcellas debased mind 🙄 😉
-
cheers Dave and all, space is a premium in the workshop, i’m gonna move the small bike shed that’s next to the workshop and build a covered / enclosed area for storing alot of stuff that gets in my way in the workshop, everything has it’s place, it’s not disorganised, just crammed to the rafters… literally !! too much fishing gear and other stuff in there,
regardless of that, any thing over about 9×2 usually gets done outside as it gives me more room to work around it, the bench is actually 12×2’6", but the app tape dispenser is one end, and the pc and sound system the other !
i had thought of using the self drilling screw things, i bought 100 to get a better price when i used them on another job last year, i still have about 80, so may well use them, just wasn’t sure they’d look too good on the underside, might just use them on the top if there’s space for the drill.
back to the job…
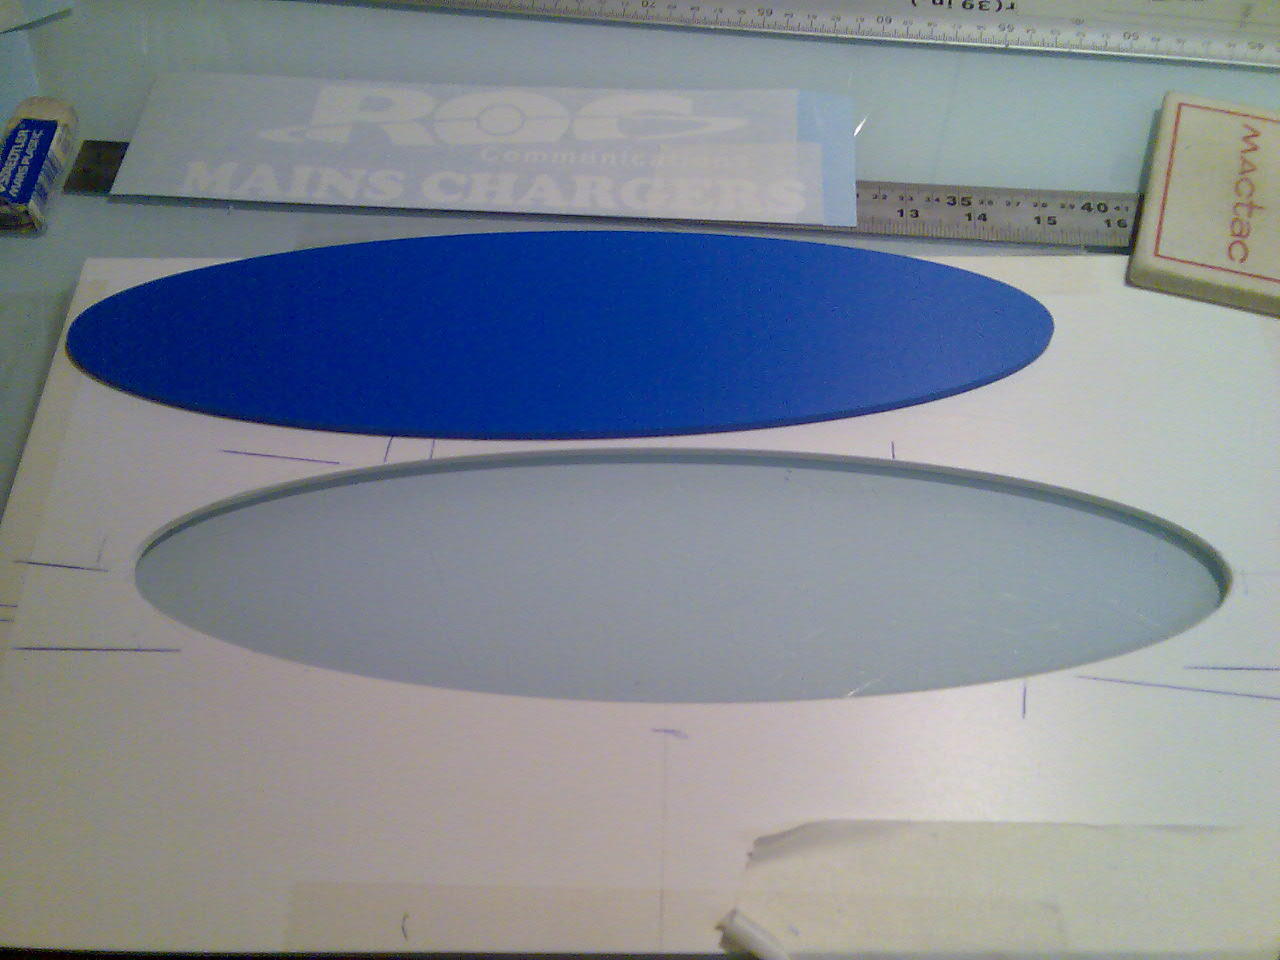
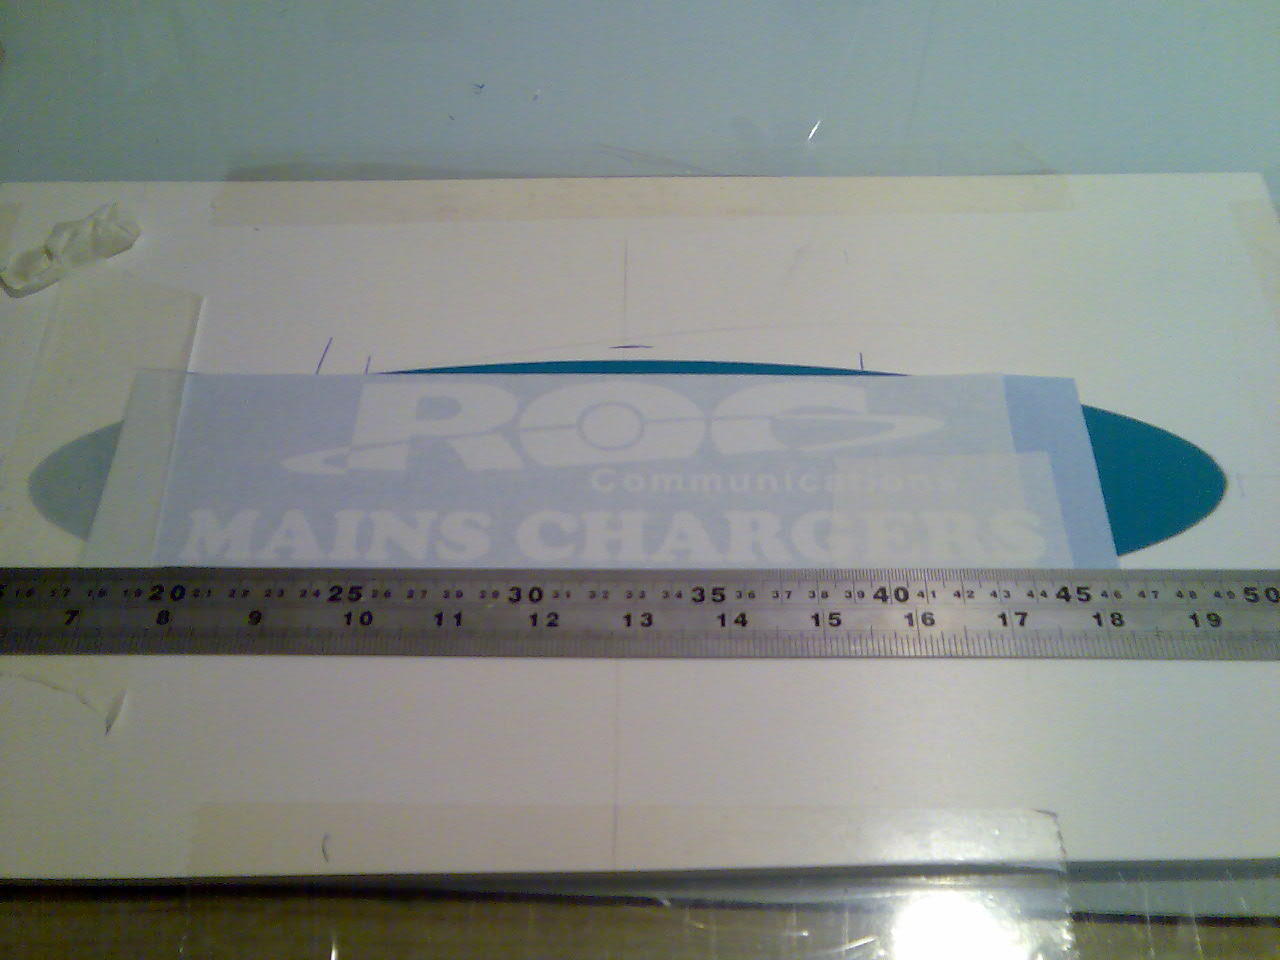
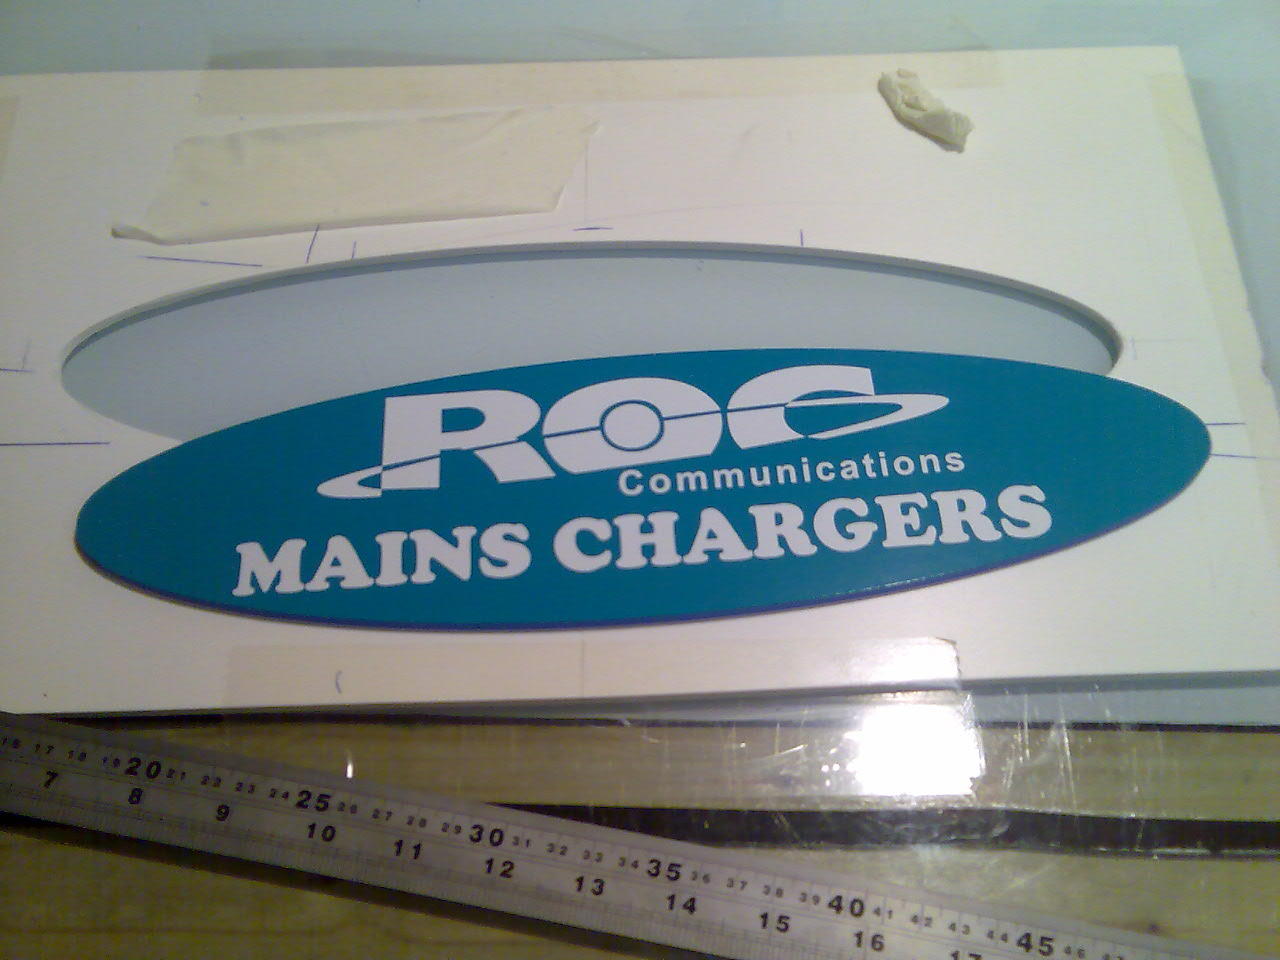
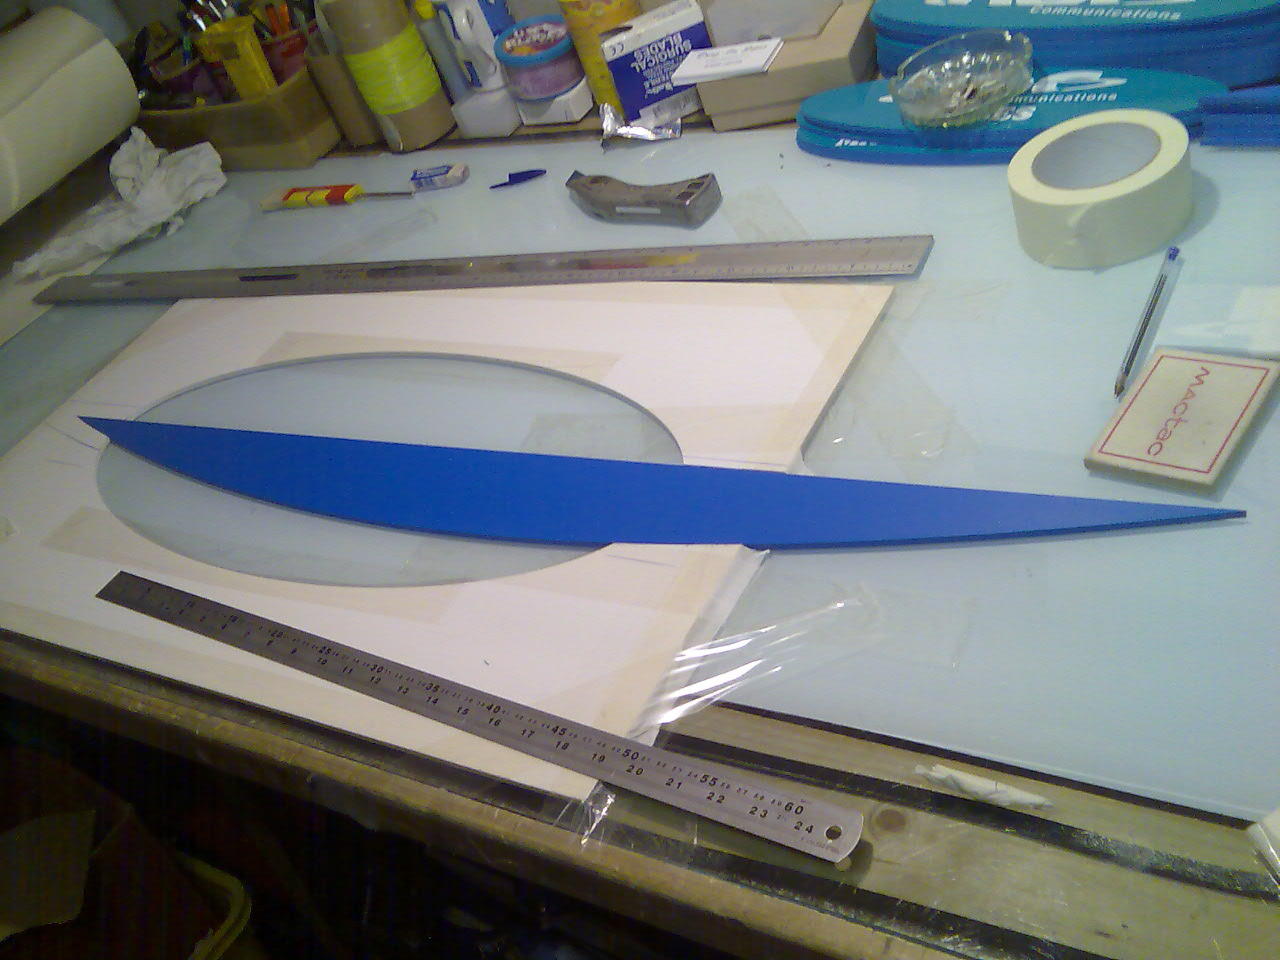
below is some more work i’m doing for the same customer, lots of internal stuff, it’s a pain really, lots of small logo’s etc, when i had the foamex shapes all cut (i used GDI in uckfield on this occasion as they’re local, a nice quick and friendly service if i may say so.), i asked them to cut me a negative of each of the sizes so i could use them as a jig, to ensure the logo’s all went on in the same place,
i’ll post the pics below, with a brief description, as i feel it may be of some use to others if they have to do the same, i hope so, it certainly made my life alot easier !
i’m quite looking forward to installing this main sign now, wasn’t keen when it was the dibond / frame, but this seems a much better proposition for both the customer, and myself, i’ve just heard the lease still hasn’t been signed, so it looks like it’ll not be fitted this weekend as planned now, but i’ll defo post pics then it’s done !
thanks again all,
Attachments:
-

nice job tackled once again hugh……take my hat off to you time and time again….you sure make good use of the boards…well done 😀 look forward to seeing the sign finished 😉
nik
-
thanks Nik, i’ve really enjoyed this past couple of weeks, i’ve had a chance to put into practice a few things learned from the boards, as well as doing several firsts. i really can’t express how much the site, and it’s users, inspire me to keep bettering (or at least trying to) myself on each job. i still lack a little confidence in certain area’s which i guess is natural, but i always try to follow advice, generously given on here, and always seem to pull it off ok !
i’ve got loads going on (for a change), in two weeks i’ve done banners, flags (my first !), car (first using prints), a van, shop signage (no pics yet as customer fitting), this pan sign, another first for me (among a few others), and no end of designs/quotes etc. i’m getting alot of repeat work, and plenty of reccomendations too, which is a real confidence booster, ‘"sorry, i can’t make that"’ is a phrase i rarely use now, and at last it seems the new kid on the block is being taken more serious by customers !
it sure is nice to be busy (though damned tiring!), and nicer still to receive positive comments from those i consider my peers, thanks all once again.
-
Hugh, that was a very nice post. 😀 i agree, I’ve got loads of advice and tips from this site that I too have benefited from. And as you, ‘no I can’t do that’ is said far less.
Keep up the good work, great to see someone so inspired 😀 -

you’ve done well mate. thanks for taking the time to post this
-

Nice one Hugh, don’t forget to post the pics after you’ve installed it!
Quick tip for anyone thats interested, if were doing ovals (or any shaped sign) the contour cut/weed line is made to the same dimension. A wee bit more care is needed when cutting after weeding but it save loads of time… if you don’t happen to have a nice ready made jig!!
-

possibly the best job i have seen you posting Hugh, well done mate.. your doing good.
nice informative post, as has been said also…
thanks for taking the time to post your work mate. -

Good stuff,
quick question, is it best to have ply backing board on the wall first before doing any sign tray, or only if the wall is not too flat.
-
thank you Rob,
your comments, and those from others, are very encouraging 😀
-
quote Alistair Richards:Good stuff,
quick question, is it best to have ply backing board on the wall first before doing any sign tray, or only if the wall is not too flat.
the existing sign (yukky correx) is already on ply which is fitted to the facia, so i’ll be fitting it directly onto that, i’m gonna take a couple of sheets just incase it’s not very sound though !
if the wall was flat (brick etc) then i would go direct onto that.
-

Good work Hugh it is really good to see someone come and stick at it ,your work is getting better all the time, I’m sure there have been times when you thought of packing it in glad you didn’t I bet your glad as well 😀 and I like the way you explain what you are doing and why, I think that helps a lot of new people.
Lynn
-

Hugh, great post. Its nice to see how someone is progressing with their business and the type of job they are prepared to take on as it helps everyone who is starting out to see what you can achieve with a bit of hard work and some sound advice. Great to when they document it like you have so others can see how you progressed the job.
I would think that this sort of post is also good for the experts that post all the answers to our questions as well because they will be able to see that their help is appreciated. Look forward to seeing the finished job. -
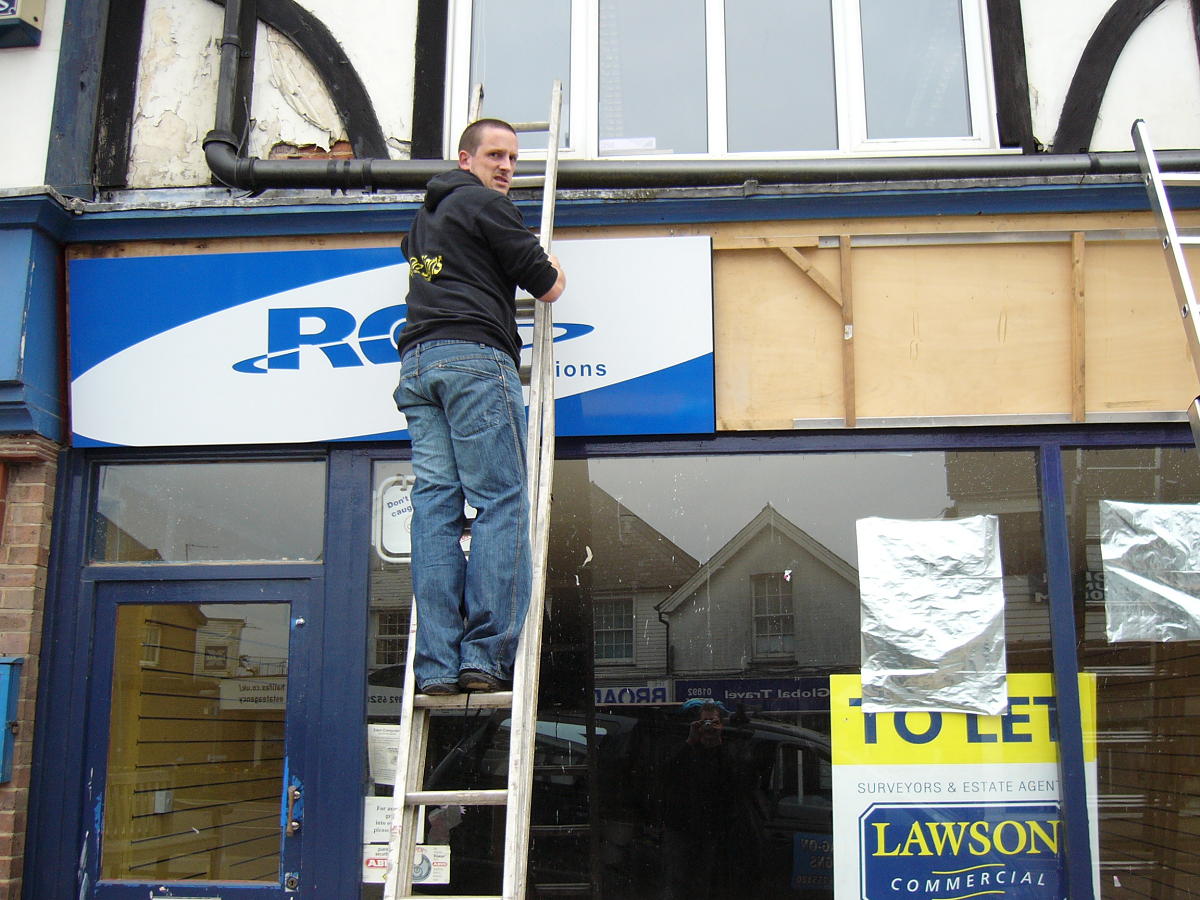
phew, thought it would never happen, got a phone call on saturday, last minute of course, could i fit the sign today as they’re opening thursday, "gladly" said I !!!
meant i got the full price for the job 😀
grabbed a couple of ladders, and a lad who words for a firm i sub to now and again, and headed off, (all fitted in the lucida by the way !) to start the job around 5:30 this evening.
we had a few initial probs, we removed the awful correx sign, to discover a nailed on foamex sign behind it, guess who’d left his claw hammer at home ?
😮 lots of heaving saw the brittle foamboard break off, and the nails that didnt come with it were hammered in with………….. pliers !!i’d allowed 50mm all around the sign, which was to be painted, i did this cos we weren’t sure of the condition of the ply behind, didnt want to fix onto possibly rotten edges ! it’s lucky I did this as there was an overhang above the sign, we mocked it up and could clearly see there was no way to get a drill to the pilot holes to drill holes for the rivets in the angle, not even room for the rivet gun !
to get around this, we left the timber frame in place, then we removed the screws from the top of the frame, hung the sign on it in the right place and pulled it away from the wall, then drilled the holes, and did the same with the other half to get the positioning right, once done, the frame was fixed back to the facia, the pans fitted back up into position, and using pipe grips (all i had to hand) i wound in some self drilling tappers into the top holes, phew ! big sigh of relief at this point, the bottom was fixed with plain pop rivets, then the window vinyl stuck on,
including a fag and coffee break, aswell as a little head scratching, i would guess it took us a little over 2hrs to complete the job, customer came back from the wine bar up the road just in time, gave me the cheque, and two happy sign fitters headed home !!!
sorry the finished pic is a little blurry, will get a better one when i take the finished hanging sign up to fit, should be painted then too !
Attachments:

-
out of interest, had i made it to the exact fascia size, how on earth would i have fitted it ? ie fixed the top ? we did consider shooting to the diy store for some gripfill stuff, but i remembered packing the self tappers just in case ! glad i did.
-

just being nosey hugh….
did you use treated timber for this job ?? if i had a penny for every rotten wooden backing fix ive had to tear down and replace id be a rich man. id say its always using treated timber for anything external – no matter how large or small ….
overall Hugh – great job pall, you should be proud of yourself mate, keep it up..
roffs
-
thank you for the comments Roy,
on this occasion i used regular untreated timber, the frame was not meant to be part of the sign originally, the angle is screwed to the fascia, so its supporting the wooden frame and sign, if the wood goes bad, the angles are still there. Point taken though,
-
Well done Hugh. Good work as usual 😀
quote Hugh Potter:out of interest, had i made it to the exact fascia size, how on earth would i have fitted it ? ie fixed the top ? we did consider shooting to the diy store for some gripfill stuff, but i remembered packing the self tappers just in case ! glad i did.Good question Hugh – and I don’t know the answer apart from fixing through from the front (which you obviously want to avoid).
Perhaps some kind of raised lip could be built into the top rail (to prevent the panel from slipping back off) allowing you to slip the panel over then rest in place – then all you would need would be a series of fixings along the bottom rail.
-
quote Hugh Potter:out of interest, had i made it to the exact fascia size, how on earth would i have fitted it ? ie fixed the top ? we did consider shooting to the diy store for some gripfill stuff, but i remembered packing the self tappers just in case ! glad i did.
Hugh,
sign looks good, but…
Iwouldn’tt have used a tray in the first place, as the 3d effect isnt needed, but as you did, you could have made it almost the full depth, and held the top edge in place with wooden or plastic beaading, same colour as the surround. Screwed or even pinned in place, so the tray could be removed and reused in the future,
Anyway mate, you done good.
Peter
-

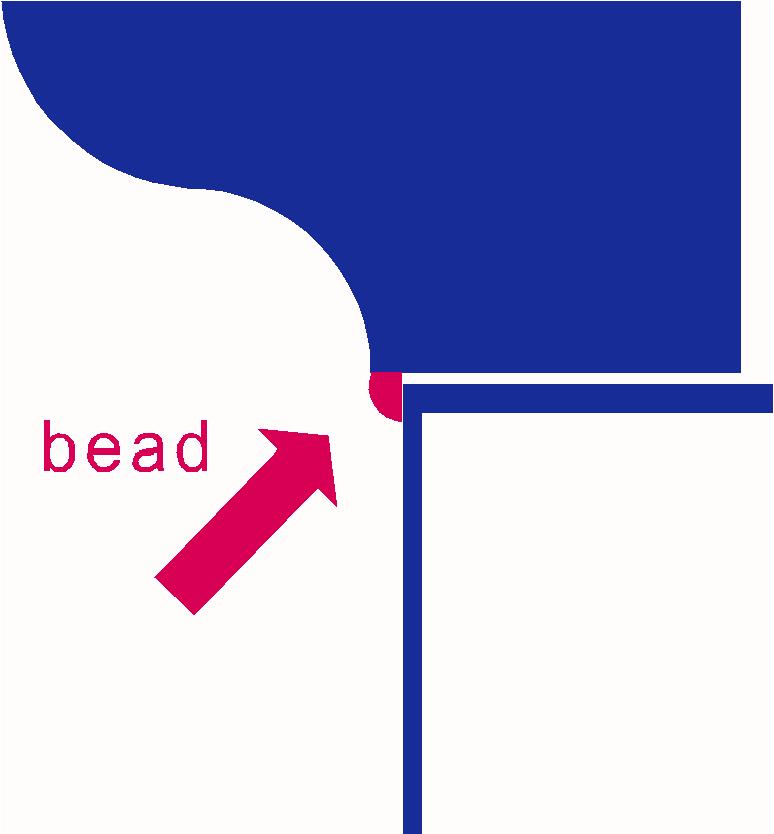
Well done Hugh, looks good mate.
Better when wood is painted above tray.When you can’t fit a top angle bracket to get a perfect fit, you would make the tray with a folded (approx 20mm) lip as per quick knock up diagram below.
You would just need an angle bracket for fitting bottom and screw through the upper lip stright into backing at top.Hope that makes sense
😕
Attachments:

-
my suggestion Hugh,
cant tell from the pics if it was doable though
Peter
Attachments:
-
Nice looking job Hugh, once the painting has been done I dont think it will really notice that the tray stops a bit short but as has been posted you now have a couple of options for fixing the top of the next one. Looks like you have done an excellent job with the join between the two boards which is one place that a lot of sign companies seem to let themselves down.
-
thank you for all the comments, and the useful tips,
Peter, in this instance i don’t think i could’ve held it up with the beading, assuming it’s the beading that stops it falling forward, the moulded wooden overhand above was very old, and very rot,
the customer specified a pan sign, up til then i was gonna use a frame, driving past it today, i think we made the right decision, it stands out really well against all the other shops.
i think had i given it a little more research when viewing the place (difficult without the ladder), then i would’ve asked before hand, i think Martin Cole’s (thanks martin) option would’ve been the best option. certainly something to consider next time,
another thought we had, while discussing other options today, was to make the angle with keyhole style holes at the top, mark it out on the fascia, and hang the sign on them, fixing the bottom as per usual,
Martin, thanks for the comments regarding the middle, this is something i wanted to be sure would look right, even if the sign somehow parted in the future, to avoid this (other than getting it right at the installation), i wrapped the vinyl around the ends and over the locking lips, thus, colour will run consistently with the design if the worst should ever happen.
-
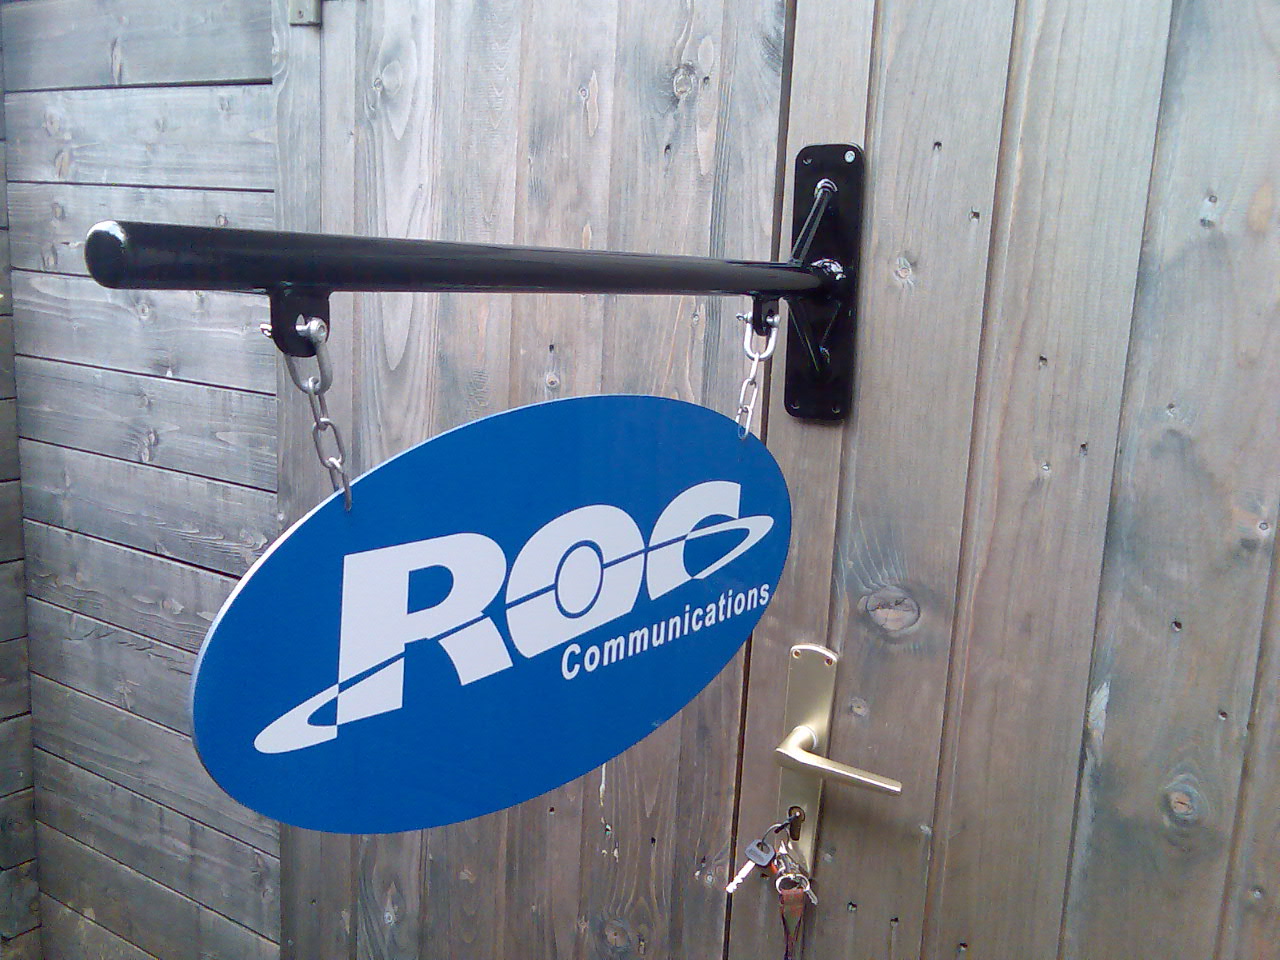
got to fit the projecting sign tomorrow, had to wait for it to be made by a local metal workshop to my design, also here’s some of the internal stuff i had to do for them,
looks ok i think !
Attachments:


Log in to reply.