Home › Forums › Printing Discussions › General Printing Topics › Photo splits?? on canvas
-
Photo splits?? on canvas
Posted by Michael Hartley on 20 December 2010 at 01:52I don’t even know if that’s the correct terminology for them. It’s when you take a large photo, and make three or so canvas prints out of it, and hang on the wall making a large picture, split into three sections.
Anyway, my sister told her friend I could make them for her. Well, how does one go about setting up this type of print? Can it be done in Corel? Do I have to have PhotoShop? What’s the correct name of this style of printing? Does one set it up in the RIP?
Maybe someone could point me towards a tutorial, or I could search if I knew the correct terminology. I get alot of different stuff when I search for photo splits, and most of it doesn’t have anything to do with printing. I’m just looking for a little guidance before I go experimenting, and wasting a bunch of canvas. Thanks Mike
Mo Gillis-Coates replied 14 years, 10 months ago 8 Members · 17 Replies -
17 Replies
-

I dont know what its called either!
but its easy to set up in the rip or your photo editing prog. you need to tile the whole picture with panels the size of the separate sections plus the "wrap around" for the frame. then just print these tiles. to make the overall array you need to place the parts on the wall in the same position as in the original.
If the overall size off the picture is less than your printer width, then you can just print the whole picture and manually cut to size after placing over the frames to get the correct spacing.Hope this helps
Peter
-

Hi Peter, I think tiling is the way to go taking into account overlap. I think (but may be wrong) that if you just print the whole image in one you will not have extra for the overlaps? If I am making sense.
Otherwise yes, agree with Peter, we would tile to the size of each individual stretcher and bleed a little of the image as excess to fold around the sides of the frame.Peter
-
Hi Peter
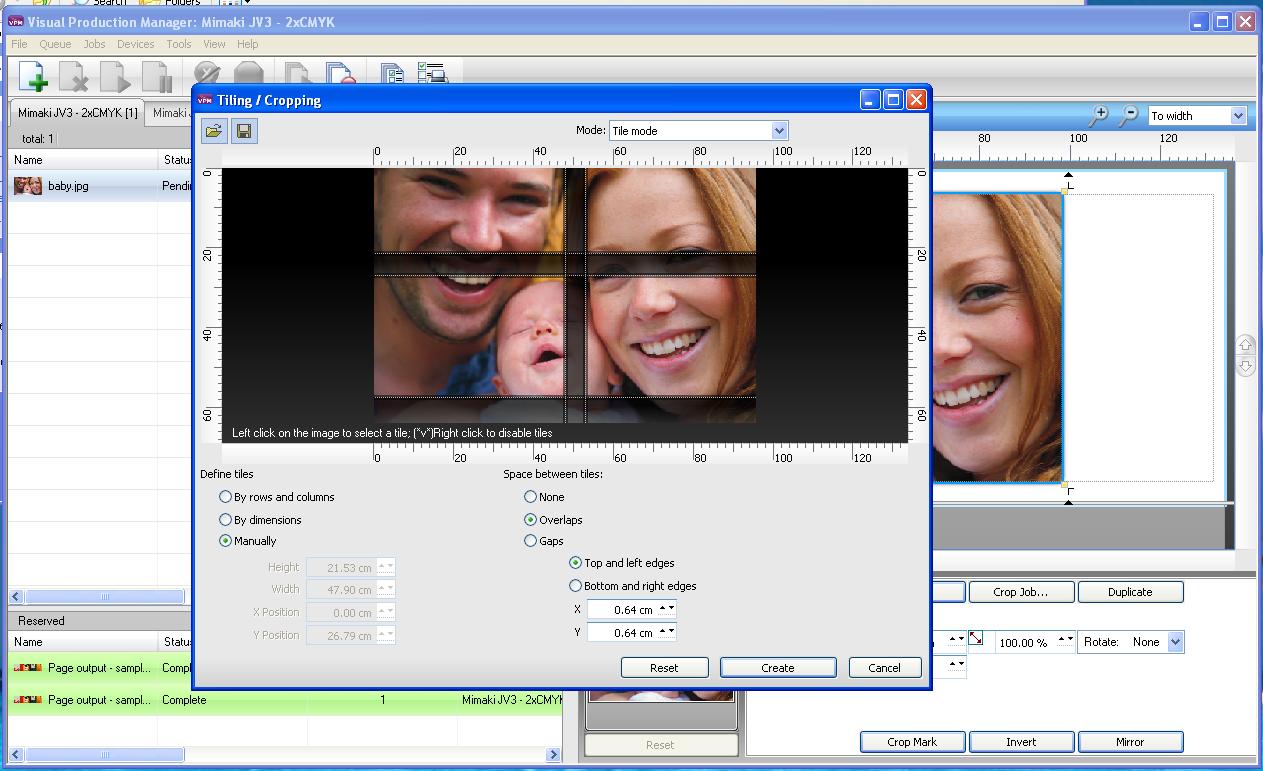
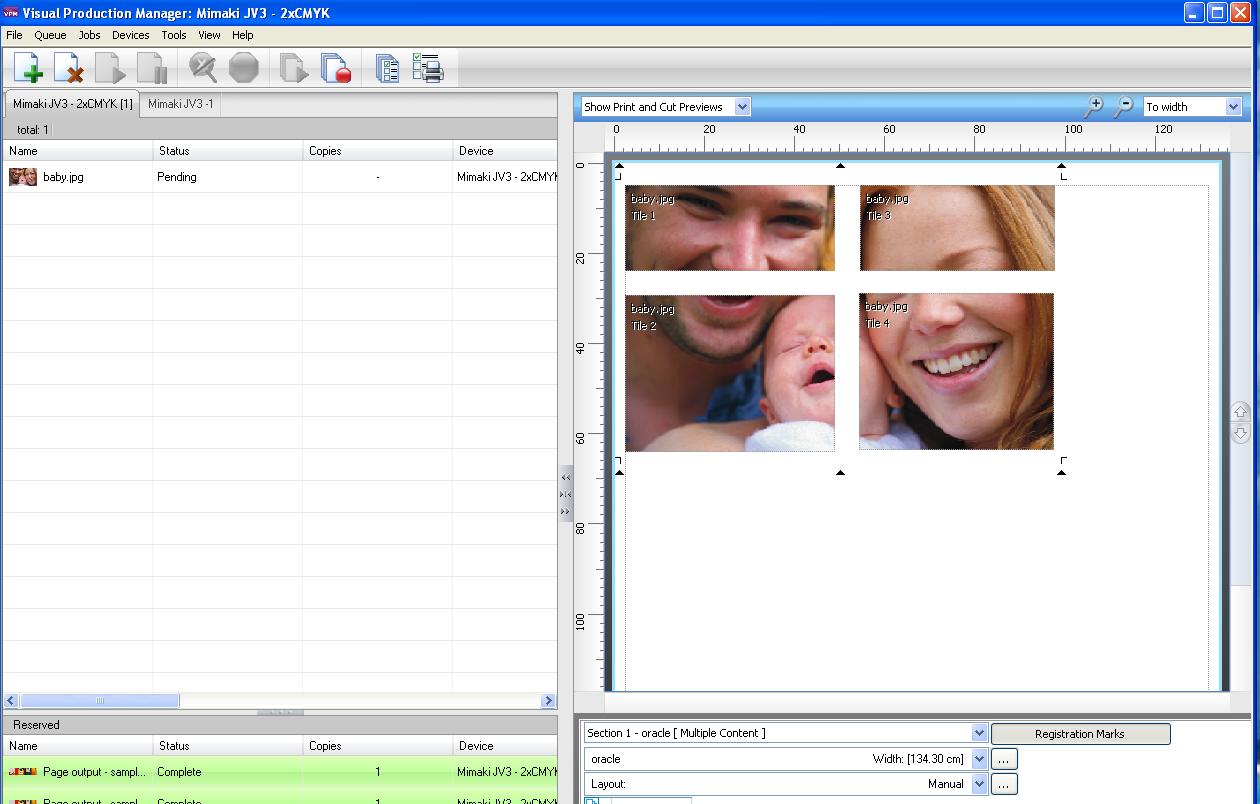
it depends on how much gap is between the individual frames.
I have attached a couple up screen shots which may help.
Thing to remember is that you need to remove the part of the image that falls into the gaps, not just move the tiles apart after printing, otherwise the overall image will be distortedPeter
Attachments:
-

You’re totally right about leaving gaps between the image, just a warning though that I’ve had at least two customers who ordered a split set (3 & 4 piece IIRC) and returned them as ‘bits were missing’.
I re-printed them how they wanted & the one that came to pick up finally went away with the original after seeing them side by side….. (:)I’d definitely supply a proof for people before hand to avoid this, especially if you don’t have an example image on your website.
Did I mention I hate canvasses?
-
Thanks all. I’m thinking this is gonna run into a long winded math equation to get the picture to wrap around the frame, and still look like a whole photo when put side by side. Still don’t know what it’s called. I’ve got some old vinyl I think I’ll experiment with first. Thanks Mike
-

are you using proper gallery rails or the thin Mickey mouse stuff.
good job i didn’t read this before i did the last set.
-
chris
I add 70mm for gallery rails, enough for the return, and to fold round, but add more if you are not certain.
Its not rocket science to calculate the space between the panels and allow enough free canvas for it, my main point was the method to tile, to remove the part of the image, that is in the gap, and not just to separate
Peter -
thanks pete i have not got a problem, i have done 2 triple sets and a 4 set and quite happy with my method, just don’t understand printing a gap. as the image that’s missing becomes the space between the panels.
to keep it all optically correct.must be one of life’s little mysteries.
enjoy
-
Just re-read the thread & I don’t ‘remove’ the part of the image that’s missing from a head on view. It’s actually duplicated so that on each side of the gap it’s the bit wrapped around the side. That way, when you look at the image off centre you effectively see the full image with no gaps.
Does that make sense? 😕
Just print each separate with a big enough overlap between the tiles to give you enough to wrap the image all the way to the back, no single colour fills for the edges.
And got to use min 38mm bars for it to look in any way decent, the thins ones look terrible.
-
quote Michael Hartley:I don’t even know if that’s the correct terminology for them. It’s when you take a large photo, and make three or so canvas prints out of it, and hang on the wall making a large picture, split into three sections.
They are called tryptic when you split a photo into three sections.
There is a photoshop plugin that can automate this, but i cant remember what its called.
There is also another plugin that can do gallery wraps made by onone software. -
Well, I don’t have PhotoShop, so I’ll have to do it in Corel. I messed around with a few different things yesterday. Did some power clipping, and some cropping to get the 1.5 inch edge all around. But, when I put the edges on the picture, it left a noticeable joint line. It may not show on the mounted frame, I don’t know, since that should be where it bends on the bars.
I’m planning on using the Hehehulimie, whatever stretcher frame kit, since I’m not using MY money, and it seems pretty neat.
I’ll mess around with it some more, and Thanks for all the help. And Thanks Andy for putting a name to it. Triptic, works for me.
Ya’ll have a GREAT Christmas. Thanks Mike
-
 quote Andy_M:They are called tryptic
Triptych is 3 panels and Tetraptych is 4 panels. It refers normally to a work of art or carved panels rather than a photograph, but what the heck, it’s Christmas :lol1: .
-
Ok i could not remember to spell it correctly 😳
Also diptych refers to 2 images
-
Do ya think those PS plug-ins would work with PS Elements? If I make any more of these (of course after I get these printed), which I’m thinking about, I’d like to have a more automated way to set them up. I could possibly swing the Elements, but can’t do the master program right now. I’ve got this old Epson printer sitting here, and it doesn’t need to be sitting. It prints about once a week. Needs to be printing something everyday. Thanks again. Mike
-
quote Michael Hartley:Do ya think those PS plug-ins would work with PS Elements? If I make any more of these (of course after I get these printed), which I’m thinking about, I’d like to have a more automated way to set them up. I could possibly swing the Elements, but can’t do the master program right now. I’ve got this old Epson printer sitting here, and it doesn’t need to be sitting. It prints about once a week. Needs to be printing something everyday. Thanks again. Mike
Yes i believe they do, but you would need the V6 plugin for gallery wrap, its called genuine fractals pro which works from PS elements 4 onward.
-

Hi Guys, the word you are looking for is "TRIPTYCH" we do a lot of this, and your right when you get your head around the overlap it’s easy enough.
The best way of doing it is to use layers in photoshop just duplicate the layer untill you have 3 of the main image, then crop your first image in allowing for wrap around (gallery is usually 38mm I allow 3.5 inch for both sides and enough to go around the back of the frame by half an inch) then on the second layer set the transparency to about 75% just enough so you can see the image underneat and then crop this with an overlap on the first of 1.75 inches (or mills if you prefer) and rinse and repeat for the last image, obviously overlaying on the 2nd image.
Once your done, reset the layer transparency or "opacity" I should say, back to 100% and separate the layers into 3 different images (best way to do this is to hide the layers you don’t want and then crop down and save it as an image on it’s own)
Job done! Don’t forget to leave some blank border to allow yourself enough to stretch the canvas around each image.
Clear as Mud?
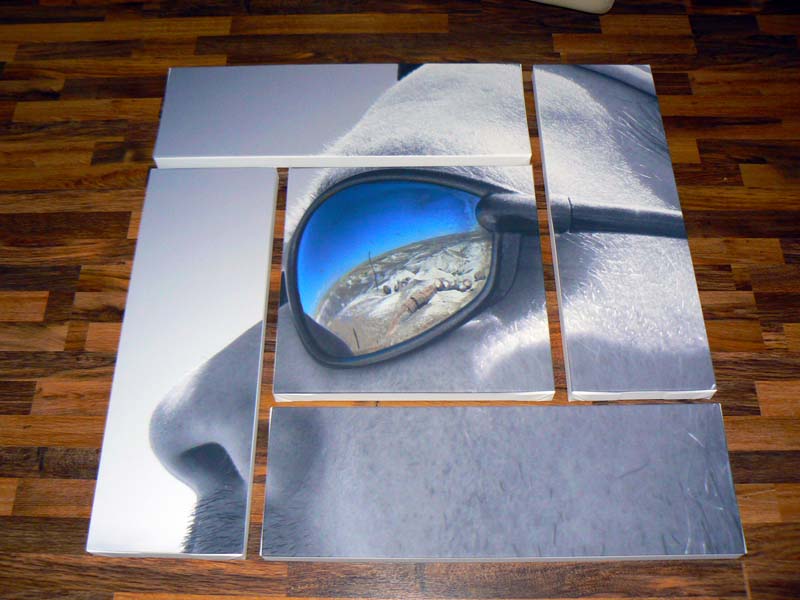
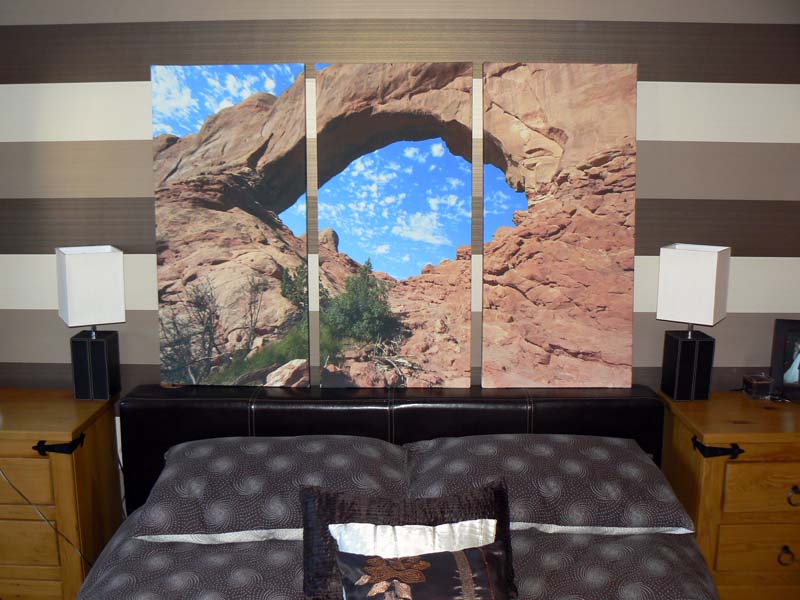
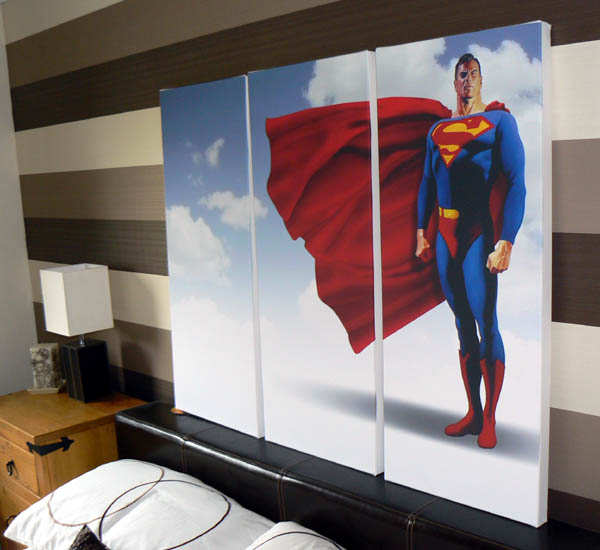
Here is a few I have done…..the easiest way is with white boarders
Mo
Attachments:

Log in to reply.