Home › Forums › Sign Making Discussions › Vinyl › Applying vinyl to corrugated shipping containers.
Tagged: container, corrugated, shipping
-
Applying vinyl to corrugated shipping containers.
Posted by Ewan Evans on 10 June 2016 at 23:34Has anyone applied vinyl to the sides of corrugated shipping containers before?
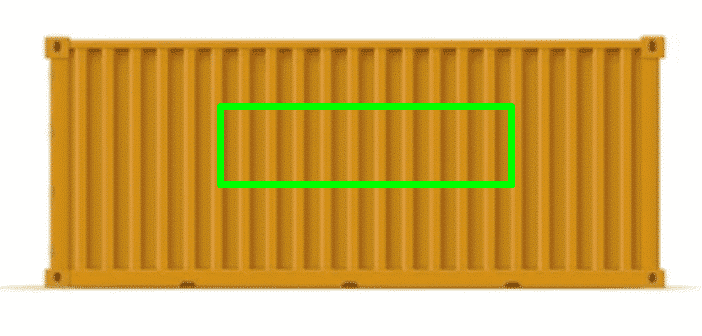
The decal will be approximately three metres long.
Will Oracal 751 vinyl be okay, or will I need to use a higher-quality vinyl?
I want to apply it as normal, then heat mould it into the recessed areas if possible, as I don’t want to lose any overall length.
EwanMartyn replied 3 months, 2 weeks ago 7 Members · 16 Replies -
16 Replies
-

1, Apply flat, slit each section and inlay a patch. it is the simplest way with no real adverse effects on the media pulling from the recesses and even if its a brand new gloss finish container, you’re very likely to get a fail.
2, Another way to do it is create the text and add 25%-35% to the length and start from the middle and inlay the media in and out of each recess.
3, create the same as option 1, but in cheap stencil media. once complete. use a short hair (not foam) 4" roller and paint in the letters, then strip off the stencil leaving nice sharp letters.
there are multiple ways of doing this but option one is easiest i think. just all depends on the quality of finish you are after. but at the end of the day, we are talking shipping containers.
-

Like anything, it depends what they are painted with.
I had a few to do for a building company, but ended up signwriting them by hand because the vinyl wouldnt stick to the surface, so do a test first.
Assuming the vinyl will stick, you would be best off distorting the image to take into account the recesses so you cut it a bit long, and then pushing it in as you go for minimum stretch. Those recesses are quite deep on many containers.Simon
-

Thanks Robert and Simon,
I had thought about the methods you both mentioned. I was going to apply it the way Robert mentioned as the second option but this job needs to be as close to perfect as it can possibly be as it’s for a prototype. If done properly it can land me a rather large contract so I was hoping for a vinyl that wouldn’t pop from the recesses or distort when moulding into them.
I don’t think there is going to be an easy solution with this one 😕
Ewan
-
quote Robert Lambie:2, Another way to do it is create the text and add 25%-35% to the length and start from the middle and inlay the media in and out of each recess.
It is closer to 5%. Surprised me too. 😀
-
slitting and trimming at the edges of the base will hide the join of the patch. still followup with a heat gun and rub down firm. 751c will do this no bother. the surface does need to be spot on.
at the end of the day, doing loads of them is great, but not if your not getting paid well for the effort. -
Thanks Robert,
If the first one goes to plan I’m getting paid very well for my effort.
Ewan
-

To ensure the overall length remains exactly as it should while folding it (not stretching it) into the recesses you need to distort the graphic as Rob has already said. To avoid guesswork and ensure it is absolutely spot on do the following:-
1/ Measure the distance between two corrugations ensuring the start and finish points are at the point where the pattern repeats – call this measurement X
2/ Now measure across the same start and finish point without going into the recess (i.e bridging it) – call this measurement YCalculate how long the graphic needs to be to look undistorted after application multiply the actual length by X then divide this figure by Y
Done this way you avoid stretching the vinyl meaning it’s much less likely to fail, won’t distort, and you can use a more economical film such as 551
-
Thank you Phill,
I will go over and see the container and try to work this out. Is 551 any good? I only ever use 651 or 751 unless I need a wrapping vinyl.
I inherited a copy of your book last weekend while buying some materials that were surplus to requirements, it’s a good read :appl:
Ewan
-
551 is a 5 year vinyl – It’s better than 651 but is not a cast vinyl like 751. It’s what I would use on a job like this providing you weren’t planning to stretch it into the corrugations but fold it instead as suggested
-

We did one a few years ago. 30 foot x 7 foot and filled the whole area with one image. Used Metamark Md5 & lam. Treated as a wall paper job. Started on the right and folded the vinyl in to the corrugated sections and overlapped each section. Need to take your time to ensure vinyl goes in down the length otherwise it will run out.
Hope that helps.
John
-
Thanks John,
Metamark Md5 is my preferred choice of print media but I am in between printers at the moment. I defo think the best option is going to be as Phill and Robert have both suggested which is the same as you are suggesting but distorting the vinyl graphic initially so it keeps it’s original size.
Actually looking forward to doing it this way as I have never done anything like that before.
Ewan
-

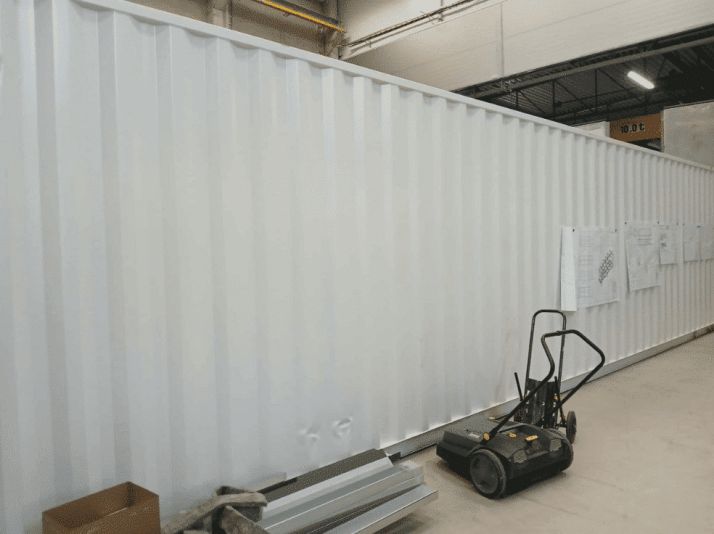
Hi guys, bringing this old post back to life as i have 4 containers to add logos to.
Is there anything anyone can add since 2016? or are we with much of the same ideas.
I was looking to start from the middle and work either way, looks like i would need to stretch the logo to make it look right, somewhere between 5% and 25%?
I was going to use a cast/wrap just to be on the safe side assuming the surface is good. Failing this a good polymeric.
One issues not spoken about is keeping the graphic inline as your fitting, with a 5m logo i can imagine this will be tricky especially on my own so maybe a 2 man job.
TIA
-

Hi Martyn
If you have access to the container.
A simple way is to…
- Size a rectangle on your computer screen to simulate the container.
- Put your logo or your text on the side of the rectangle.
- This will now give you the distance in from each side of the container to the logo.
visit the container and…
- Based on your computer sizes, measure in from each side of the container and put a mark where the logo starts and stops.
- Using masking tape, start at the left mark, and feed the tape in and out of the container recesses until you reach the next mark.
- Carefully, take the tape back off, stick it to the side of the container straight out. (no recesses)
- Now, measure the bit of masking tape, and it will give you the width that you need to “stretch” your logo to be able to go in and out those recesses without shrinking.
Once you have manufactured the logo at the new stretched width.
- Tape it onto the container, and working from the centre, apply the logo in and out of the recesses, and you will achieve the same distance/outcome as you did with the masking tape.
Note:
Pricing jobs like this should be done based on the “stretched” logo size, not the computer visual size.
-
Excellent reply rob, that’s everything i need. much appreciated mate 👍
-
Just an update – so the job in question on this thread was…
x4 of these white containers, which are scheduled to be done next month; however, as chance has it, another job came through the door, the black container, which I did yesterday.The stretch was very little, around 5%.
Material used was printed mactac 9700 – a good polymeric.
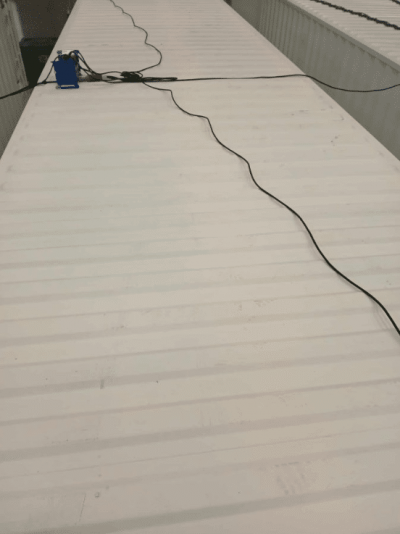
Now on these up and coming containers (for a different customer), I am planning on using Mactac 9800 – a good polymeric on the sides, but am questioning the roof as it is less “finished” than the sides, it is a matte finish and will have much less lifespan anyway, being on a horizontal.
I’m considering upgrading to a hi tack?For both these jobs, I was going to use a wrap, but I decided these sides are not so aggressive (30% angle) and opted for the polymeric based on past projects. I hope my decisions are correct.


Log in to reply.