Home › Forums › Sign Making Discussions › Vinyl › Applying 3.3m length of Etch Vinyl by yourself best method?
Tagged: controvision, etch, glass, perforated, vinyl, windows
-
Applying 3.3m length of Etch Vinyl by yourself best method?
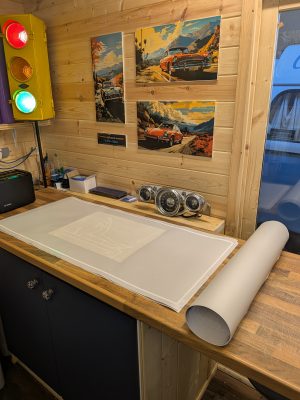
Posted by Carlos. on 27 October 2025 at 13:06Hey got a job next week with some large windows I need to apply a 3.3 m length by 610mm will use a 1.9m folding table then lifted onto the glass, I have done 2m length before wetting on the table then at full arms length transferred but 3,3m am I best to wet half and leave the rest rolled up and peel and wet on the glass or try and fold on the table? obviously dont want the vinyl to stick together or attract dust or risk a crease? any advice gratfully recieved, using Avery etch window vinyl? 🙂
 Kadir TAP replied 1 month ago 8 Members · 23 Replies
 -
23 Replies
-
-

its hard to explain this type of thing without showing. 😀
clean everything down and get it ready for applying the material. mark out the window. spray a light mist of water around the window frame and below it to help stop attracting any dust and static. be careful not to spray where you will put masking tape or it wont stick. heavily mask tape the material into place and then from one side as you remove the paper back, spray with water until you get to the other side. you should be able to lift and lay it until you want to start squeeging it. best of luck -

As Simon has said, air-release glass etch vinyl would really help speed up the application.
Couple that with the fact that the glass will be cold at this time of year and won’t stick well at all, a dry application should be relatively easy.Once you clean down the glass properly with isopropyl alcohol and make sure it has been blade scraped to clean anything on the surface. Make sure you also clean around the window frame and all around the sill of the window. This is to prevent any static dust jumping to the rear of the film due to static charge when you remove the lining paper.
It greatly helps if you roll the material face down and remove half of the lining paper by rolling it in on itself, then roll it back down, repositioning it on the etch again. This allows the paper to be removed much more easily without the possibility of creases or removing the centres from letters as you pull it out.
Using masking tape, tape the job into position….
lift one side and pull the lining paper out, cut away the excess while holding the vinyl and pull the vinyl down into alignment and start to apply from the middle, out towards the ends.
Like anything, it gets easier the more you do it, but I can’t advise you more to practice, practice… a window application like that would take you 20 minutes from cleaning, installing and walking away knowing there will be no come-backs.Wet Application:
I have never advised applying wet, but at the end of the day, you have to get the job done and make money. Again, due to the time of year, the glass will be cold and repel adhesion. Coupled with water and it won’t want to stick! It is fine getting the vinyl on and into place, even squeegeeing it down. But if you can’t get the application tape off, you will turn a 20-minute job into several hours!My tip would be to use RapidTac 2 application fluid. I think you can still get it from All-Print supplies.
It is a soapy water type fluid, but also has a chemical that stimulates the adhesive and helps it bond, even in very cold weather.Judging by your photo, you have graphics in the middle. “I think” you have double-taped them. The second layer will create a lip and won’t do you any favours when it comes to squeegeeing out the water.
You will also have to be careful that the second layer doesn’t separate once wet, while you’re trying to work with it.It’s always handy to mark the glass to show a line to work against. Masking tape on the outside of the glass helps do this because you can work away without worrying that it will come off by hitting it with your squeegee or the water taking it off, and it is easy to see. You just have to remember you have the thickness of the glass to compensate for when lining it up. Alternatively, use a chinagraph wax pencil or pen, marking it inside, but again, you need to be careful you don’t place the graphic over the mark, or you will trap it beneath the vinyl, and you are NOT getting it clean off, once you’re finished.
-

“My tip would be to use RapidTac 2 application fluid. I think you can still get it from All-Print supplies.
It is a soapy water type fluid, but also has a chemical that stimulates the adhesive and helps it bond, even in very cold weather.”I live in this world for 5 months of the year. Fitting graphics down to -10c. Everything about it is horrible.
Having used most methods out there including rapid tac, i can say adding 1 3rd Isopropanol to your slightly soapy water solution has the same effect as rapid tac.
-
Funny you should say that, Martin. I remember being out in cold weather, fitting graphics to a van.
I was cold and rushing the job. I wiped down the panel with Isopropyl and quickly applied a large vinyl graphic. But due to the cold and the vinyl stiffening up, I slightly creased it with a squeegee swipe, so I quickly snapped up the film, and it was stuck solid. I couldn’t get it off!
I didn’t apply it wet, but I think the cold had slowed down the quick isopropyl evaporation, and I applied it directly on top, causing a bonding reaction with the adhesive.
My point is, you could be correct with your assumption about your fluid mixed with isopropyl. 👍On a side note, from memory, Rapid-Tac 2 has the higher bonding or shorter wait before removal. Was it Rapid-Tac 2 you used or Rapid-Tac 1?
Regardless, though, I think you could be right with your Tip on adding it to your mix. I might test that out. It’s minus 2 here, just now. 🤓-
-2c, jeez that is cold for Britain. Yes it was rapid 2 and i was very pleased with the product, it didn’t cure cancer but made the jobs at least achievable which without was impossible. I didn’t like the price but it is what it is. Only reason i stopped using it is they no longer imported it into the country so having spent some time on fitting forums i came across this formula which is much cheaper and i feel does exactly the same. I really try not to be fitting in below -3c, that seems the turning point for the vinyl and my hands but on few occasions have had no choice but to get jobs done around -5c.
Winter sucks.
i still get clients asking me to come fit jobs when its -20c and they seem to struggle with the fact that stickers just don’t stick
-
-
-2c, jeez that is cold for Britain.
Im in central Scotland, Martyn. It could be mid-summer, and we’re frozen. 🤣
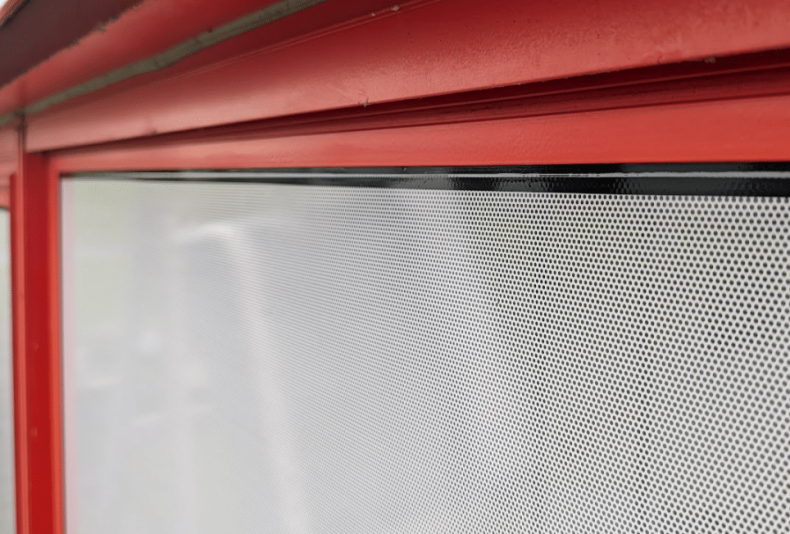
Ironically, we are in the middle of installing “external” Controvision, perforated vinyl onto windows this week.
170 metres x 1320mm, of it. Freezing cold, and it’s dark by 4 pm. we have just started the second floor, so working from a cherry picker now.
Great Fun! 🤨-

ohhhh fun.. don’t you find the contravision brittle as hell ?!!!!
-
-
Hi Colin
Yes, it definitely changes the material for the worse.
We have it laminated with an optically clear cast vinyl, so that greatly helps with the brittle side of it and general handling. But regardless, it does not eliminate it. Another issue is “kinks” in the film. Due to how the material reacts with the cold, a kink, even a small one, can become a real problem. A quick solution is a bit of heat, but that just swells the body of the vinyl. Now, if the rest of it is perfectly flat and fitted to cold flat glass, that little kiss of heat makes the area you applied heat to look like puff pastry and won’t lay flat, and if it does, its adhesion is weak and may lead to tunnelling of the material over time.There are many reasons why this application we are doing “should NOT be done”, and no matter what we do, the temperatures pretty much void your warranty. But I made sure the customer was well aware of this, because I quoted for the job in early summer! They have accepted all responsibility and ongoing costs for any unforeseen issues, or I wouldnt have even considered the job. But the customer is a massive company, and everything has been easy-going. So I can’t complain. other than the weather! 😀
-
i cant imagine fitting controvision in these conditions, i’m assuming you are doing it dry?
Its always nice when you quote a job during the summer with good conditions in mind, then they pull the trigger in the middle of January and its a nightmare.
How long do you expect controvision to last? its supposedly only short term use but done few jobs 5+ years ago and its holding up well although not in direct sunlight.
Also as recommended i normally seal the edges with clear mastic
-
-
Dry application.
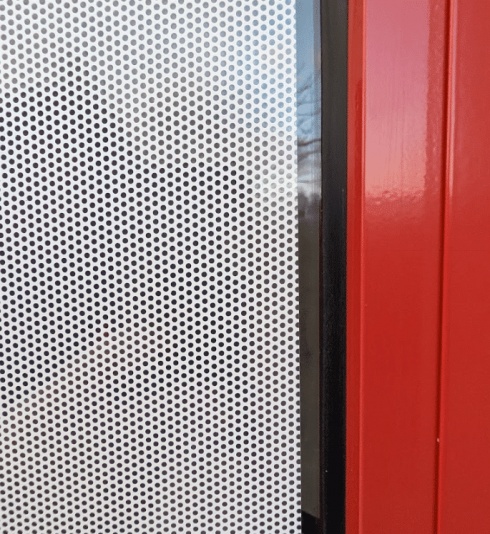
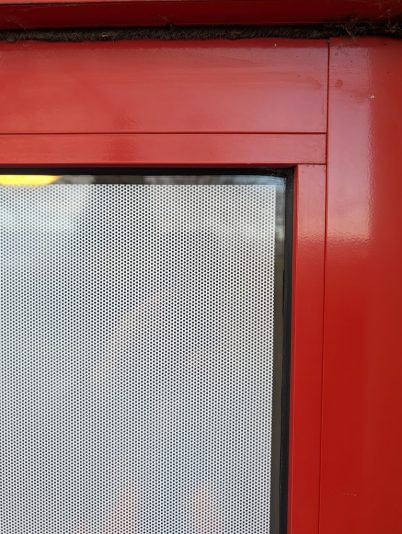
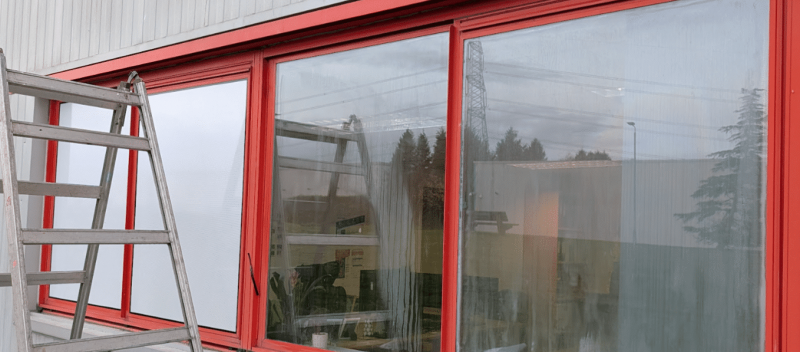
There’s 8mm trimmed back, with a black vinyl border around the perimeter, which overlaps the edge and acts as a seal for water penetrating the edge.
The rubber seal of the window dictates just how neat it looks, which is fine for the majority, but that is outwith our control.
This started out as an internally applied window tint job, then external window tint, then laminated controvision. Hense the time the whole process has taken to get to this stage. Life expectancy of all the films, the install process etc. were all submitted, but this was the chosen route.
-
Nice job 👍. Never thought of putting a black vinyl border to seal it, good idea. So this is just plain white, they obviously wanted privacy but with still seeing out.
Im guessing you trimmed the panels to size in the shop, not trimming them down once fitted?
-
-
Hats off to you! defo not a job we’d like to do in the cold, and great to see a good border around the edges (we made our own 5mm tool for creating a neat border on window installations).
We have January window installations for museums each year – solid vinyl, we time the work to start 11am, let the sun at least get up a little and warm stuff, give the glass a very gentle warm up with the heat gun and dry fit always, then border trim.
Mind you, change over in 28oC summer on glass has its issues too…!
-
I am 100% with you on that!
I’ve been asked twice why we can’t start earlier. I point to the grass, which is still frosty!!
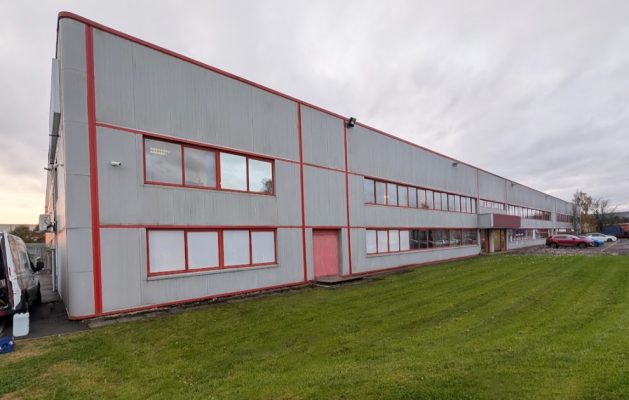
Even after washing, drying and chemical cleaning the windows. Just the heat off your hands lining up the material causes condensation. You now have moisture at both top corners, which are key adhesion areas.This is the building, with only 8 windows completed at this point.
-
This is the front office of a huge factory. The windows have “random” milky condensation stains within the double-glazed units. Although most are perfectly fine, the line of thought was to hide the marks completely, but still let the staff see out as normal.
As I said, initially, they were going to tint them or use mirror film. But internally, that was pointless because the marks were totally visible.
Even externally, you could still see the milky marks through the tint, hence why they opted for the controvision.Yes, we cut the panels to size in our workshop, but we cut them to the actual size of the glass.
The windows are not perfectly consistent sizes. So cutting them to the glass size, then coming “in and down 8mm” and applying it. means you have extra material down the left and at the bottom, to trim flush, then trim back.
Doing it means our panels are always right, because their windows vary by up to 30mm out!
We were caught out by that in the first 10-15 windows, but we just used them up further along. So far, we have only wasted about 300mm x 1200, and that was by me! it was getting dark, colder and a firm squeegee swipe creased the brittle material. 😏🤣I would prefer the 5mm Border as Colin has said, but some windows have wobbly rubber seals, some are silicone, some have none, and it’s an internal rubber. So the 8mm helps maintain one size suits all.
-

Hello everyone.
I just wanted to say hello.
I want to say that we all follow these kinds of conversations.
No matter how good you are at it, these kinds of conversations always bring you something.
I apologise for my terrible English.
I’m always following!
Greetings from Birmingham
tptsigns.-
-
Welcome from me also, Kadir. 👍
Every day is a school day for us all. The best way to learn is from each other!
-
Thank you. Yes, you’re absolutely right.
I do this job, but I don’t think I’m very professional.
I sometimes help people for free, both to improve my English and to learn the trade.
Of course, people generally don’t want to be very helpful in this country. I don’t know why, but I’ll keep trying.
I bought two machines, a Roland SP540V and a GRAPTECH FC7000-75.
I’ve done great work with both of them. But I’m always striving to be a better salesperson and installer.
Birmingham can be a challenging city at times, but I’m confident I’ll succeed.
-
-


Log in to reply.