Home › Forums › Sign Making Discussions › Gallery › Airbrush Painting – pt 2
-
Airbrush Painting – pt 2
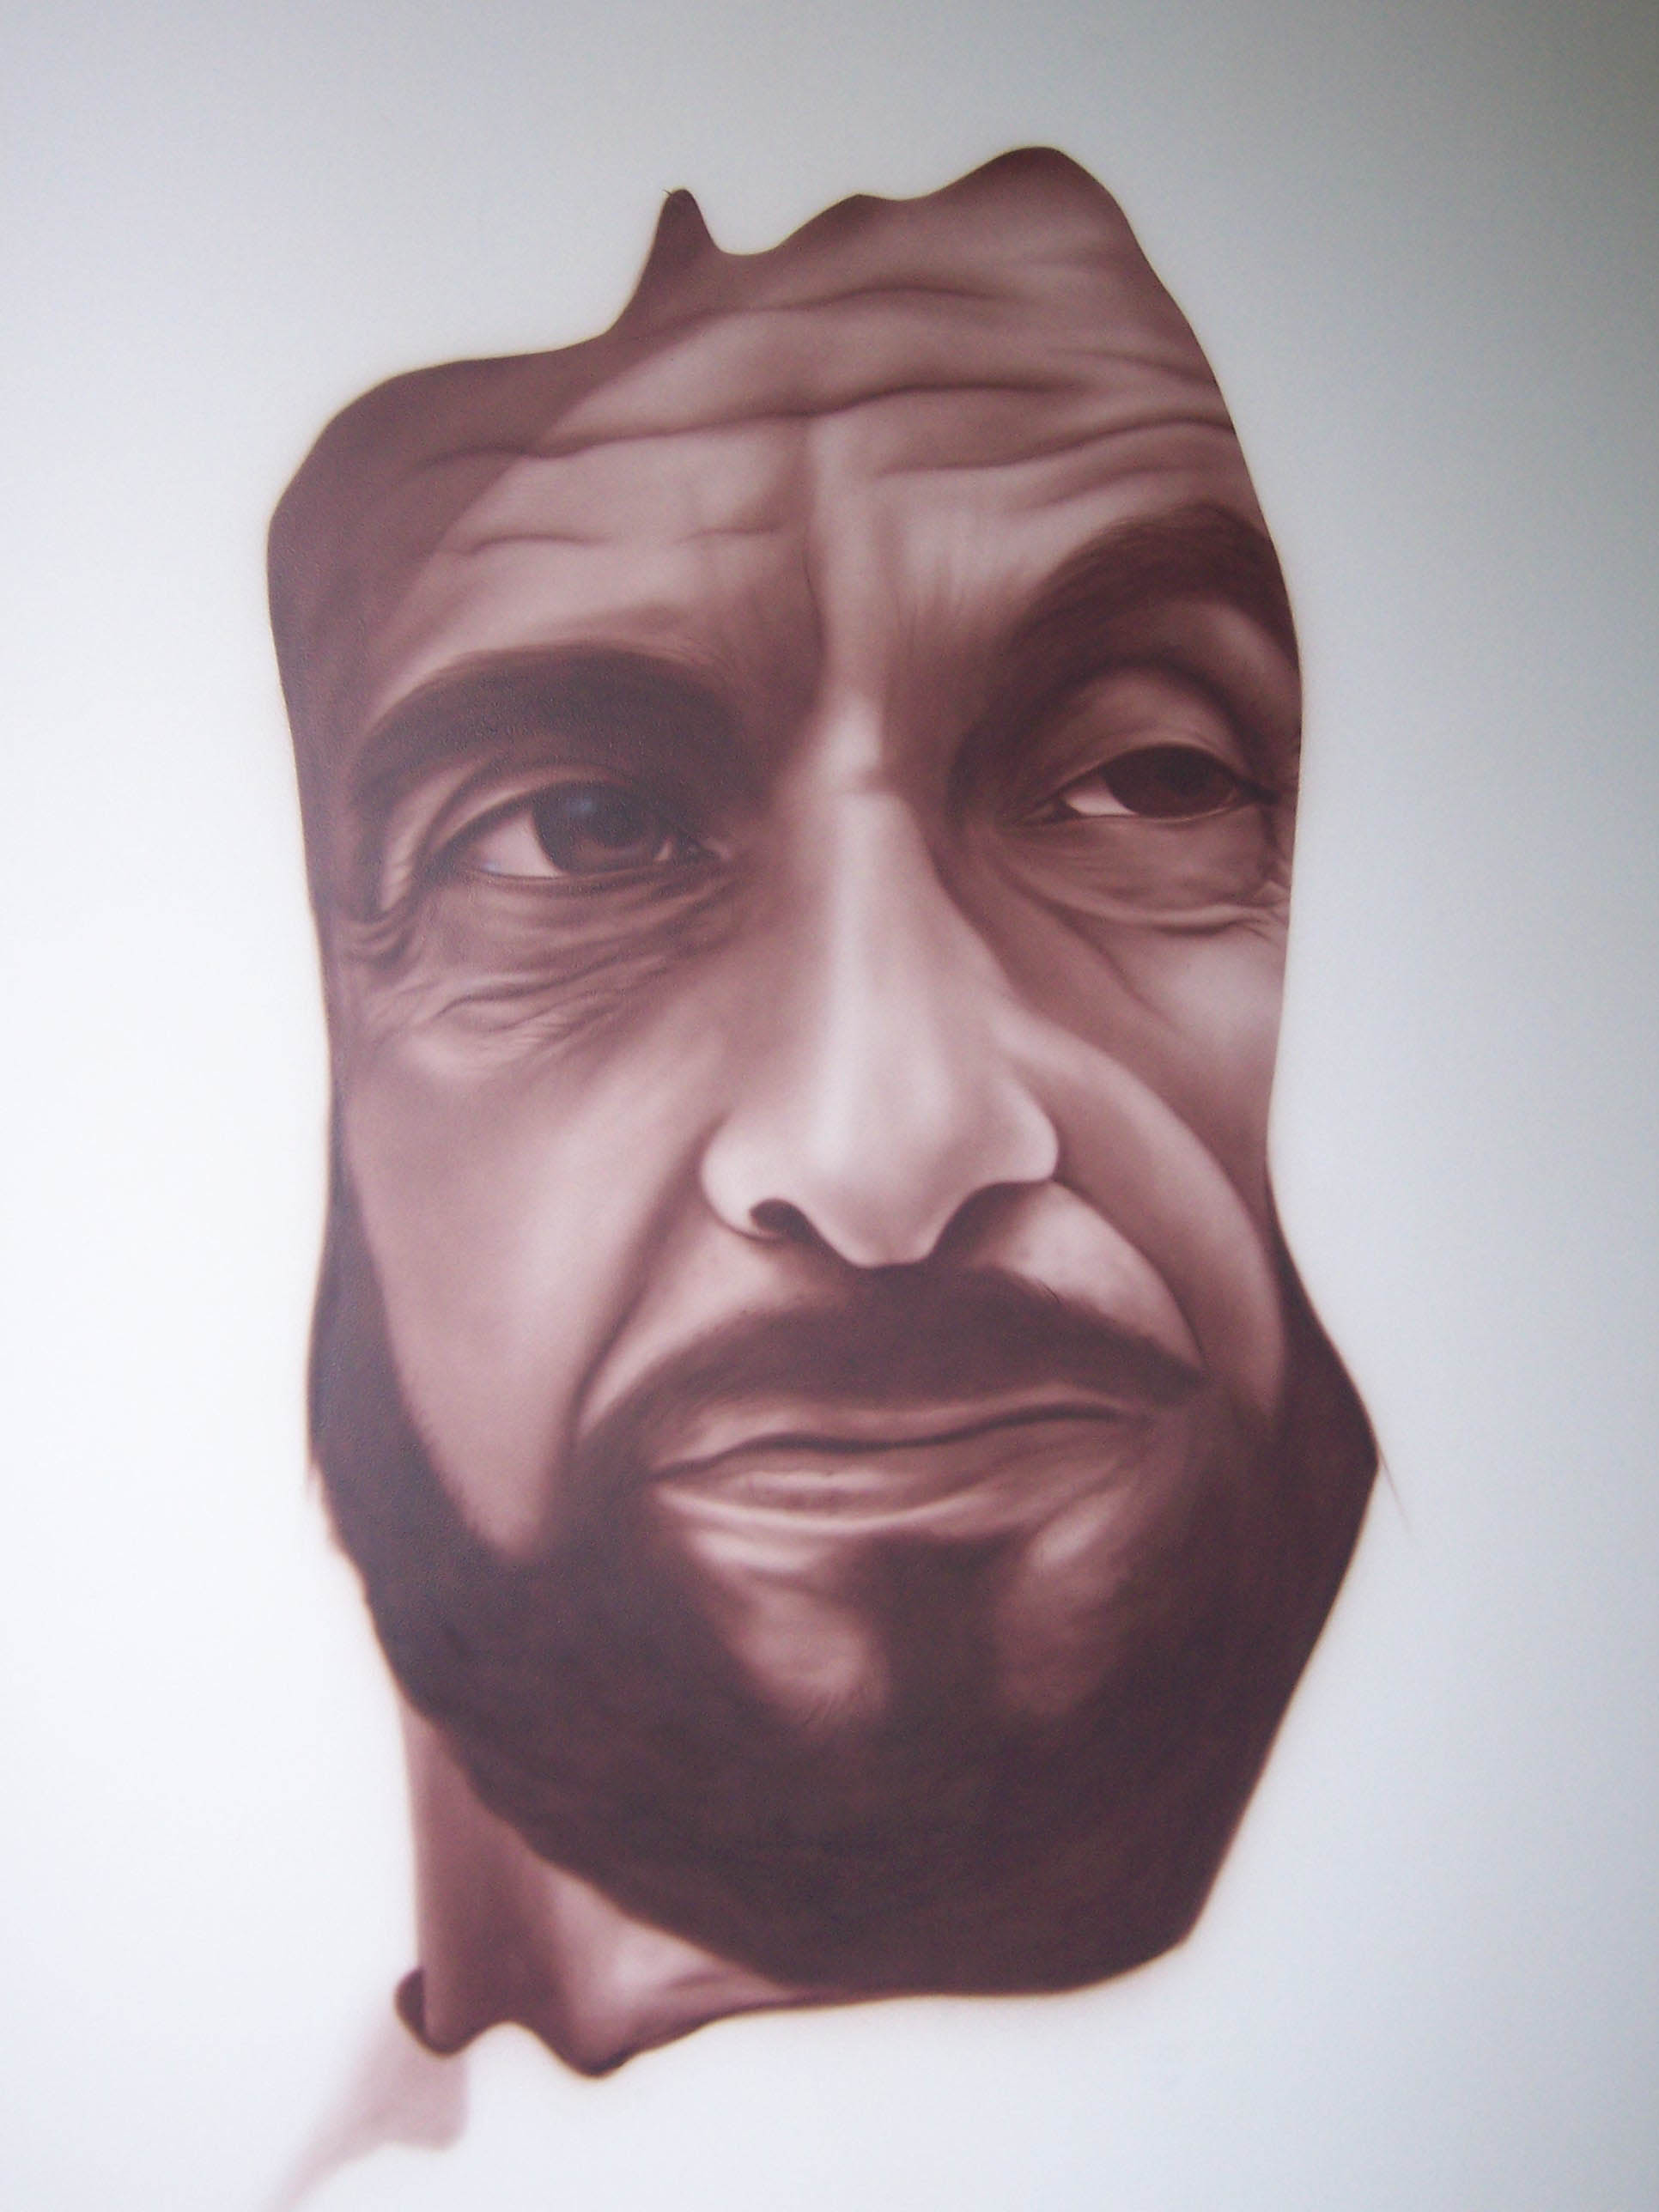
Posted by monty on 1 March 2006 at 16:01This is the second sheikh- Zayed i have been working on, I just do a little bit at a time when i get a chance, as I’m teaching art and design during the day, Obviously not finished yet. , hope you like.
Attachments:
 Robert Lambie replied 19 years, 10 months ago 7 Members · 8 Replies
 -
8 Replies
-

very nice monty 😀 i wouldnt know where to start, what do you do first, when tackling a project like that? 😀
nik
-

thanks you nice people, anyways to start with i source a good pic, and its important to have good pic, the photocopy onto clear film and project on to the wall and get the airbrush going and “dust” in lightly the proportions and positioning of the main lines etc, then i go layer again doing the medium tones and slowly build it up into the dark tones and fine lines, its basically a lot of layering, studying the photo and sitting back then going in and layering until you are happy with it, if it takes too long i start getting impatient and not fussing too much, i want this to be good as prince Michael whatever he is and a sheikh from Dubai are coming to our school for grand opening this Monday and it will be a lot of media coverage. i took step by step photos and will load them when i figure it out and finish the pic, hopefully tomorrow.
-
quote monty:i took step by step photos and will load them when i figure it out and finish the pic, hopefully tomorrow.
look forward to seeing them 😀
nik
-
that will be interesting to see a step by step Monty, you work is brill 😀
Lynn
-

excellent work !! i’ve watched an airbrushing pal at work, makes it look so easy, but i dare say it aint !!!

Log in to reply.