Creating a Traditional looking sign, by Duncan Wilkie

Creating a Traditional looking sign
Picture 1
Here I paint the board using Oneshot enamel for the finishing coat. I also use the OneShot hardener additive for maximum durability.
Most folk won’t be so lucky to get a good MDO board, so they should use the best substrate/board available to them. If I was using exterior Medex for example, I would prime it as per the manufacturer’s instructions and use OneShot for the top coat.
Whilst sanding in between coats with a tack cloth, I would give one coat of primer and two coats for the enamel.

Picture 2
When thoroughly dry (usually overnight), we apply a paint mask to the surface.
The Picture below shows the Paint Mask applied to Painted MDO Board

Picture 3
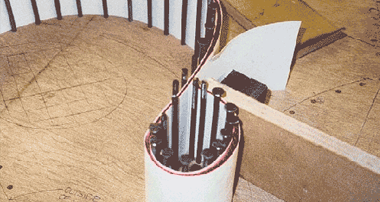
Next, we route out the letters using a CNC Router. we route right through the paint mask film with a “V” carving router bit.
To generate the routing paths Ee use Gerber Auto Carve software and
a Gerber CNC Router to do the actual routing work.
Please note: A “V” carving bit cuts a nice clean edge on the mask, a straight bit does not!
The picture below shows the CNC Router cutting through the vinyl paint mask with a “V” carving bit.

Picture 4
From here we proceed to cut out the sign panel shape with a straight cutting bit, A jigsaw or the like could also be used.
I want a radius around the edges of my sign, so I proceed to “round over” the sign perimeter edges and fill any edge voids with filler.

Picture 5
A very important step when using plywood is to seal the exposed wood with a premium exterior wood glue or epoxy as shown in the picture below. These guard against potential delamination of the plys and seal up the wood really well.

Picture 6
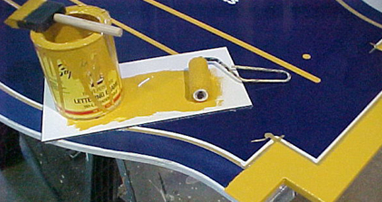
After the glue is thoroughly dry, we prime and enamel the routered text/graphics.

Picture 7
The Picture below shows me backfilling with the appropriate colours.

Picture 8
Before the final coat is dry, we remove the vinyl paint mask.

Picture 9
Here we rub down the face of the sign around the edges where i will mask off and paint my border colour.
I like to use sanding sponges or scotchbrite pads to do this. 150-grit sandpaper is fine also. when done, dust off thoroughly with a tack cloth or damp cloth.

Picture 10
Here you can see I have begun painting my border, edges and rear of the sign.

Picture 11
Below shows the vinyl graphics i will apply to the sign once dry.
It is important to have everything laid out just right and ready for application.
using a clear application tape for work like this helps the lining-up process a lot!
Vinyl: 2mil High Performance “Calon” Vinyl.
Application Tape: “Conform” Clear.
I would suggest always using the best grade/make of vinyl available to you as you want the vinyl failing before the sign itself.

Picture 12
The picture below shows the sign complete with vinyl graphics in place.
Any touch-ups needed are now done and the panel is ready to install.
From step 1 to step 10 I would guess a total of 5 hours was needed spread over 2-3 days to allow for paint drying times.

Picture 13
The picture below shows a close-up shot of the router and paintwork.

Well, that’s about it folks! I hope this step-by-step will be of help to some of you. If anyone has any questions please feel free to ask.
Duncan Wilkie