Convert photographs into cut vinyl vector files.

Convert photographs into cut vinyl vector files.
“Can you cut photographs in vinyl, using your vinyl plotter?”
Yes! With this technique, you can convert any photo into cuttable vector files.
Pop-art style vinyl cut images
In this tutorial, Barnabas Rumpf of Image Grafikai Muhely shows us how to create stunning photo images from vinyl using CorelDraw software and a bit of imagination.


Installing the special character set
First, copy the special character set called “pottyos.ttf” into your Windows/fonts folder.
You can download Bgasci from the following sites:
- Mazaika: BGASCII
- Softpedia: BGASCII
This font contains 16 different-sized dots.
These dots reproduce the final image. It is similar to an offset printed image.
Preparing the photo
- The original photograph is crucial to the end result.
- Choose a not-too-detailed, high-contrast photo
e.g. portraits, objects without background etc.
- Import the photo into Photoshop or a similar graphics package, and convert it to grayscale.
In Photoshop select: Image>Mode>Grayscale. - If needed, use the Brightness/Contrast command Image>Adjustments>Brightness>Contrast to add more contrast to your photo.
- Set the default foreground and background colours, then rotate the photo by 45 degrees
Image>Rotate Canvas>Arbitrary.
It will look like below “screen angle”.

Next, use the Image Size command: Image>Image Size, to resize the photo.
The resolution of the photo determines the quality of the final image, but remember you can’t cut dots that are too small.
For example, set the width of the photo to 200 pixels and save it as a JPG file.

Using Bgasci
Run the Bgasci and type the text string into the textbox: ABCDEFGHIJKLMNO and a space.
Then open your jpg image with the JPG button.
For the best result scale it to half size.
E.G. our rotated portrait is 200 × 200 pixels, so we must scale it to 100×100 pixels.
You can resize the image by resizing the image window.
You can read the actual size in the heading of this window.
Tip:
If your directory structure is too long, you can’t read the actual size.
The answer: copy your image into the parent directory (e.g. C:/)!

Press Go and the software converts your picture to a text file, then:
– click on the text once
– press Control+A to select all
– Press Control+C to copy text to the clipboard
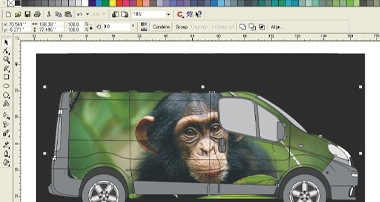
Working with vectors
Open a new CorelDraw (or a similar graphics package) document, select the Artistic Type tool, then click on the empty page and press Control+V to paste the text.

Next, apply the special font called “Pottyos”, and set the line space to 79% of the character height.


Then rotate back the picture by 45 degrees.

If you want to cut it in vinyl, you must weld the overlapping dots.
First, convert the graphic to curves In CorelDraw
Arrange/Convert To Curves, and ungroup it Arrange/Ungroup.
One after another select each part of the image, use the Arrange/Break Apart command then use the Weld command. Then weld the overlapping main parts.

More facilities
With this technique, you can make special type effects and colour blends too!