Home › Forums › Sign Making Discussions › General Sign Topics › Lettering Transit Custom’s etc
-
Lettering Transit Custom’s etc
Posted by Ewan Evans on 6 April 2018 at 11:43I know this has been asked before but with more and more vans coming out without straight lines to work from on the panels what method do people use to keep the text consistent? I have been doing quite a few Transit customs lately and the extra time required to fit vinyl to these is starting to annoy me a bit. I’ve started using magnets with string to find a line I’m happy with and working from that but I find doing it this way a bit frustrating sometimes due to the contours of the van making the string either sit too close the the van sometimes or quite a bit away from the bodywork. Would using a laser level with a lockable pendulum and a tripod be a better option so you can select a van straight line such as the sill and place the beam further up the bodywork making it easier to measure from? I have never used a laser level but had been looking at purchasing the Bosh PLL2 and the tripod to go with it. I know others prefer the Dewalt but the Bosh is lockable and gives angle readouts.
What do you’s think?
Ewan
Ewan Evans replied 7 years, 4 months ago 13 Members · 22 Replies -
22 Replies
-

I do this for over 20 years and never used laser before. Simply don’t need it.
There is no right or wrong. Send client both options so client can have a look and decide for himself.
Some clients want logo to follow bottom/ chassis line – some clients want logo to follow "middle sporty line".
Just do what your client will like / approve. This way you are safe. -

We always go from the extreme base of the van. I agree it’s becoming a pain with all the new sporty shapes, but we always
tell the customer "When you get a certain distance from the van, all you can see is the box shape of the van, with the lettering following the baseline, all the stripes and swages disappear at a distance". -

Thanks for the replies Martin and Pane. Yes the base of the van is usually my preferred choice but always find it a pain to measure from due to plastic mouldings and curved panels as I feel you don’t get a true measurement from back to front if you know what I mean? That is why I was thinking of buying a laser with a tripod.
Ewan
-

Unless there is a very good design reason not to, I follow the base of the van, (which usually follows the ground, which is why it works best.)
-

Follow the sill of the vehicle. from wheel to wheel…
Visually, you look on the vehicle "on the whole" not by the panel shapes and body lines.
You also do not "design" the van graphics to suit the body lines of the vehicle. you simply overlay the graphics and position where you want them to land.
You do not rotate the lines of text to suit lines in the body work, because we know then it looks ridiculous.If measuring is frustrating due to moulding etc.
Measure up, "lets say" 800mm close to start of front wheel arch, then measure up 800mm close to start of rear wheel arch.
run a length of 2 inch masking tape straight along the side sticking to vehicle.
you now have a central level to take all your measurements from. -

All depends on customer. Some want it to follow the panels, some want it to run straight.
9/10 times we will do them parallel to the ground, can use a spirit level if had to and use a chinagraph pencil to mark.
I tend to use a laser level to give me a start and level from the main text. -

I just tend to run masking tape along the tops of the wheel arches, as long as all my text match that line then it looks good. Not had one complaint
-

We hate the new transits.
The sill runs higher towards the rear.
We put a laser on the side, we doubted the laser tbh the van made the laser look out.
In the end we use what looked the best level. No ones come back yet -

We purchased the bosch laser level you mention and to be honest it can still be a pain to get level. It tries to self level itself until a certain point then. I tend to do what Rob mentioned but instead of running masking tape I use the laser line instead. Wouldn’t be the 1st time I’ve stuck a graphic over the making tape 🙁
-

I have a laser level but more often than not I use a spirit level with an adjustable bezzel, just find the angle that you like and turn dial and lock, don’t forget that the other side is the opposite so reset.
Peter -
Be good to see an image of that Peter? I also have a laser but I don’t tend to use it
-
On Transit customs I always go by the top of the panel, that’s pretty level.
-

Transit Customs are about 30mm out from the top from left to right or vice versa so mark it from there and go down
-
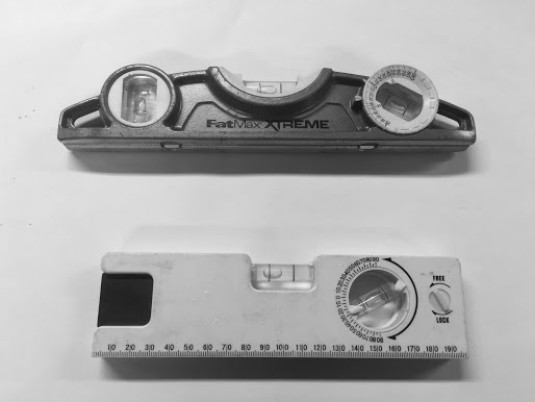
Hi Daniel,
I actually have a couple of them, one from a pound shop and a Fat Max one, I wouldn’t be without them.
Cheers
Peter
Attachments:
-
Thank Peter
I visioned something a bit more high tech than that lol
-
Sorry everyone, just seen these replies there. Got the vans done the way I have been doing the Ford Transit Customs in the past which is pretty much the way Robert suggested but using magnets and string keeping the string line exactly top of the wheel arches giving me a good line to work from. As others have mentioned, it looks strange and draws your eye up close but perfectly "van straight" and consistent from a distance. The customer was delighted so that’s always a bonus. Thanks for the replies and I may well buy a laser in the future instead of using string or tape.
Ewan
-
Thanks for the reply Ewan,
no matter when, always good to know how folk got on after the problem/question arises.
cheers mate! -
Since I last posted on here I’ve bought myself Huepar green laser from Amazon which I think is much better than the Bosch red laser I initially bought. The laser makes a lot of jobs easier with it having a lockable pendulum but it’s still a pain trying to decide what line to work from, especially on the new Transit L3’s.
-
Bricklayers chalk line from top of wheel arch to top of wheel arch, works every time and gives a nice blue chalk line to work from. Cheap as chips from screwfix etc.
-
That was my plan today Andy, use the wheel arches but it just didn’t look right and when checking the line on Impact outline software it confirmed that the front arch was higher than the rear. I ended up running the vertical line of the cross level to give me my horizontal and that seemed to work well. I checked that line on Impact and that seemed to be plum and it looked a good option to work from on the van.
Cheers
Ewan
-
I was wondering if anybody actually worked from the actual ground level.
The reason I say that is that whenever we make up a visual of a vehicle for a customer, the logo/writing is level on screen, even when the vehicle leans forward, but it always seems to look correct.
However as soon as the car arrives we all start tweaking it to be level with the sill, or some other arbitrary part of the car, and it ends up different from the visual that the customer approved. -
Hi Simon, In theory what you say is true but my understanding is that unless you can guarantee all the tyres have the same tread, same pressure, the springs are all equal then the van won’t be level to the ground. You then have to consider what’s inside the van etc as this can also determine how level the van is to the ground. Finding a line to work from such as the sill, wheel arches etc give’s you what I would call "a van level line" to work from. If we were to apply graphics by using the ground as a level then we could simply use a spirit level or self levelling laser level to apply them "horizon level", unfortunately it won’t look right most of the time. I wish we could just apply them that way though as it would make life a whole lot easier.
Ewan

Log in to reply.