Home › Forums › Sign Making Discussions › Neon, LED, Lighting › Fabricating a tray do’s and donts
-
Fabricating a tray do’s and donts
Posted by Phillip Patterson on 4 January 2013 at 20:12Hi all,
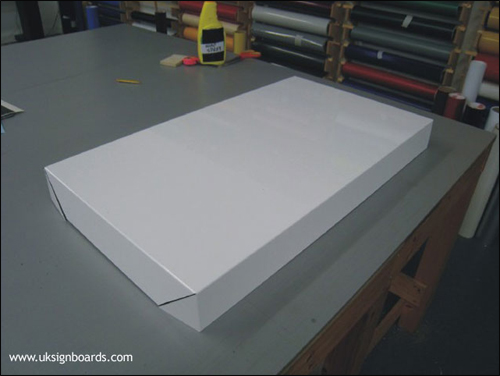
I’m hoping to fabricate my first tray and was wondering what is the best way to go round doing it. I have attached a layout plan is it right? its a complete guess off my head.
Also i’m thinking of adding 3mm acrylic sheeting behind the tray using vhb tape my only concern is would it warp and then come off??
my last question is would you just screw or tape the box on corners.
Thank you for your help
Sorry forgot to add attachment! please find attached.
Attachments:
 Simon Worrall replied 11 years, 5 months ago 9 Members · 21 Replies
 -
21 Replies
-

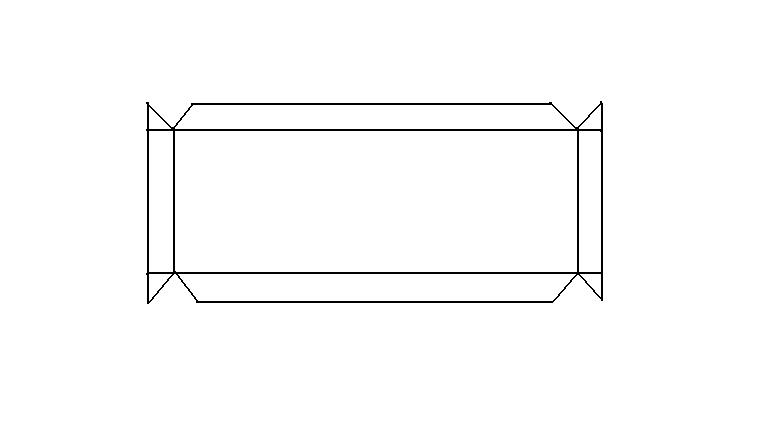
You need a corresponding angular cut on the long edges to complete the corners.
Make a test pattern out of card first. -

I’ve never made my own but have had both styles of corners, one similar to how you have done it and then cut straight cut edges that meet up so the join runs done the corner (if that makes sense) I find the join down the corner actually looks a bit better as long as you get it nice and neat and would presume it’s much easier to do.
-

As Peter says – you need a slanted cut on the long return otherwise you will have a section of material overlapping which will look unsightly. This is the method that Dibond themselves recommend as it means the corner itself is finished, with the joint itself being away from the actual corner (and therefor not visible when looked at from below or the side). But I know many people get good results using Warrens suggestion. I have used both methods and both will work
Attachments:
-

is this going to be just a tray or are you looking to have it illuminated same as a light box? only reason I can think of for the acrylic. If the letters are to be cut out how are you going to do it because you obviously need to think about the centres of letters.
have you thought about how your going to keep water out if it’s illuminated.
Corners I normally rivet, can’t remember how it was done on the tutorial or if I have even seen it lol. -

The blue nose is cracking me up Martin!
I do the join on the corner but you do have to be very neat with your cuts and even a little bit of tension in the diabond can cause it to come apart slightly.
I might give the method that Phill has shown a go next time though.Steve
-

Thanks guys,
So I assume the design layout is as below and riveting the corners would enforce the box from losing shape. is that right??
would there be any need to do anything else to enforce the box or willl it be okay?? for example metal brackets inside, glue or anything else??
I will be getting the box cnc routed with fret cut letters, backed with opal, 3mm acrylic (only on the areas where they need to be instead of applying it to the whole box) stuck with vhb tape, with locaters on the front of the opal, holding flatcut letters.
the other issue ive had is the customer wants pink letters on the front but wouldn’t it show up the areas where the locaters are?? i was gonna use 3mm acrylic but now thinking of using composite letters and either before or after routing, applying pink vinyl on.
Attachments:

-
No
The shape you want to cut out is as shown here
Attachments:
-
Thanx phill,
what would i rivet the corners to?? would i use small rectangle piceces of diabon beneath the tray and rivet??
Also does my proposed manufacturing theory sound ok??
and what do you guys normally do for stand off letters stuck on lit up opal, with regards to the worry of shadows forming from the locators?? when using acrylic flat cut letters
thanx again
-
Yes, you can rivet or glue a rectangular piece behind the joins. As for your other questions, I don’t know I’m afraid
-
 quote Phillip Patterson:Thanx phill,
and what do you guys normally do for stand off letters stuck on lit up opal, with regards to the worry of shadows forming from the locators?? when using acrylic flat cut letters
thanx again
Phillip if you fix translucent acrylic flat cuts on locators to a translucent ( opal ) illuminated panel you will always see the locators ! You can buy snap fix locators in clear but you would still see them when illuminated from the rear.
ACM fret cut illuminated trays make great signs but do have limitations.
Consider how you plan to illuminate your tray, if using standard gear you will need at least 100mm return, and even at a hundred mm you will struggle to get a good even spread of light from standard tubes, creating hot spots / uneven brightness !
Also note that if using standard gear then you will get a considerable build up of heat from the tubes. This can be a major headache because of the differences in expansion rates between your ACM and acrylic. Although this tends to be more of a problem when using prismatic diffuser sheeting and ACM
Fret cutting trays can considerably weaken their structural integrity, so consider how much will be machined / fret cut out. If the tray is going to be in more than one section they can be a royal pain in the **** to strengthen sufficiently.
Taking all the above into consideration, there comes a point where the only way forward is a fret cut and finished aluminium tray.
Best of luck !
-
Think I might cut the letters from composite and then apply vinyl before or after cnc routing so that will resolve the issue of visible locators hopefully.
also Im thinking of having a return of about 160mm so with that depth I’m hoping it wont interfere with geartrays or have any heating issues. though im concerned about warping and acrylic panels coming off with this method of sign production. I have ben told to use vhb tape but will see if i can use something stronger like bond glue or something.
i was thinking of producing the inner part of the sign out of lightbox profile and creating a box that way but then thought might be better to just create another tray just 5mm smaller all around so i can sandwhich the two together. is there an orthodox way of doing the inner boxes??
Thanx again
-
I have used both UHB gel tapes and Polyurethane adhesives in the past just be very very careful with surface cleaning before bonding.
A 160mm return will be fine for getting a good light spread from the tubes but I share your concerns about supporting a return of that size.As long as it is fully supported you should be ok, lengths of 150mm angle ?Or an internal tray as you say…
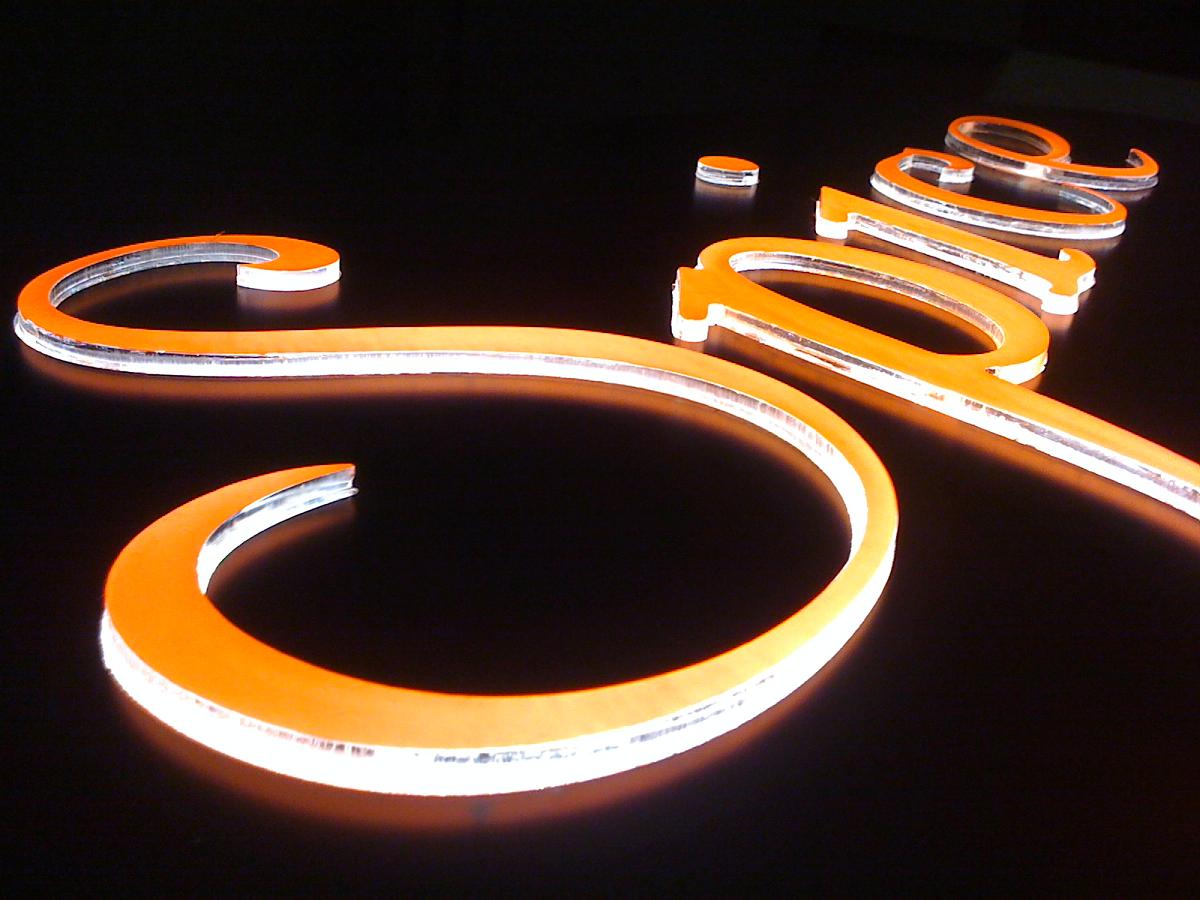
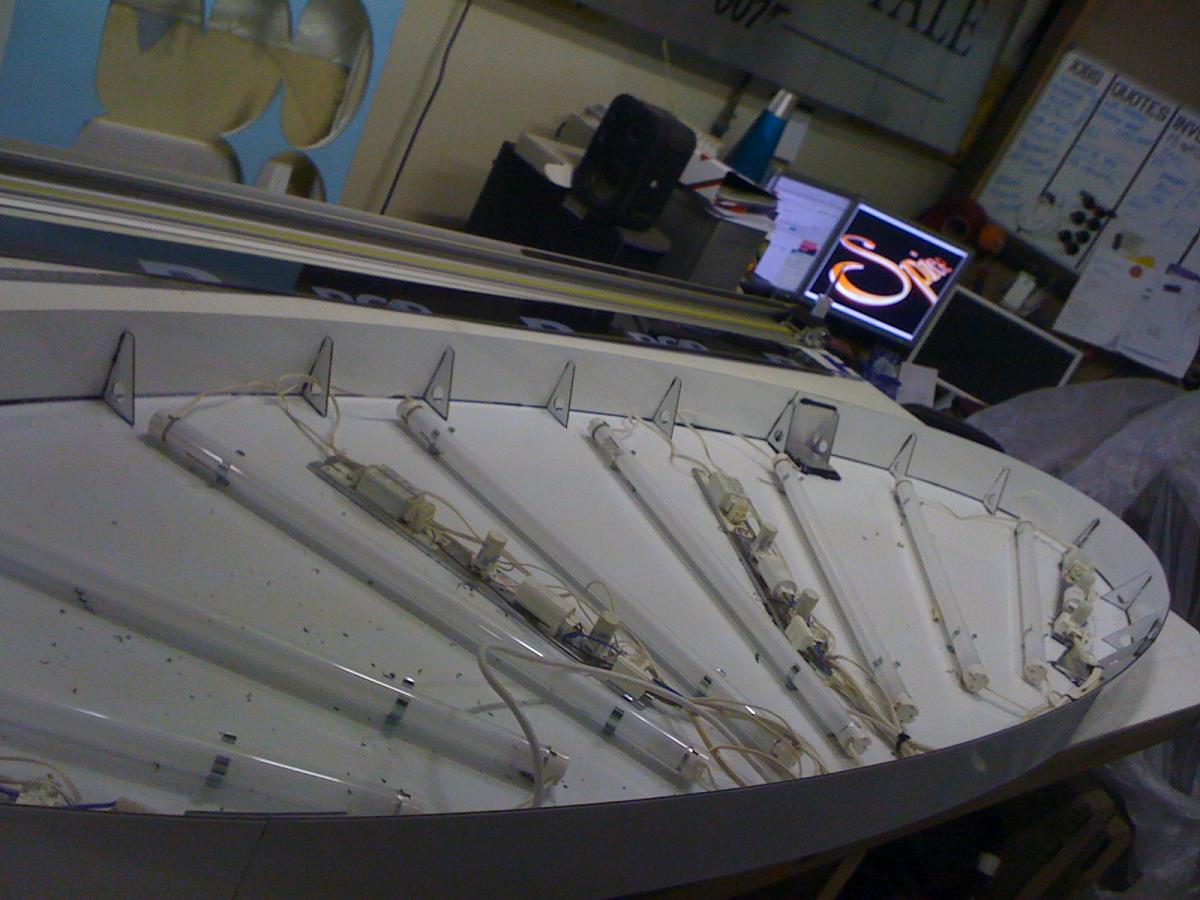
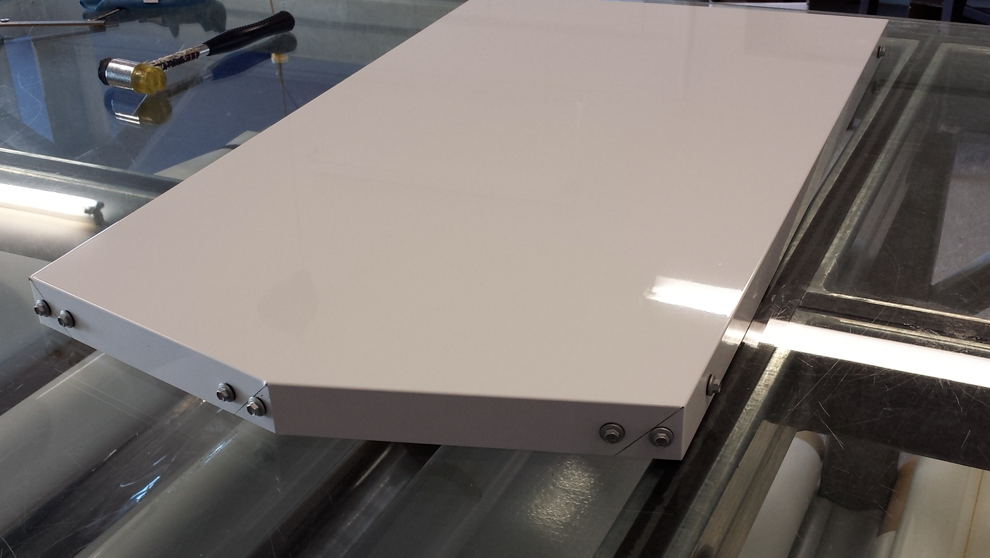
see images below for one I made a few years ago..the back tray is fabricated completely from ACM. The return was bonded on rather than folded as the light tray was oval. The letters were 10mm clear acrylic flame polished with a lightbox vinyl to face, mounted onto 3mm opal.
To be honest I would only use this method for internal signs these days. Unless you have your own CNC i doubt it would be cost effective.If this job were to come up again I think I’d farm it out to a trade supplier and have it fabricated in Ali then powder coated etc etc.
Attachments:
-
I forgot to add… and I think it goes without saying… You can only use machine grade ACM with at least a 0.3 skin for this sort of work.
and for me there is only one or two brands I’d be happy using !
-
Dave, how did you apply the orange vinyl on the letters?? did u apply vinyl and then cut round each letter? or did you cut the same shaped letters on the plotter or apply first then rout one time??
Cheers again buddy 😀
-
Machined the letters, cleaned up and polished the edges then applied translucent orange vinyl.. I just cut out pieces of vinyl by hand big enough to cover each letter, applied and knifed around the edge.
-

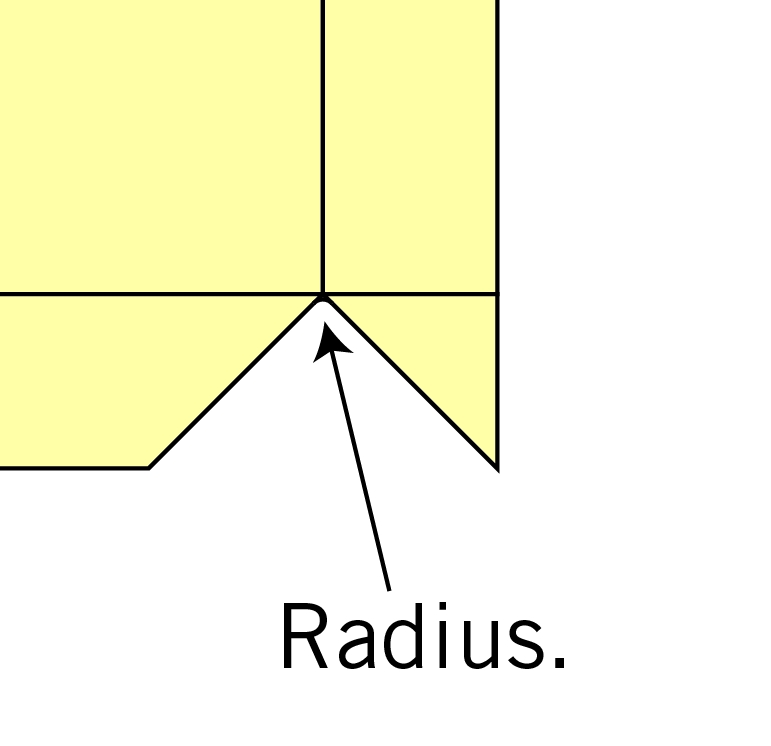
I am about to make my first tray on the router, and I have a nagging question.
I am using a 6mm bit. What do you do with the radius on the INSIDE corners? Do they have to be filed away before the tray gets folded?Simon.
Attachments:
-

We always use a 3mm bit for the corners and use vectric as our cnc software which allows us to cut outside of the line and not on the line. Cutting outside of the line ensures the joint will be nice and close. With the m bit we get a ever so slightly small gap nothing to be panicked by.
-
Yep, I also do the same as James. 3mm single flute, cutting outside edge of path.
-
I also use a single flute 3mm bit in one cut, you might have to file the radius but it’s not much.
Steve
-
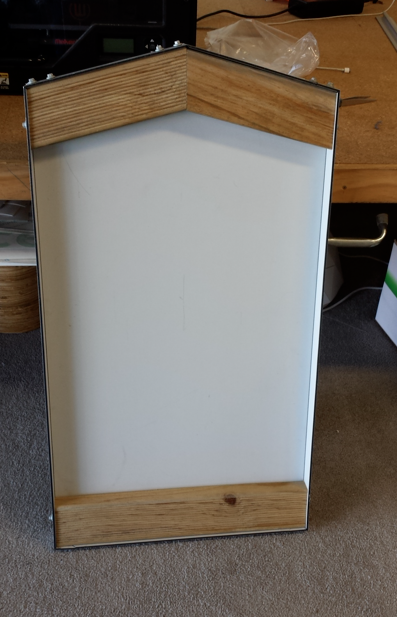
I found I didnt have a 3mm bit so I used a 4mm – it worked perfectly well, and the slight bulge in the corner doesnt really seem that bad.
I enclose a pic of my first tray.
THey wanted a roofline at the top – lord knows how I figured out the angles but it all fitted together very well.
I used treated wood behind, and roofing screws to put it together so they could mount it from the back. Yes I know the screws are ugly but they are so common here they are part of the culture.
I have made a few trays since this one to practice different ways to fit them and assemble them, and to make up a few samples. They have not really caught on in NZ yet, but when they do I will be ready!
Attachments:

Log in to reply.