Home Forums Sign Making Discussions Gallery flame polished signage: unicorn property

  • flame polished signage: unicorn property

    Posted by David Rogers on 16 December 2008 at 08:39

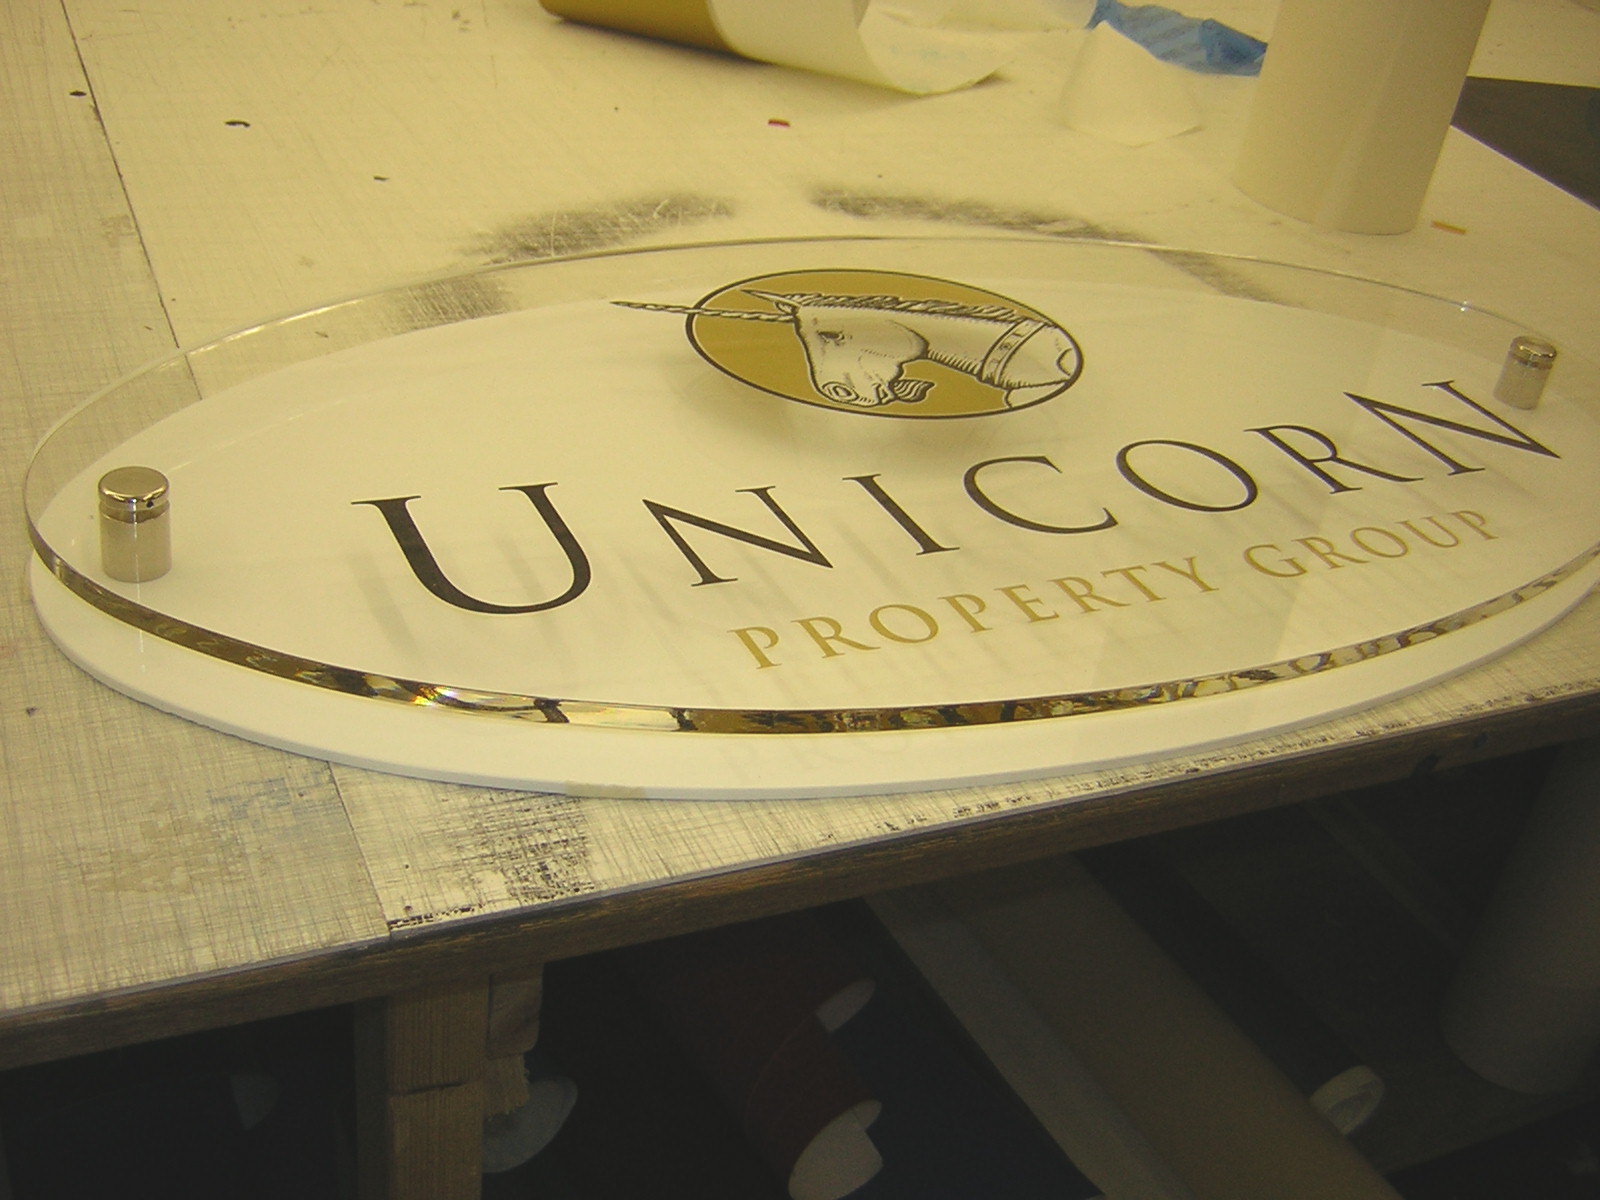
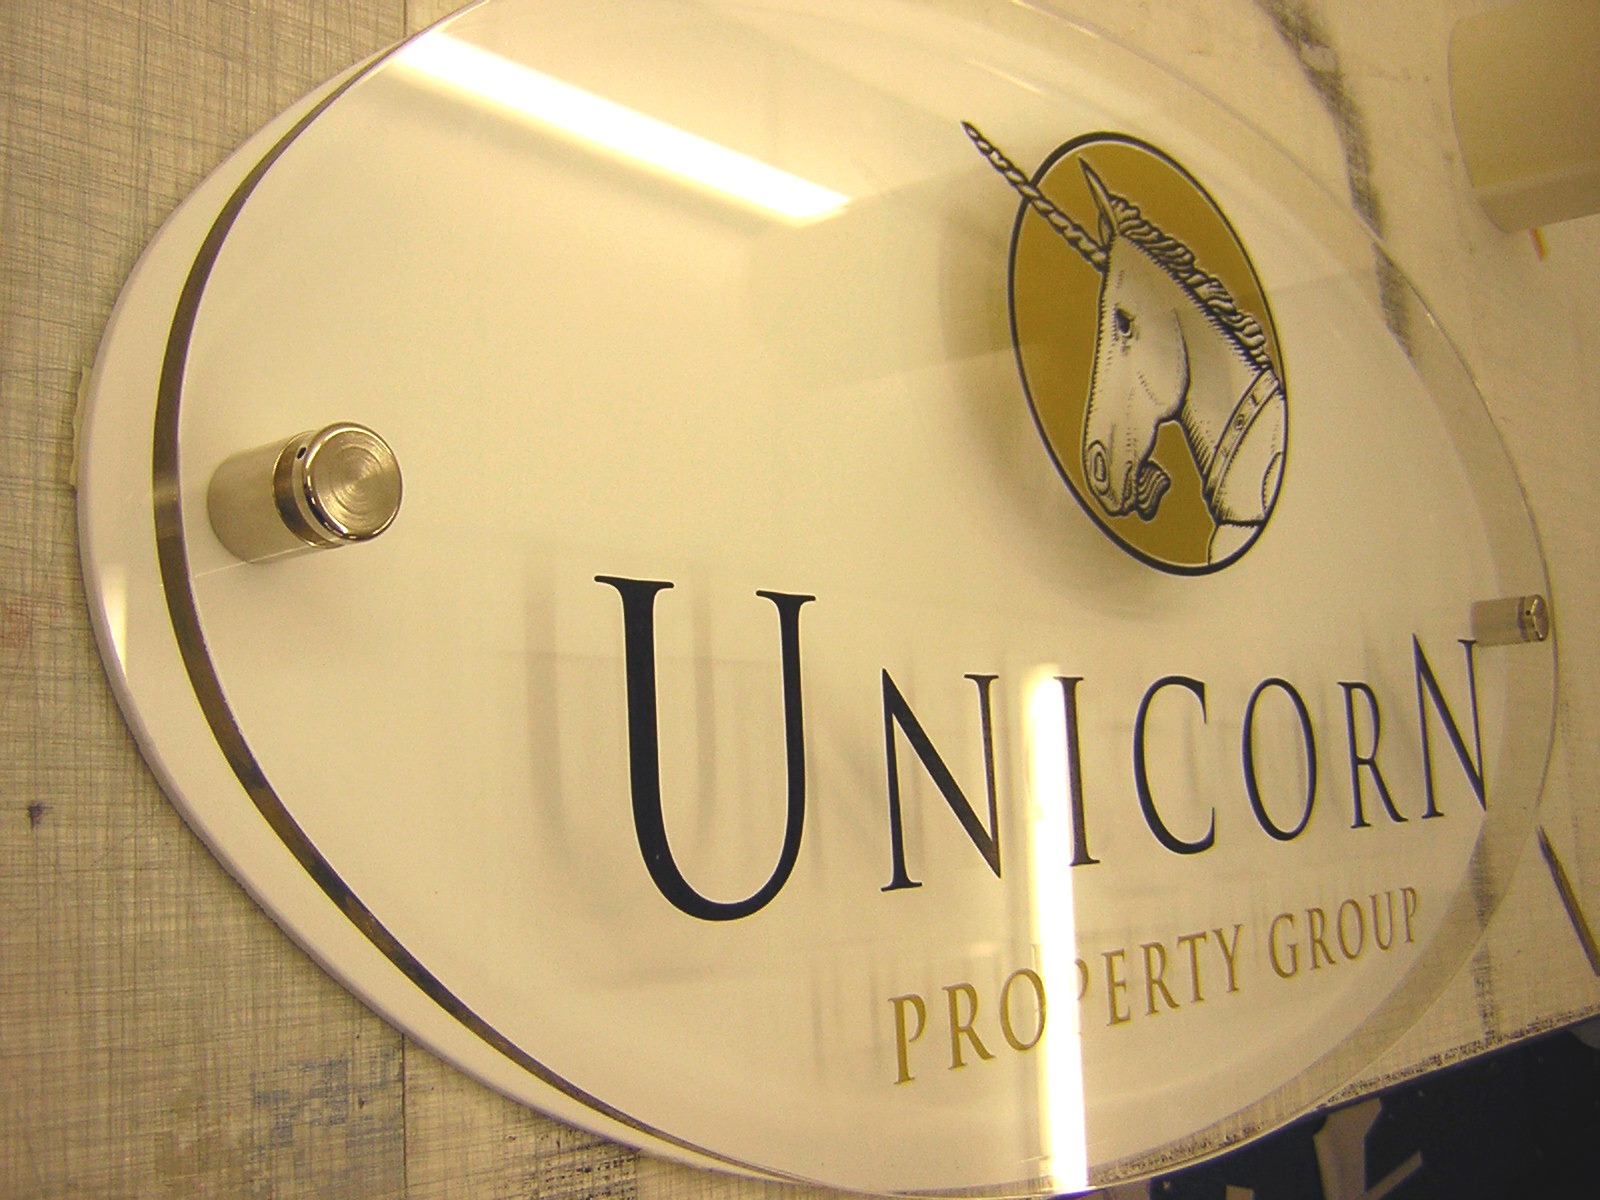
    Unicorn oval – 800x400mm in 10mm acrylic with black & gold vinyl on rear. 6mm white acrylic as a back mount. Nickel plated 25mm stand-offs.

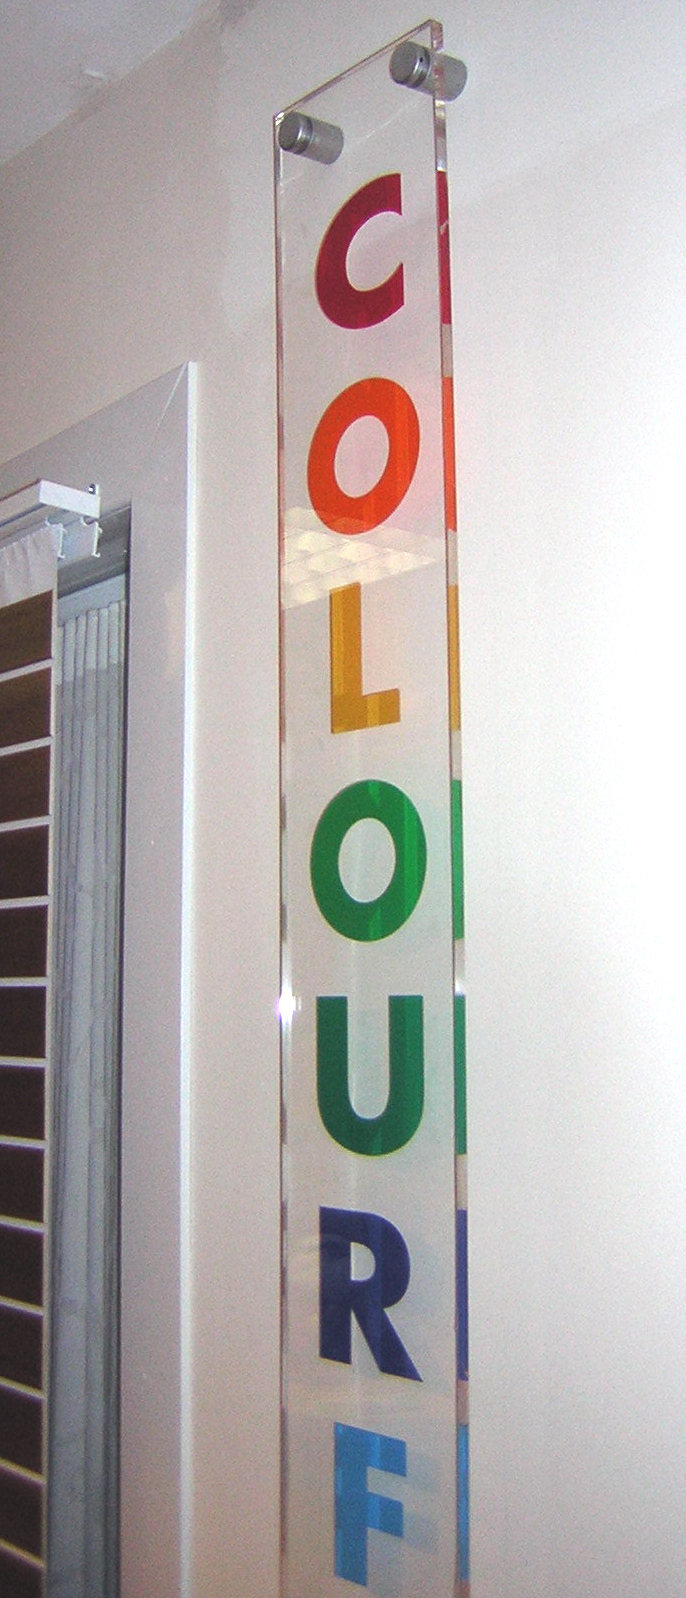
    ‘Colourful’ – 1200x150mm in 8mm acrylic – multi-coloured vinyl on rear.
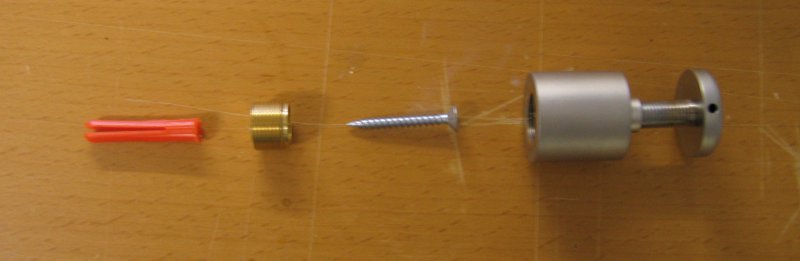
    Satin 25mm mounts.
    (Have made 20 of these for the various blinds showrooms ‘colourful’ ‘contemporary’ ‘ classic’ & ‘calming’)

    Ovals bought in from Pinetree – had VERY poor polished edge finish…most apologetic so I re-did in house.

    Dave


    Attachments:

    Steve Underhill replied 16 years, 10 months ago 6 Members · 8 Replies
  • 8 Replies
  • Phill Fenton

    Member
    16 December 2008 at 08:45

    They look great Dave – very upmarket signs. 😀

  • Paul Humble

    Member
    16 December 2008 at 09:04

    Cheers Dave, the oval one looks like a great idea for the sign we were discussing last night. Just one question, how do you mount the finished sign to the wall, do the standoffs you use allow you to go through the white acrylic and into the wall or did you use VHB tape?

  • Graeme Harrold

    Member
    16 December 2008 at 09:26

    You use regular rawl plugs and screws. Depending on the quality of the stand off, you either fix a small external threaded cup to the wall and then screw the barrel to it. Dead simple, but with wow factor.

    Fairfields, Mid-West and iSpy all worth checking out at the sign shows.


    Attachments:

  • David Rogers

    Member
    16 December 2008 at 09:28

    re-white back.

    I had them machined with two 15mm holes to take the brass ‘cup’ of the stand-offs (3 part FAIRFIELD as per picture above) I had in stock. But it’s easy enough to do a small hole enough to accommodate a screw & just screw through that into the wall.

    I also tagged the centre with a small piece of THIN d/s tape…just to be sure it lay perfectly flat.

  • Graeme Harrold

    Member
    16 December 2008 at 09:44

    This is something else I threw together for a Military customer as a means of tying traditional and modern together.


    Attachments:

  • Dave Harrison

    Member
    16 December 2008 at 18:50

    Very nice Dave. . do you have a flame polisher or do you use a blow touch ?
    I’ve tried with the later using MAP gas ( burns hotter apparently ) but didn’t wasn’t overly happy with the end results !

  • David Rogers

    Member
    16 December 2008 at 19:12
    quote Dave Harrison:

    Very nice Dave. . do you have a flame polisher or do you use a blow touch ?
    I’ve tried with the later using MAP gas ( burns hotter apparently ) but didn’t wasn’t overly happy with the end results !

    I use my ‘Bernzomatic Mini’ with the gas up full but air flow reduced (sliding the red bar forward until you get a softer flame…then wedge it. I use a packer of 2.4mm). Perfect for doing up to 10mm wide.

    It’s all about surface prep & correct flaming speed. I wet sand to remove saw / router marks & then scrape with a steel blade. Quick wipe down & flame it…you have to feed the flame INTO the job and follow the ‘pool’. Practice makes nearly perfect….

    http://www.diy.com/diy/jsp/bq/nav/nav.j … earch=true

  • Steve Underhill

    Member
    16 December 2008 at 19:41

    Thats the one I use for my edge lits too.
    never tried it for soldering just flame polishing.

Log in to reply.